Getting Started With NetBox Reports

One of many awesome features of NetBox is NetBox Reports. You may have already heard about them, and may think they sound complicated as they are written in Python, but fear not, you do not need to be a full on Pythonista to get started.
A NetBox report is a mechanism for validating the integrity of data within NetBox. Running a report allows the user to verify that the objects defined within NetBox meet certain arbitrary conditions. For example, you can write reports to check that:
- All top-of-rack switches have a console connection
- Every router has a loopback interface with an IP address assigned
- Each interface description conforms to a standard format
- Every site has a minimum set of VLANs defined
- All IP addresses have a parent prefix
…and so on. Reports are completely customizable, so there’s practically no limit to what you can test for.
Subscribe to our community newsletter for more tutorials like these!
Running NetBox Reports
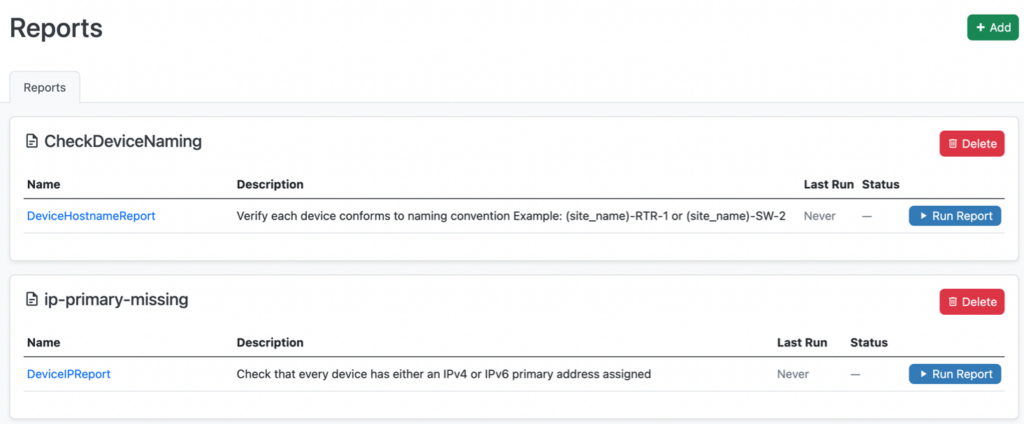
Once reports have been uploaded to NetBox they are available to be executed from within the UI under Customization – Reports and also via the REST API. Below you can see two example reports available to run, and all you need to do to run a report on is click on Run Report:

Note – In the up-coming release v4.0 of NetBox, Reports and Custom Scripts are being merged under the Scripts section of the menu, so Reports will appear under Customization > SCRIPTS.
Writing NetBox Reports
We’ll focus on an example report (ip-primary-missing.py) that checks that every device has either an IPv4 or IPv6 primary address assigned. So let’s break it down starting with the Python import statements:
from extras.reports import Report
from dcim.choices import DeviceStatusChoices
from dcim.models import Device
Each report is defined as a Python class inheriting from extras.reports.Report. Also, as this report is working with objects within the DCIM data model in Netbox, we import some classes from here too – from dcim.models we import Device, and from dcim.choices we import DeviceStatusChoices.
The main point here is that the complete NetBox Python environment is available to a report, including all of NetBox’s internal mechanisms. So if you are developing your own reports then at some point you may need to refer to the NetBox source code.
Ok, back to the report itself – after the imports you have the Report Python Class that inherits the Report base class. There is also some class meta data – in this case a description of what the report does.
class DeviceIPReport(Report):
    description = "Check that every device has either an IPv4 or IPv6 primary address assigned"
Next, within the report class, we define any test methods we are running in the report. In this case we have a single test method defined called test_primary_ip4 but you could just as easily have many test methods defined here.
This example test method loops over all devices that have a status of Active and then loops over all of the interfaces for each active device to check if they only have a management interface (such as a PDU) which will allow for ‘dumb’ devices that have no interfaces, and therefore no IP addresses.
Then the code simply checks if the values of device.primary_ip4_id and/or device.primary_ip6_id are None and if so logs a Failure or Warning message. If a device has a primary IPv4 address but not an IPv6 primary address then this will be logged as an info message.
    def test_primary_ip4(self):
        for device in Device.objects.filter(status=DeviceStatusChoices.STATUS_ACTIVE):
            intcount = 0
            for interface in device.interfaces.all():
                if not interface.mgmt_only:
                    intcount += 1
            # There may be dumb devices with no interfaces so no IP addresses, that's OK
            if intcount == 0:
                if device.primary_ip4_id is not None:
                    if device.primary_ip6_id is not None:
                        self.log_failure(device, "Device has primary IPv4 and IPv6 address but no interfaces")
                    else:
                        self.log_warning(device, "Device has missing primary IPv4 addresses but no interfaces")
                else:
                    self.log_success(device)
            elif device.primary_ip4_id is None:
                if device.device_type.is_child_device is True:
                    self.log_success(device)
                else:
                    if device.primary_ip6_id is None:
                        self.log_failure(device, "Device is missing primary IPv4 and IPv6 address")
                    else:
                        self.log_warning(device, "Device is missing primary IPv4 addresses")
            else:
                if device.device_type.is_child_device is True:
                    self.log_success(device)
                else:
                    if device.primary_ip6_id is None:
                        self.log_info(device, "Device is missing primary IPv6 address")
                    else:
                        self.log_success(device)
As you can see, reports are completely customizable. Validation logic can be as simple or as complex as needed. Also note that the description attribute supports markdown syntax. It will be rendered in the report list page.
Adding Reports to NetBox
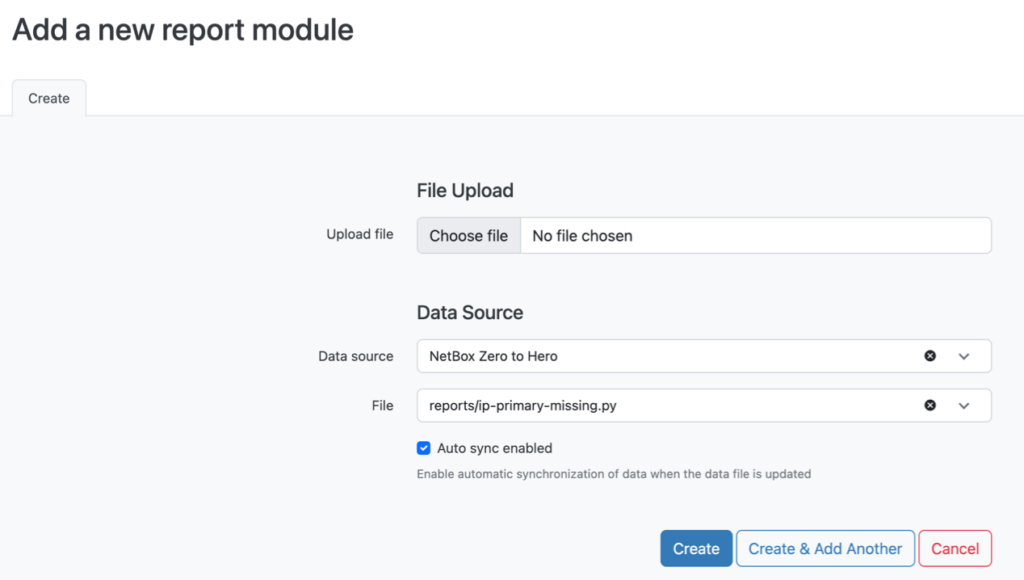
Now we have our report written we can upload it to NetBox, via the UI. Navigate to Customization – Reports and from here you can click the link to add a new report. You can either upload the file from your local machine, or from a remote data source like a Git repo or S3 bucket. Note – remote data sources were added in NetBox v3.5.0 and you can read about them here.
We’ll add our report from a remote data source (Git repo):

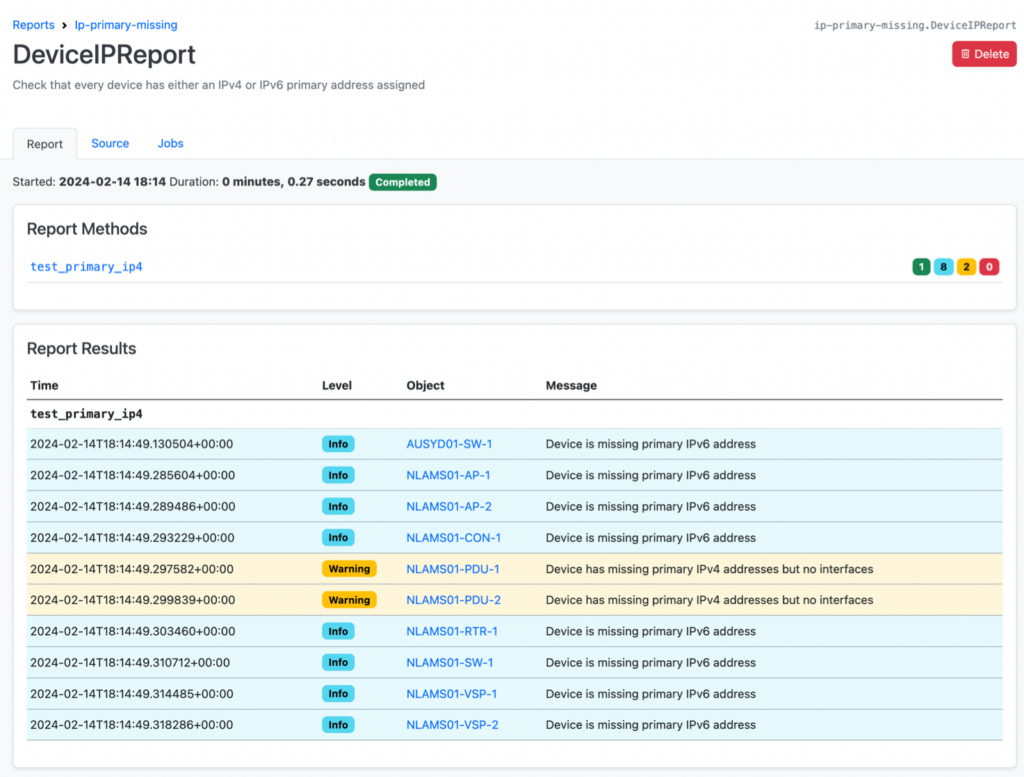
After we click Create, we can now see the report has been loaded and is available to be run:

To run the report, simply click on Run Report and then you will see the results of the report including the log messages output to the screen.

NetBox Report Resources
So, I hope that this has been a useful overview of what NetBox Reports are and what kind of reports they can produce. You’ve learned the basics of writing reports and where to find documentation to help you develop your own reports further.
You can find the example report used in this article in the Git Repository that accompanies the NetBox Zero to Hero course, along with another example report to help get you started.
You can also view a short video explaining how to work with reports and scripts stored in a remote data source (git repository) synchronized with NetBox, and there are more example reports here for you to take inspiration from.
If you are interested in receiving tutorials like this in your inbox, subscribe to our community newsletter.
