NetBox Enterprise Installation
Step-by-step guide for installing NetBox Enterprise Embedded Cluster
Installation Journey Requirements → Installation (you are here) → Configure & Deploy
Overview
This guide walks through the complete installation process for NetBox Enterprise Embedded Cluster. The installation consists of two main phases: deploying the Kubernetes cluster infrastructure, then configuring and deploying the NetBox application within that cluster.
Expected Duration: 30-45 minutes
Prerequisites
Before beginning installation, ensure you have completed all preparation steps:
Required Preparation
- System prepared: Complete distribution-specific preparation
- Authorization token received: Obtain download token from NetBox Labs
- Hostname finalized: Choose permanent hostname (cannot be changed after installation due to kubernetes limitations)
- IP address finalized: Configure static IP (cannot be changed after installation due to kubernetes limitations)
- Firewall configured: Ensure required ports are open
Hostname and IP Cannot Change
The hostname and IP address of the host cannot be changed after installation. Finalize these settings before proceeding.
Recommended Preparation
- TLS certificate ready: Prepare custom TLS certificate for admin console (optional, can configure later)
- Database planned: Decide between embedded PostgreSQL or external database
- Cache planned: Decide between embedded Redis or external cache
- Resource allocation planned: Review system requirements
Network Requirements
Verify network connectivity from your installation host:
| Service | URL/Hostname | Purpose |
|---|---|---|
| Download server | app.enterprise.netboxlabs.com | Installer download |
| Container registry | registry.enterprise.netboxlabs.com | Container images |
| License validation | proxy.enterprise.netboxlabs.com | License checking |
For proxy environments, see proxy configuration.
Installation Process
Phase 1: Deploy the Admin Console and Cluster
Step 1: Download Installer
Download the NetBox Enterprise installer package to your prepared host:
# Download installer (replace <token> with your authorization token)
curl -f "https://app.enterprise.netboxlabs.com/embedded/netbox-enterprise/stable-v2" \
  -H "Authorization: <token>" \
  -o netbox-enterprise-stable-v2.tgz
Verify Download:
# Check file size (should be approximately 300 MB)
ls -lh netbox-enterprise-stable-v2.tgz

# Verify file is complete (not empty or truncated)
file netbox-enterprise-stable-v2.tgz
Expected output: netbox-enterprise-stable-v2.tgz: gzip compressed data
Download Troubleshooting
- If download fails, verify firewall allows HTTPS to
app.enterprise.netboxlabs.com - For proxy environments, use:
curl -f ... --proxy http://proxy:port ... - Contact NetBox Labs support if authorization token doesn't work
Step 2: Extract and Install
Extract the installer and launch the installation process:
# Extract installer package
tar -xvzf netbox-enterprise-stable-v2.tgz

# Launch installation with license file
sudo ./netbox-enterprise install --license license.yaml
For Proxy Environments:
sudo ./netbox-enterprise install \
  --license license.yaml \
  --http-proxy http://proxy.example.com:8888 \
  --https-proxy http://proxy.example.com:8888
Installation Process:
The installer will:
- Verify system requirements
- Prompt you to create an Admin Console password (save this securely)
- Install embedded cluster components
- Start the Admin Console
Expected Output:
Visit the Admin Console to configure and install netbox-enterprise: http://your-hostname:30000Installation Duration: 5-10 minutes
Phase 2: Configure and Deploy NetBox
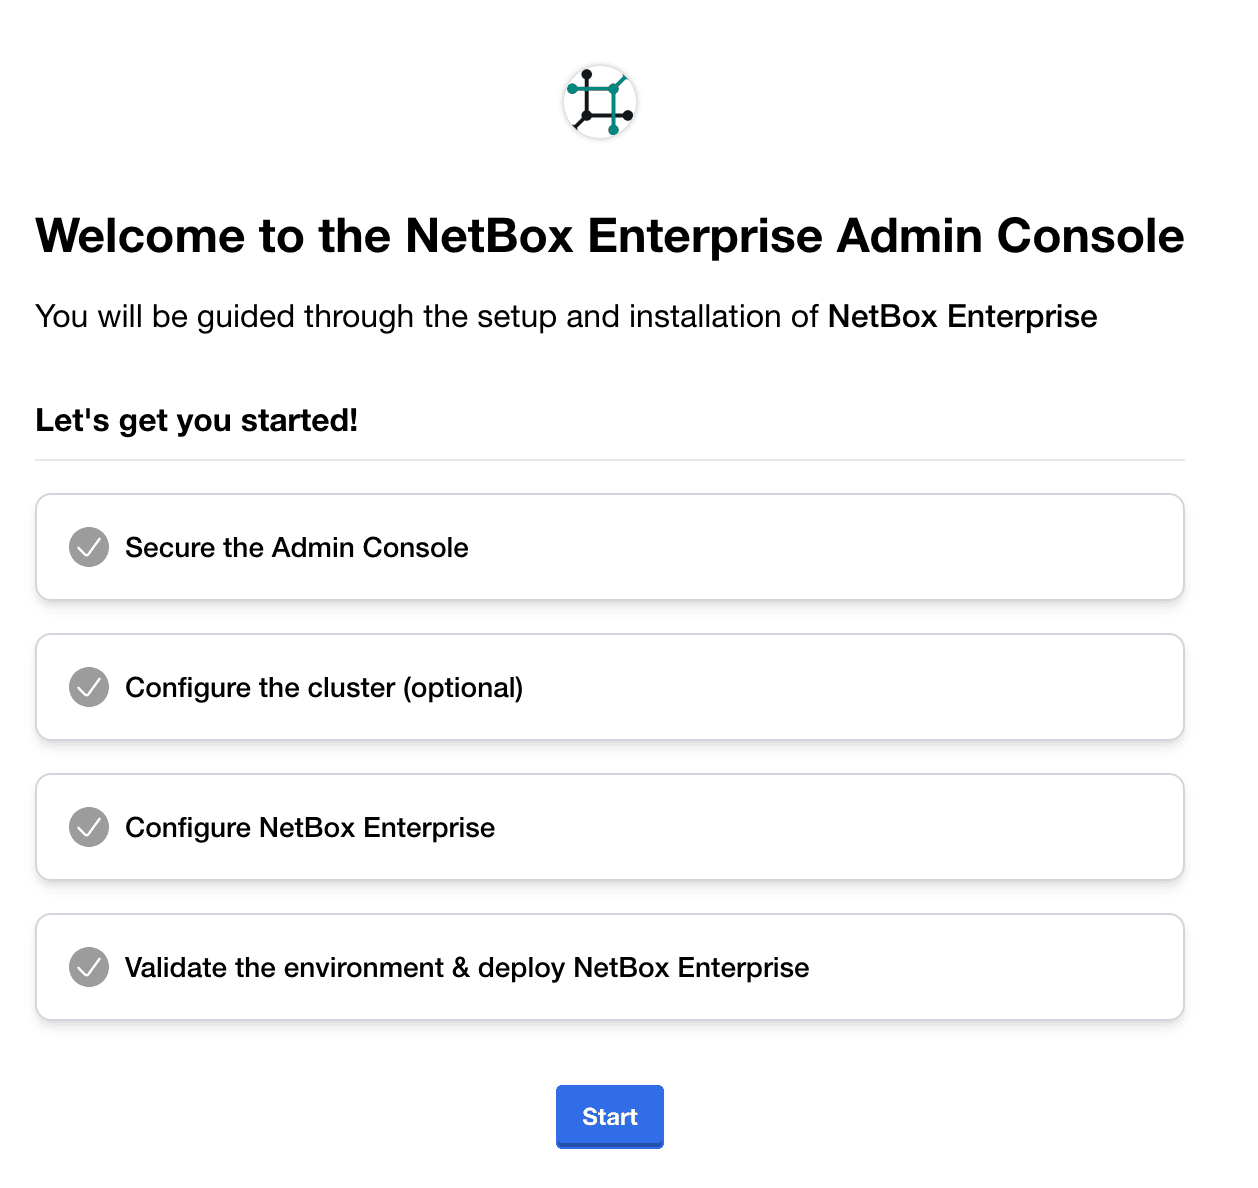
Step 3: Access Admin Console
Open the Admin Console URL in your web browser:
http://your-hostname:30000Enter the Admin Console password created during installation and click Start.
Step 4: Configure TLS (Optional but Recommended)
The Admin Console initially uses a self-signed certificate. You'll see a TLS warning:

Option A: Accept Self-Signed Certificate (Quickstart)
Click Continue and accept the self-signed certificate in your browser. You can configure a custom certificate later.
Option B: Upload Custom TLS Certificate (Recommended for Production)
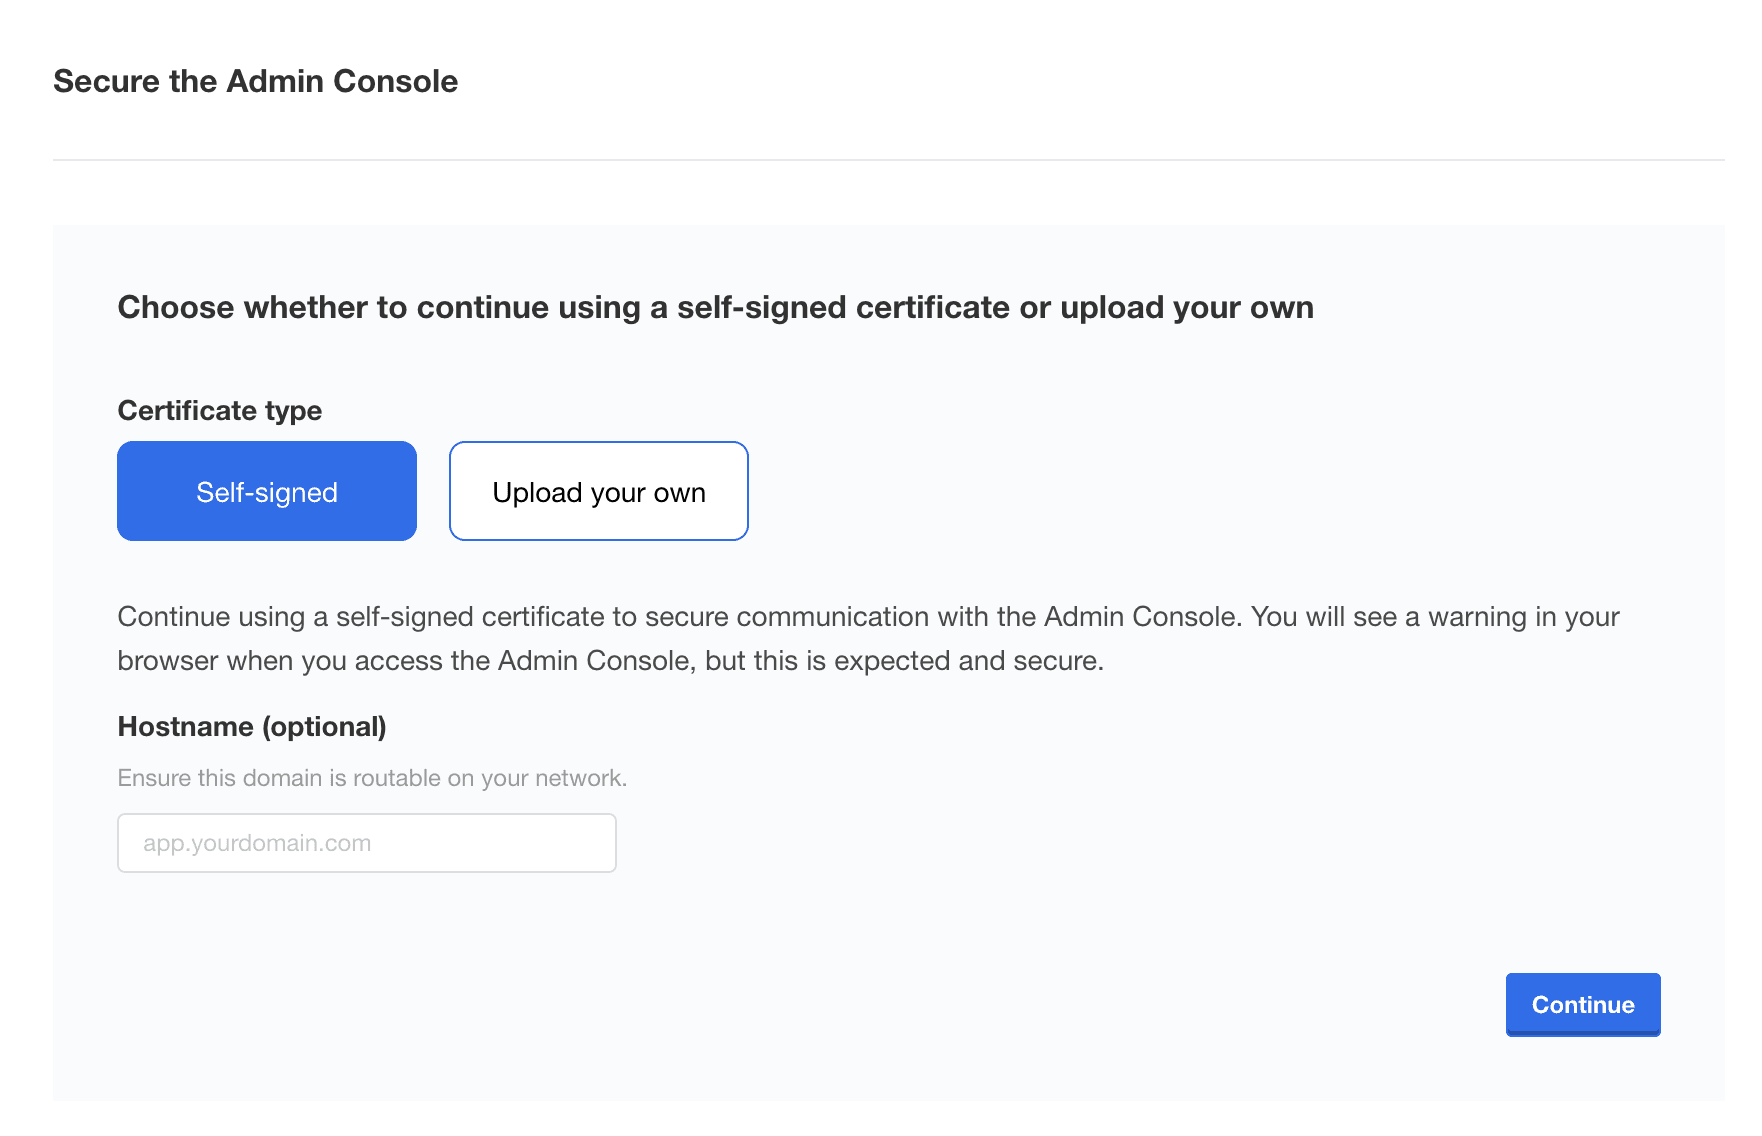
- Set your hostname (FQDN recommended)
- Upload your TLS certificate and private key
- Click
Upload and continue
For detailed TLS configuration, see TLS and Gateway documentation.
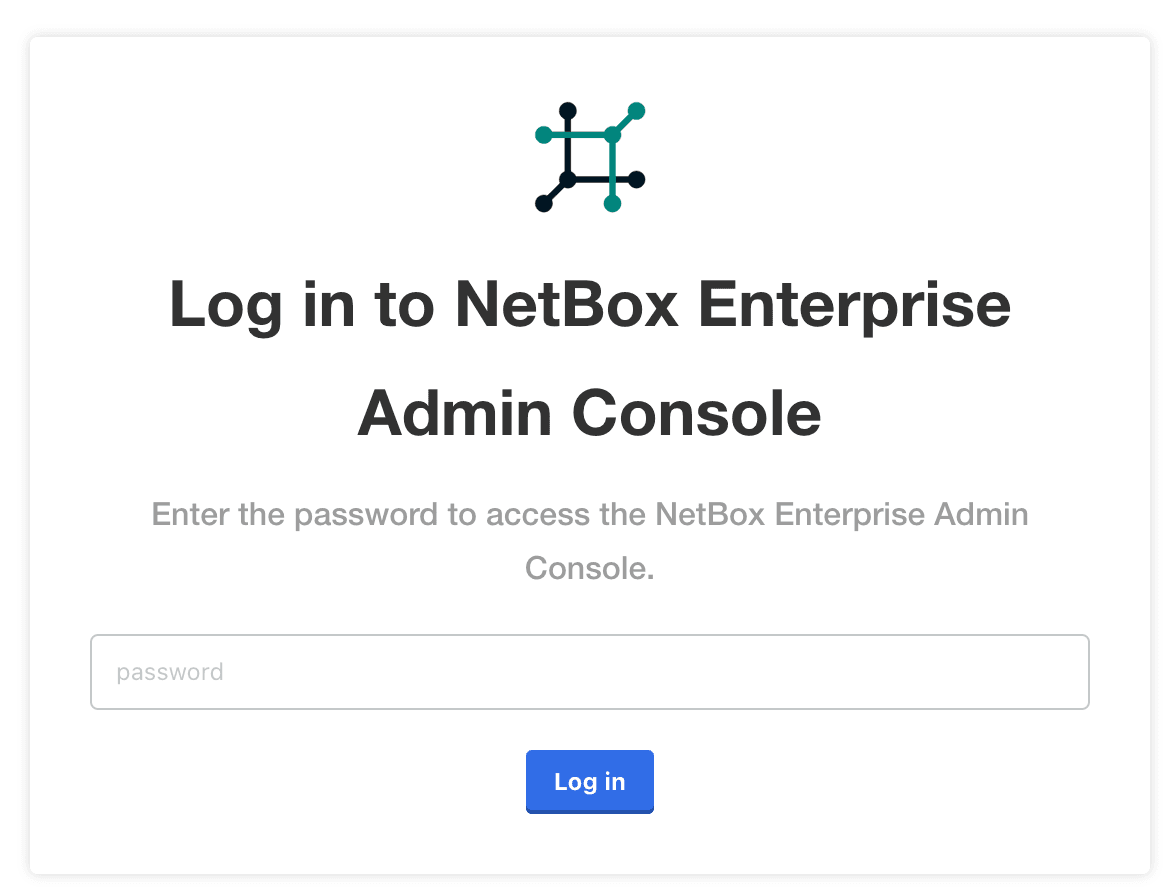
Step 5: Log In to Admin Console
After TLS configuration, log in with your Admin Console password:
Step 6: Cluster Node Configuration
Once logged in, you'll be presented with the option to add additional nodes to the cluster.
For single-node deployments, click Continue without adding nodes.
For multi-node deployments, see the Multi-Node Installation Guide.

Phase 3: Configure NetBox Application
Step 7: Create NetBox Superuser
Configure the initial NetBox superuser account:
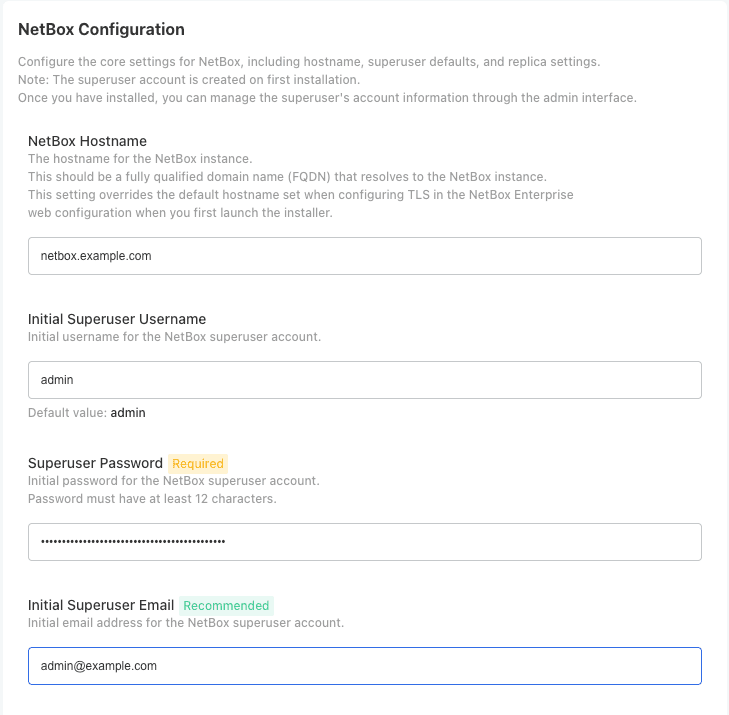
Superuser Configuration:
| Field | Description | Example |
|---|---|---|
| Hostname | NetBox FQDN | netbox.example.com |
| Username | NetBox admin username | admin |
| Administrator email address | admin@example.com | |
| Password | NetBox initial admin password | (secure password) |
Password Management
Save this password securely. You'll use it to log in to NetBox after deployment.
One Time NetBox Admin Password
The NetBox admin password is only set on initial installation and cannot be reset from the admin console later (you must use advanced tools to reset it on the command line).
Step 8: Configure Replicas and Resources
Set the number of NetBox application replicas and resource allocation:
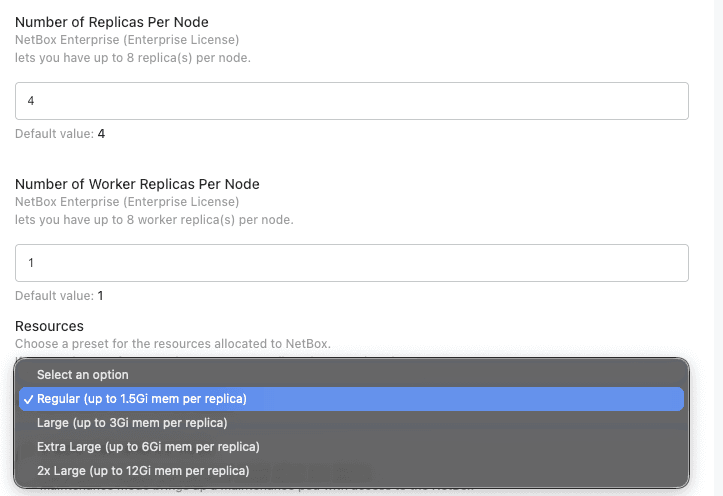
Replica Configuration:
| Setting | Recommended | Notes |
|---|---|---|
| Initial Installation | 1 replica | Start with 1 for faster initial deployment |
| Production (After Setup) | 2-3 replicas | Increase after verifying installation |
Worker Replicas:
Set Number of Worker Replicas to control how many RQ worker pods process background jobs (scripts, reports, webhooks). The default is 1. The maximum tracks your license tier: Pro licenses allow up to 4, Enterprise licenses up to 8.
Resource Presets:
| Preset | Memory per Replica | Use Case |
|---|---|---|
| Regular (Default) | Up to 1.5Gi | Standard workloads |
| Large | Up to 3Gi | Moderate to heavy workloads |
| Extra Large | Up to 6Gi | Very large repositories or datasets |
| 2x Large | Up to 12Gi | Repositories over 1GB or high-memory operations |
Choose the preset based on your workload requirements. You can adjust this later if needed.
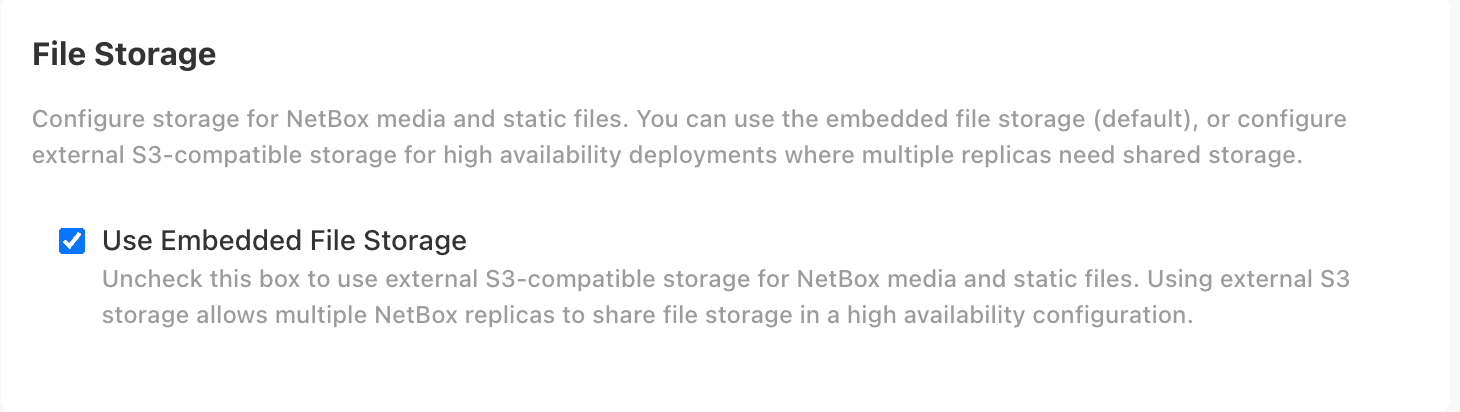
Configure your file storage:
Choose between built-in local storage or external S3-compatible storage:
- Built-in Local Storage: Suitable for single-node deployments where files are stored locally on the server
- External S3-Compatible Storage: Required for multi-node deployments; optional but recommended for single-node deployments for better backup and disaster recovery
If using S3-compatible storage, provide:
- S3 Endpoint: Your S3 endpoint URL (e.g.,
s3.amazonaws.com,s3.us-east-1.amazonaws.com, or your MinIO/other provider endpoint) - Bucket Name: The S3 bucket name for storing NetBox media files
- Region: The S3 region (e.g.,
us-east-1) - Access Key ID: S3 access credentials
- Secret Access Key: S3 secret credentials
For migrating to S3 storage, see the Storage Migration Guide.
Maintenance Mode and Debug Logging:
Enable Maintenance Mode brings up a maintenance pod with access to the NetBox application and database while stopping the main NetBox service, the workers, and all Diode services. Use it to run tasks that need exclusive database access, such as restoring a backup, running migrations, or debugging the database. To restore normal operation, uncheck the box and deploy again.
Enable Debug Logging (custom_logging_enabled) increases log verbosity to help diagnose problems.
Maintenance Mode
Do not enable Maintenance Mode during initial installation. Only use Maintenance Mode when migrating existing data or performing maintenance that requires exclusive database access.
Do not enable debug logging in production
Debug logging can expose sensitive data to unauthenticated users and imposes a substantial performance penalty. Enable it only for short-lived troubleshooting on non-production systems.
Optional: Configure Private Copilot
If you have a Private Copilot license entitlement, the KOTS config page includes a Private Copilot section where you can enable the feature and configure your LLM provider. See the Private Copilot setup guide for configuration details.
Step 9: Configure Database (PostgreSQL)
Choose between embedded PostgreSQL or external database:
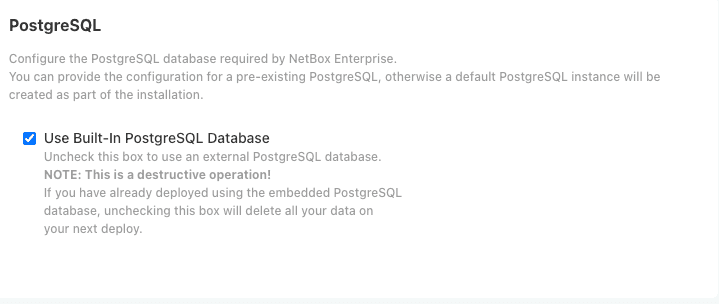
Option A: Built-in PostgreSQL (Recommended)
No configuration required. Automatically managed and included in cluster backups.
You can size the built-in database with the PostgreSQL Resources preset:
| Preset | Memory | Use Case |
|---|---|---|
| Small | Up to 512Mi | Light workloads |
| Medium | Up to 1Gi | Standard workloads |
| Large | Up to 2Gi | Moderate to heavy workloads |
| Extra Large | Up to 4Gi | Large datasets |
| Unlimited (Default) | No constraints | Removes resource limits |
Unlimited removes resource constraints
Selecting Unlimited lets the database pod consume more resources than the node has available, which can destabilize the node. Set an explicit preset on shared nodes.
Option B: External PostgreSQL
For existing managed databases (AWS RDS, Cloud SQL, etc.). An external install needs three separate databases: one for NetBox, one for Diode, and one for Hydra.
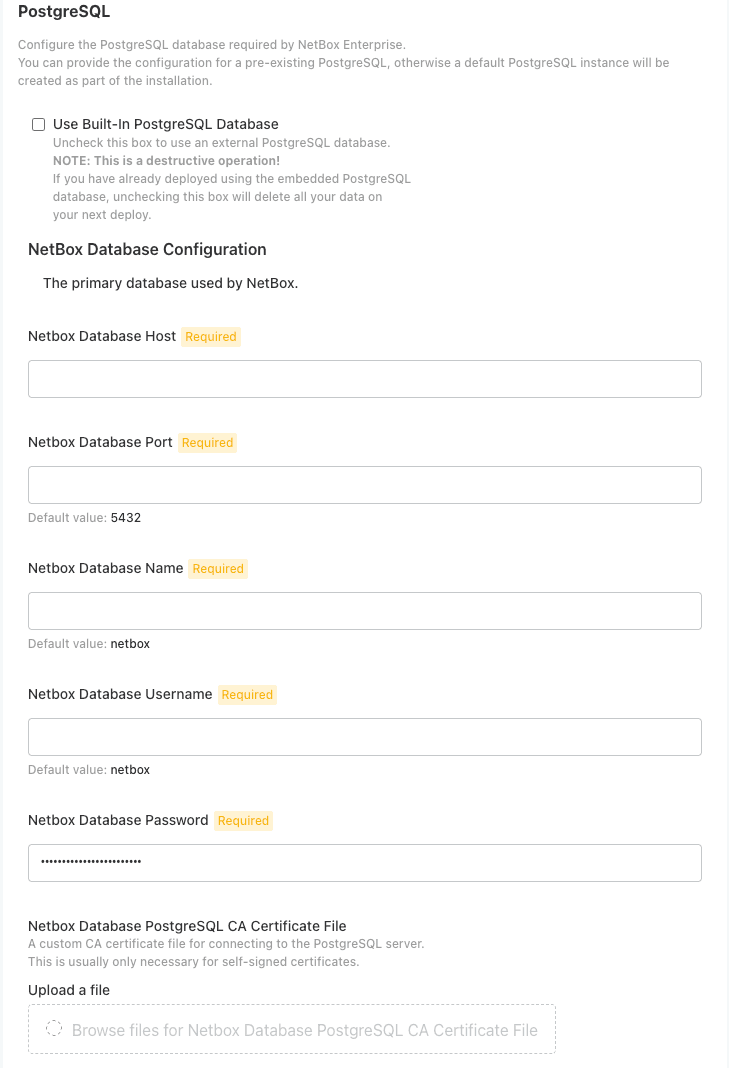
NetBox Database Configuration
The primary database used by NetBox.
| Field | Description | Default |
|---|---|---|
| NetBox Database Name | Database name | netbox |
| NetBox Database Username | Database user | netbox |
| NetBox Database Password | Database password | (required) |
| NetBox Database Host | Server hostname | (required) |
| NetBox Database Port | Server port | 5432 |
TLS settings for the NetBox database connection:
| Field | Description | Default |
|---|---|---|
| NetBox Database SSL Mode | disable, allow, prefer, require, verify-ca, or verify-full. prefer and allow fall back to unencrypted if TLS is unavailable; use require or stronger over a network. | require |
| Skip TLS Verification | Connect over TLS even when the certificate is invalid (expired, self-signed). Has no effect once a CA certificate is uploaded, because libpq always verifies when a CA is present. Remove the CA to skip verification. | off |
| CA Certificate File | Custom CA certificate for self-signed servers. Uploading a CA forces verification even at SSL mode require. | none |
| Client Certificate File | Client-side (mTLS) certificate. | none |
| Client Key File | Client-side (mTLS) key. | none |
Diode Database Configuration
The Diode database stores Diode Agent configuration and state.
| Field | Description | Default |
|---|---|---|
| Diode Database Name | Database name | diode |
| Diode Database Username | Database user | diode |
| Diode Database Password | Database password | (required) |
| Use Same PostgreSQL Server as NetBox | Reuse the NetBox host, port, and SSL settings. When checked, the host/port/TLS fields below are hidden. | off |
| Diode Database Host | Server hostname (when not reusing NetBox) | (required) |
| Diode Database Port | Server port | 5432 |
The Diode database exposes the same SSL Mode (default require), Skip TLS Verification, CA Certificate File, Client Certificate File, and Client Key File fields as the NetBox database. They appear only when Use Same PostgreSQL Server as NetBox is unchecked.
Hydra Database Configuration
The Hydra database stores Hydra Agent configuration and state for the OIDC server.
| Field | Description | Default |
|---|---|---|
| Hydra Database Name | Database name | hydra |
| Hydra Database Username | Database user | hydra |
| Hydra Database Password | Database password | (required) |
| Use Same PostgreSQL Server as NetBox | Reuse the NetBox host, port, and SSL settings. | off |
| Hydra Database Host | Server hostname (when not reusing NetBox) | (required) |
| Hydra Database Port | Server port | 5432 |
The Hydra database exposes the same SSL Mode (default require), Skip TLS Verification, CA Certificate File, Client Certificate File, and Client Key File fields as the NetBox database, shown only when Use Same PostgreSQL Server as NetBox is unchecked.
Grant database permissions
Each external database user must own its database and hold privileges on the public schema. The Admin Console shows the exact ALTER DATABASE, GRANT ALL PRIVILEGES, and GRANT ALL ON SCHEMA public statements to run for the NetBox, Diode, and Hydra users.
Step 10: Configure Cache (Redis)
Choose between embedded Redis or external cache:
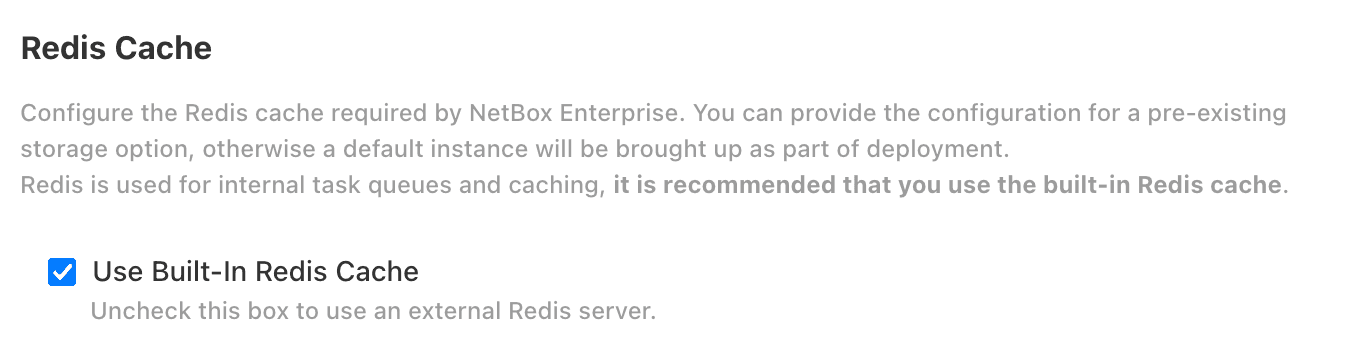
Option A: Built-in Redis (Recommended)
No configuration required. Automatically managed.
You can size the built-in cache with the Redis Resources preset:
| Preset | Memory | Use Case |
|---|---|---|
| Small (Default) | Up to 512Mi | Light workloads |
| Medium | Up to 1Gi | Standard workloads |
| Large | Up to 2Gi | Moderate to heavy workloads |
| Extra Large | Up to 4Gi | Large workloads |
| Unlimited | No constraints | Removes resource limits |
Unlimited removes resource constraints
Selecting Unlimited lets the Redis pod consume more resources than the node has available, which can destabilize the node.
Option B: External Redis
For existing managed cache (AWS ElastiCache, etc.).
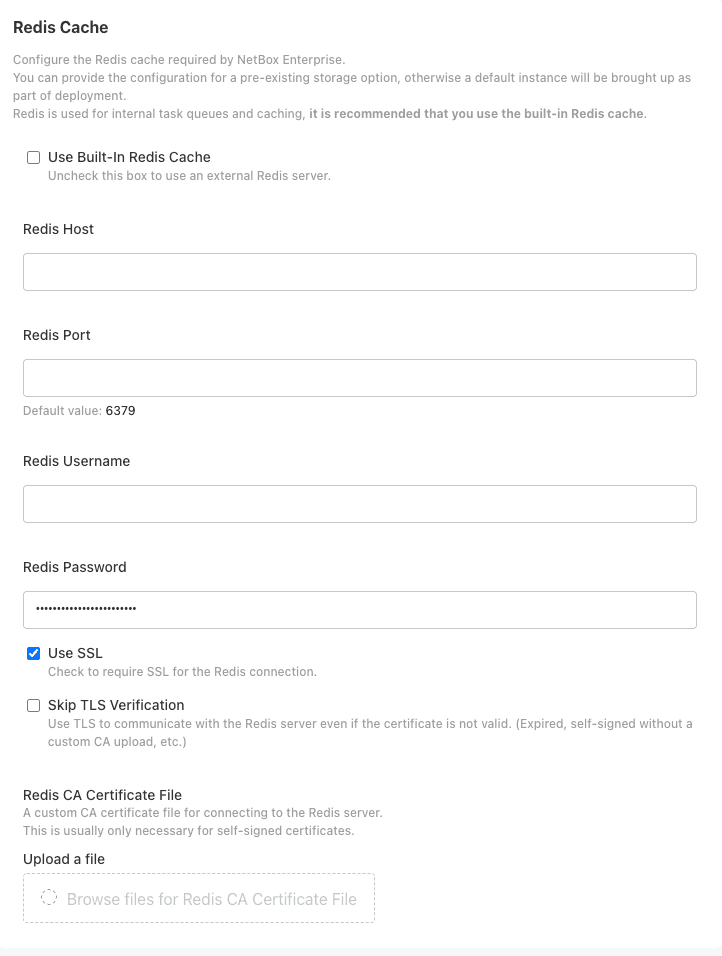
| Field | Description | Default |
|---|---|---|
| Redis Host | Server hostname | (required) |
| Redis Port | Server port | 6379 |
| Redis Username | ACL username, if your server uses one | none |
| Require Authentication | Check if the server requires password authentication, then provide the password below. Left unchecked with no password, the operator connects without authentication. | off |
| Redis Password | Password (when authentication is required) | none |
| Use SSL | Require SSL for the Redis connection. | on |
When Use SSL is enabled, these TLS fields appear:
| Field | Description | Default |
|---|---|---|
| Skip TLS Verification | Connect over TLS even when the certificate is invalid (expired, self-signed). | off |
| Redis CA Certificate File | Custom CA certificate for self-signed servers. | none |
| Redis Client Certificate File | Client-side (mTLS) certificate. Required if the server has tls-auth-clients enabled. | none |
| Redis Client Key File | Client-side (mTLS) key. Required if the server has tls-auth-clients enabled. | none |
Optional: Configure Diode
The Diode section controls how ingested data is applied to NetBox.
Auto apply ingested entities to NetBox (diode_auto_apply_changesets) automatically applies the changesets Diode generates. It is enabled by default unless NetBox Assurance is licensed, in which case it defaults to disabled so that changesets can be reviewed in NetBox Assurance and Changes before they are applied.
Optional: Advanced Settings
The Advanced Settings section is hidden until you check Show Advanced Settings. The defaults are correct for most installations. Change these only when you have a specific reason.
Operator lifecycle
| Setting | Description | Default |
|---|---|---|
| Suspend Reconciliation | Pause the operator from making changes to cluster resources. Useful for debugging or manual maintenance; the operator stops reconciling this NetBox Enterprise instance until you turn it off. | off |
Migration settings
| Setting | Description | Default |
|---|---|---|
| Database Migration Timeout | Maximum time the database migration job may run. Accepts durations (1h, 30m, 1h30m) or bare seconds (3600). Minimum 300 seconds. | 1h |
| Migration Statement Timeout | Per-statement timeout for index reconciliation, so one slow operation cannot consume the whole job deadline. Accepts durations (15m, 900s) or bare seconds. Minimum 60 seconds. | 15m |
Gateway
| Setting | Description | Default |
|---|---|---|
| Configure NetBox to Use Proxies | Propagate the deployment's configured proxy settings into the NetBox container. Uncheck if the proxy settings conflict with other NetBox features. | on |
| Gateway Request Timeout | Total time for the entire client request through the gateway, including any retries to the backend. Gateway API duration (e.g. 30s, 1m30s); bare numbers without a unit (e.g. 60) are rejected. Blank uses the controller default. | controller default |
| Gateway Backend Request Timeout | Time for an individual gateway-to-backend request. Must be no greater than the request timeout. Gateway API duration (e.g. 15s). | controller default |
| Max Upload Size (MB) | Maximum request body (file uploads) the gateway accepts, in megabytes. Larger requests are rejected with 413 before reaching NetBox. 0 disables the limit. | 25 |
Extra CA certificates
| Setting | Description | Default |
|---|---|---|
| Additional CA Certificates | A PEM bundle of extra CA certificates the NetBox application should trust. Useful for custom or self-signed certificates. | none |
Redis tuning (built-in Redis)
These settings appear only when Redis is operator-managed (built-in). They cap Redis memory and control persistence without rebuilding the operator. See Redis Configuration for the equivalent custom-resource fields.
| Setting | Description | Default |
|---|---|---|
| AOF (Append-Only File) Mode | Append-only file persistence. Disabled prevents the out-of-memory restart loop -- a restart loads the compact RDB snapshot instead of replaying every write, so a crashed Redis does not re-fill memory on startup. Enabled maximizes write durability. | Redis default (off) |
| Redis Memory Cap (% of container limit) | Sets Redis maxmemory to this percentage (0-100) of the pod's memory limit. Requires a Redis memory limit (set via the Redis Resources preset). | no cap |
| Redis Key Eviction Policy | How Redis selects keys to evict when maxmemory is reached: noeviction, allkeys-lru, volatile-lru, allkeys-random, volatile-random, volatile-ttl, allkeys-lfu, volatile-lfu. | noeviction |
| Redis Additional Configuration | Raw Redis directives appended verbatim after the typed fields. Redis uses the last occurrence, so raw directives take precedence. | none |
Diode tuning
These settings tune the Diode ingestion pipeline. See Diode Configuration for the equivalent custom-resource fields.
| Setting | Description | Default |
|---|---|---|
| Reconciler replicas | Number of Diode reconciler pods (1-255). When a redundant deployment is active, its auto-scaling takes precedence over this value. | 1 |
| Reconciler rate limit (RPS) | Maximum reconciler operations per second (1-255). | 20 |
| Reconciler rate limit burst | Maximum burst size for the reconciler rate limiter (1-255). | 1 |
| NetBox API rate limit (RPS) | Maximum NetBox API requests per second from the reconciler (1-255). | 20 |
| NetBox API rate limit burst | Maximum burst size for the NetBox API rate limiter (1-255). | 1 |
| Ingestion-log processor concurrency | Concurrent ingestion-log processors (1-255). | 4 |
| Auto-apply processor concurrency | Concurrent auto-apply processors (1-255). | 1 |
| Ingester Redis memory high-watermark (%) | Redis used_memory/maxmemory percentage (0-100) at which the ingester rejects ingest with ResourceExhausted. 0 disables the check. Only meaningful when Redis has a memory cap. | 90 |
| Ingester / Reconciler / Auth / Hydra extra env vars | One KEY=value per line; blank lines and # comments are ignored. User-set values override operator defaults of the same name. Lines without = are dropped. For secretKeyRef values, edit the NetBoxEnterprise resource directly. | none |
Configuration and environment overrides
The Advanced Settings section also includes the NetBox Python Configuration Overrides and NetBox Environment Overrides textareas. These are documented with the authentication and plugin guides.
Step 11: Accept Terms of Service
Accept the NetBox Enterprise Terms of Service to proceed with deployment:

Type ACCEPT (case-insensitive) and click Continue.
Phase 4: Deploy and Verify
Step 12: Run Pre-flight Checks
The installer runs pre-flight checks to verify system readiness:

Pre-flight Checks Verify:
- Sufficient system resources (CPU, memory, disk)
- Required network ports are available
- Kernel modules loaded
- System configuration meets requirements
- Unprivileged processes can bind ports 80/443 (
net.ipv4.ip_unprivileged_port_startset to 80 or lower). The bundled gateway sets this automatically, so this check only warns.
If checks fail, review error messages and correct issues before proceeding.
The unprivileged-port check is a warning, not a blocker. The bundled gateway applies this sysctl automatically via a privileged init container before Traefik starts, so no action is needed on most hosts. It only matters if your cluster forbids privileged containers. In that case, run this on each host before installing (lowers the range and persists it across reboots):
echo 'net.ipv4.ip_unprivileged_port_start = 80' | sudo tee /etc/sysctl.d/99-netbox-unprivileged-ports.conf && sudo sysctl --systemStep 13: Deploy NetBox
Click Deploy to start the NetBox application deployment.
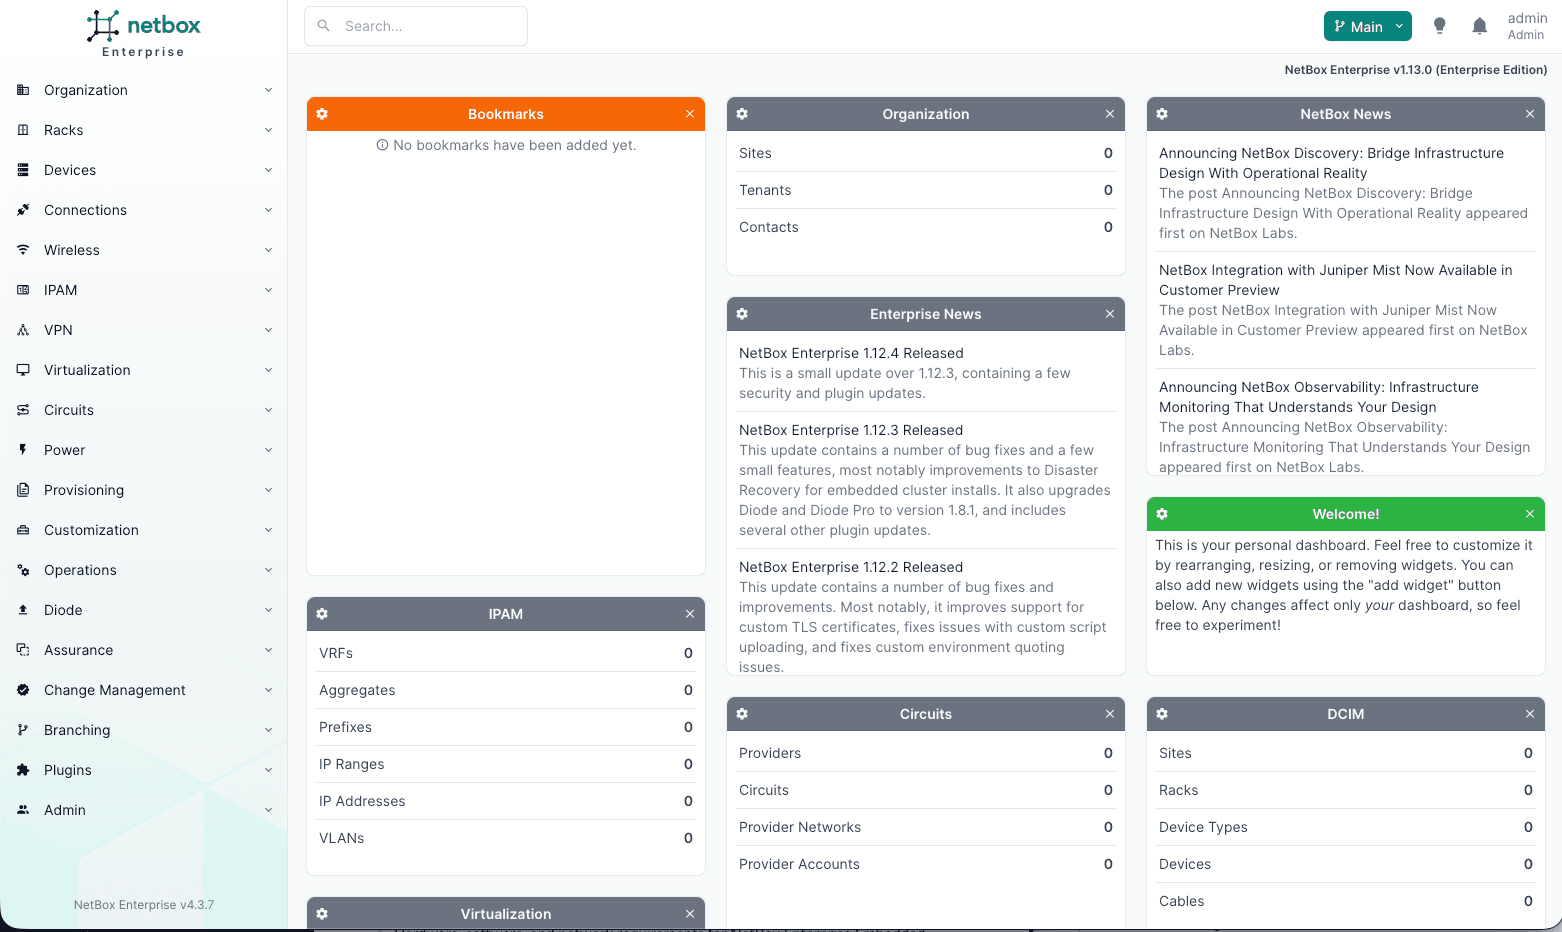
You'll be redirected to the Admin Console Dashboard showing deployment status:
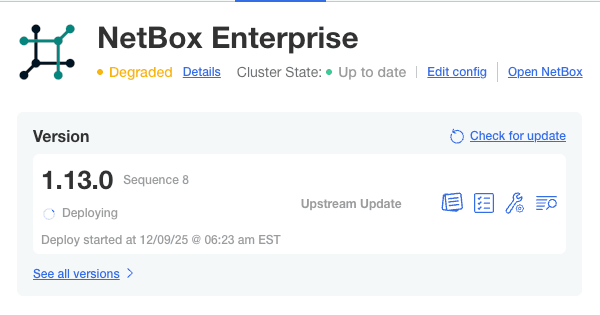
Deployment Process:
The initial deployment performs:
- Pull container images from registry
- Start NetBox application pods
- Initialize PostgreSQL database
- Run database migrations
- Configure the Traefik gateway
- Health check all services
Expected Duration: 10-15 minutes for initial deployment
Step 14: Verify Deployment Success
Monitor the dashboard until status changes to Ready:
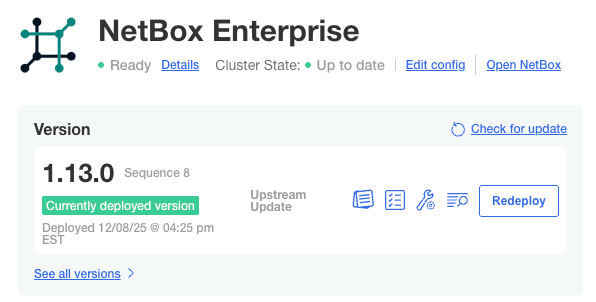
When Status Shows Ready:
- NetBox is fully initialized
- Database migrations completed
- Application is accessible on ports 80 and 443
Step 15: Access NetBox
Once deployed, access NetBox via web browser:
http://your-hostnameOr for HTTPS (with valid TLS certificate):
https://your-hostnameLog in with your superuser credentials:
Verify successful login:
Post-Installation
| Task | Instructions |
|---|---|
| Increase replicas (production) | Admin Console > Config > Number of Replicas > Save > Deploy |
| Configure authentication | SAML, Azure AD, OIDC, LDAP |
| Enable Private Copilot (license required) | Private Copilot setup guide |
| Install plugins | Built-in plugins, Custom plugins |
| Configure backups | Backup guide |
| Migrate existing data | Migration guide |
Troubleshooting
For detailed troubleshooting, see the Troubleshooting Guide.
| Issue | Quick Check |
|---|---|
| Installation fails | Verify swap disabled (swapon --show), kernel modules loaded, disk space available |
| Cannot access Admin Console | Check systemctl status k0scontroller and firewall allows port 30000 |
| Deployment stuck "Unavailable" | Check pod status: sudo /var/lib/embedded-cluster/bin/kubectl get pods -A |
| Pre-flight checks fail | Review failure message; common causes: disk space, port conflicts, missing kernel modules |
| Cannot log in to NetBox | Verify pods running; reset password via Admin Console > Config |
Reset and retry installation:
sudo ./netbox-enterprise reset
sudo ./netbox-enterprise install --license license.yaml