OpenID Connect (OIDC) Single Sign-On
Configure OpenID Connect authentication for NetBox Enterprise with Okta, Keycloak, or any OIDC-compliant identity provider
NetBox Enterprise supports single sign-on (SSO) with any OpenID Connect provider, including Okta, Keycloak, Auth0, Authentik, and Google Workspace. This lets users log in with their existing credentials instead of separate NetBox account credentials.
SSO centralizes access control and simplifies user management, letting administrators grant or revoke NetBox access directly from the identity provider.
Applies to both deployment methods
This guide shows configuration via the Embedded Cluster Admin Console. For Helm deployments, add the same Python configuration to netboxEnterprise.spec.netbox.config.customPythonConfig in your values file. See NetBox Configuration for details.
Prerequisites
Before configuring OIDC authentication, ensure you have:
Identity provider requirements:
- An OIDC-compliant identity provider, with permission to create application registrations
- Test user account for validation (optional but recommended)
NetBox Enterprise requirements:
- NetBox Enterprise v1.10 or later
- Admin console access (
https://<your-cluster-host-or-ip>:30000/) - HTTPS configured for production deployments
- NetBox Enterprise URL (used for redirect URI configuration)
- Outbound HTTPS from the NetBox pods to your provider's OIDC endpoints
Backends
NetBox authenticates through Python Social Auth, which provides a dedicated backend for Okta and a generic backend for every other OIDC provider.
Your choice determines both the settings prefix and the redirect URI.
| Provider | REMOTE_AUTH_BACKEND | Redirect URI |
|---|---|---|
| Okta | social_core.backends.okta_openidconnect.OktaOpenIdConnect | https://<your-netbox-domain>/oauth/complete/okta-openidconnect/ |
| Other OIDC providers | social_core.backends.open_id_connect.OpenIdConnectAuth | https://<your-netbox-domain>/oauth/complete/oidc/ |
Microsoft Entra ID
Entra ID authenticates through its own OAuth 2.0 backend rather than either of the backends above. See Microsoft Entra ID Single Sign-On and Microsoft Entra ID Group Mapping.
Identity provider configuration
We recommend creating a test user in your identity provider before you begin. You can skip this if you already have a suitable account.
Okta
-
In the Okta Admin Console, go to Applications and Resources> Applications and click Create App Integration.
-
Select OIDC - OpenID Connect as the sign-in method and Web Application as the application type.
-
Complete the following fields:
- App integration name: Enter a name (e.g. "NetBox Enterprise").
- Grant type: Select Authorization Code.
- Sign-in redirect URIs:
https://<your-netbox-domain>/oauth/complete/okta-openidconnect/ - Sign-out redirect URIs:
https://<your-netbox-domain>/(optional) - Assignments: Select the controlled access setting appropriate for your organization.
-
Click Save.
Under General > Client Credentials, note the Client ID and Client secret.
-
Also note your Okta domain. This is shown under Settings > Account (for example,
dev-123456.okta.com).
Note:
- Use HTTPS in production (HTTP only allowed for localhost testing).
- The redirect URI must match exactly what you configure in NetBox, including the trailing slash.
- The sign-out redirect URI is optional. Logging out of NetBox ends the NetBox session only, and the user's Okta session stays active.
Generic OIDC provider
These steps apply to Keycloak, Auth0, Authentik, Google Workspace, GitLab, Dex, and other OIDC-compliant providers.
-
Create a new OIDC client or application in your provider's console.
-
Complete the following fields:
- Application type: Web application (confidential client)
- Grant type: Authorization Code
- Redirect URI:
https://<your-netbox-domain>/oauth/complete/oidc/
-
Note the Client ID and Client secret.
-
Note your provider's issuer URL. This is the discovery endpoint URL with
/.well-known/openid-configurationremoved, because NetBox appends that path itself.
| Provider | Issuer URL |
|---|---|
| Keycloak | https://<keycloak-domain>/realms/<realm> |
| Auth0 | https://<tenant>.auth0.com |
| Authentik | https://<authentik-domain>/application/o/<app-slug> |
| GitLab | https://<gitlab-domain> |
Confirm the discovery document is reachable and returns JSON:
curl https://<issuer-url>/.well-known/openid-configurationThe response lists the endpoints NetBox will use, including authorization_endpoint, token_endpoint, userinfo_endpoint, and jwks_uri.
NetBox Enterprise configuration
Add Python configuration overrides
Open your admin console at https://<your-cluster-host-or-ip>:30000/ and select the Config tab.

Enable Show Advanced Settings and locate the NetBox Python Configuration Overrides section.
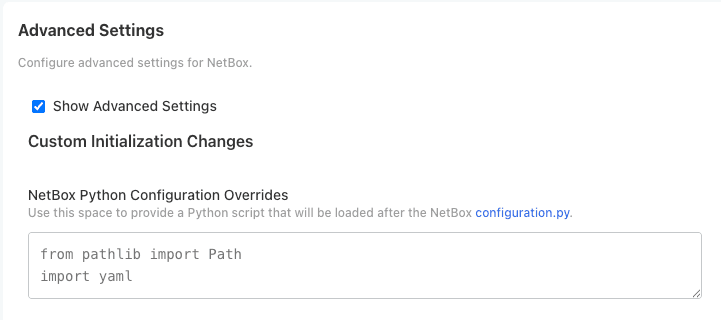
Add the configuration for your backend, replacing the placeholder values.
Okta:
REMOTE_AUTH_BACKEND = 'social_core.backends.okta_openidconnect.OktaOpenIdConnect'
SOCIAL_AUTH_OKTA_OPENIDCONNECT_KEY = '<client-id>'
SOCIAL_AUTH_OKTA_OPENIDCONNECT_SECRET = '<client-secret>'
SOCIAL_AUTH_OKTA_OPENIDCONNECT_API_URL = 'https://<okta-domain>/oauth2/'client-idandclient-secretare the Client Credentials from the General tab of your Okta application.okta-domainis your Okta domain, such asdev-123456.okta.com. Use/oauth2/for the default authorization server, or/oauth2/<auth-server-id>/for a custom one.
Generic OIDC:
REMOTE_AUTH_BACKEND = 'social_core.backends.open_id_connect.OpenIdConnectAuth'
SOCIAL_AUTH_OIDC_KEY = '<client-id>'
SOCIAL_AUTH_OIDC_SECRET = '<client-secret>'
SOCIAL_AUTH_OIDC_OIDC_ENDPOINT = 'https://<issuer-url>'
SOCIAL_AUTH_OIDC_OIDC_ENDPOINT must be the issuer URL without /.well-known/openid-configuration. NetBox appends that path when it fetches the discovery document, so including it produces a doubled URL and authentication fails.
Deploy your configuration
- Scroll to the bottom of the Config page
- Click Save config
- Click Go to updated version when prompted
- Click Deploy to apply changes
- Wait for NetBox Enterprise to reach Ready state
Configuration changes require restarting the application. Existing user sessions remain active during deployment.
Test your configuration
Log out of NetBox and click the Log In button at top right. You should see the normal login form as well as an option to authenticate with your provider.
Click that option. You will be redirected to your provider's authentication portal, where you can log in with your test user's credentials. You may also be prompted to grant the application access to your account.
If successful, you will be logged in as the provider's user. You can verify this by clicking your login ID in the upper right and selecting Profile.
This user account is now replicated within NetBox Enterprise, and can be assigned groups and permissions.
Assign permissions
New users have no permissions by default. To assign permissions:
- From NetBox Enterprise, navigate to Admin > Authentication > Users (requires admin access).
- Locate the OIDC user and assign appropriate groups or individual permissions.
- Set Staff or Superuser status, if needed:
- Staff: Allows access to the NetBox admin interface.
- Superuser: Has all permissions without explicitly assigning them.
Security considerations
Exercise caution when configuring Superuser users or groups.
Superusers have unrestricted access to NetBox and can:
- Modify any data, including configuration
- Elevate other users to superuser status
Group mapping
Automatic permission assignment from provider group membership is provider-specific, because each provider represents groups differently.
NetBox Enterprise ships authentication pipeline extensions for:
- Microsoft Entra ID Group Mapping, which matches on group object IDs
- SAML Group Mapping, which matches on group names
Group mapping for Okta is also supported. For help setting this up, or setting up group mapping for a generic OIDC provider, contact NetBox Labs support.
Troubleshooting
kubectl access
The commands below require cluster shell access.
Redirect URI mismatch
Symptoms:
- Error message:
redirect_uri_mismatch, or a provider error page stating the redirect URI is not permitted - Error stating the redirect URI must use HTTPS
Resolution:
- Verify the redirect URI registered with your provider matches the backend you configured, including the trailing slash:
- Okta:
https://<your-netbox-domain>/oauth/complete/okta-openidconnect/ - Generic OIDC:
https://<your-netbox-domain>/oauth/complete/oidc/
- Okta:
- Check for a missing trailing slash, HTTP instead of HTTPS, the wrong domain, or extra whitespace.
- If NetBox sits behind a reverse proxy or load balancer that terminates TLS, NetBox may not know the original request was HTTPS and will build an
http://redirect URI. Confirm the proxy forwards the original protocol headers, and setSOCIAL_AUTH_REDIRECT_IS_HTTPS = Trueto force HTTPS. - After correcting the redirect URI with your provider, wait a few minutes for the change to propagate.
Not logged in after authentication
Symptoms:
- Redirected back to NetBox after authenticating successfully
- Not logged into NetBox
- No error message displayed
Resolution:
- Verify
REMOTE_AUTH_BACKENDmatches the provider you configured, and that the settings prefix matches the backend. Okta settings useSOCIAL_AUTH_OKTA_OPENIDCONNECT_; generic OIDC settings useSOCIAL_AUTH_OIDC_. - Verify the client ID and client secret are correct, and that you copied the secret value rather than its identifier.
- Check NetBox logs for authentication errors:
kubectl logs <netbox-pod> -n kotsadm | grep -i "oauth\|oidc"
Discovery endpoint not reachable
Symptoms:
- Connection timeout during authentication
- Errors fetching the OIDC configuration or the signing keys
Resolution:
- Confirm
SOCIAL_AUTH_OIDC_OIDC_ENDPOINTdoes not already end in/.well-known/openid-configuration. - Verify the NetBox pod can reach the discovery document:
kubectl exec <netbox-pod> -n kotsadm -- curl https://<issuer-url>/.well-known/openid-configuration - Check that firewall rules allow outbound HTTPS and that DNS resolves from inside the cluster.
SSL certificate verification fails
Symptoms:
- Error:
SSL: CERTIFICATE_VERIFY_FAILED - Common with providers using an internal or private certificate authority
Resolution:
Add your provider's certificate authority to the NetBox trust store. Do not disable verification in production.
For development only, verification can be disabled:
SOCIAL_AUTH_VERIFY_SSL = FalseClient secret expired
Symptoms:
- Authentication worked previously but now fails
- Error in logs:
invalid_client, or a message about an expired secret
Resolution:
- Generate a new client secret in your identity provider.
- Update the secret in your NetBox configuration.
- Deploy the updated configuration.
Prevention: Set calendar reminders ahead of secret expiration so you can rotate proactively.
Logged in but everything is denied
Symptoms:
- Authentication succeeds but pages return "You do not have permission to access this page"
Resolution:
OIDC creates the account but grants no permissions. See Assign permissions, and verify the user's Active flag is set in Admin > Authentication > Users.
Security considerations
Client secret management
- Store client secrets in the NetBox configuration and rotate them before expiration
- Use shorter expiration periods in high-security environments
- Revoke a secret immediately if it may have been exposed
Transport security
OAuth 2.0 and OIDC depend on encrypted transport for their security guarantees, so use HTTPS for both NetBox and your identity provider in production with valid TLS certificates. See TLS and Gateway Configuration.
User provisioning
- Users are automatically created on first login
- Accounts cannot be deleted via the identity provider (must be disabled in NetBox)
- Consider implementing automated deprovisioning processes for terminated employees
Session management
NetBox sessions are independent of your provider's token lifetimes. Users re-authenticate when their NetBox session expires, not when the provider's tokens do, so disabling a user in the provider prevents future logins but does not terminate an active NetBox session. To revoke access immediately, disable the account in NetBox as well.
Session lifetime is controlled by LOGIN_TIMEOUT, in seconds:
LOGIN_TIMEOUT = 3600Audit logging
Monitor authentication events in the NetBox application log:
kubectl logs <netbox-pod> -n kotsadm | grep authentication