Floorplans
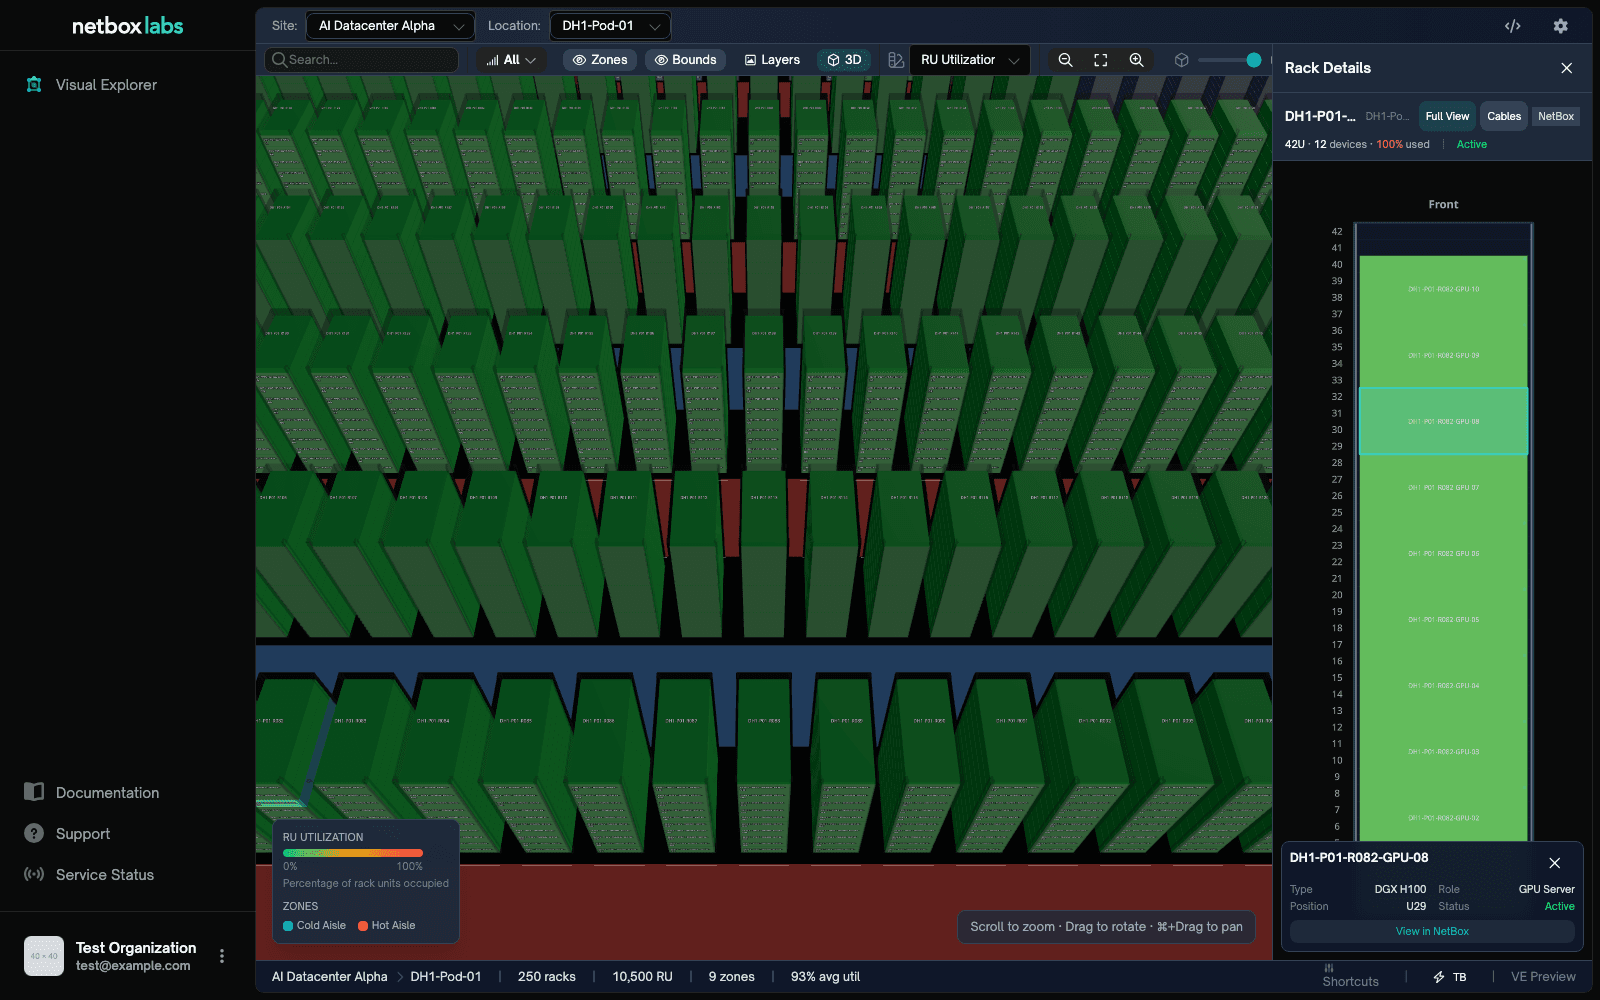
The Floorplan view renders your racks to scale on a plan of the room - in 2D or 3D, optionally over an architectural drawing - using geometry data stored in NetBox alongside the rest of your infrastructure record. This page explains how that geometry is modeled and the two ways to set it up: visually in Visual Explorer (the recommended path), or through the NetBox REST API.
How floorplan data is modeled
Floorplan geometry lives in NetBox in three objects:
- Floorplan - the room itself. A floorplan belongs to a NetBox location (this is required - a floorplan's location is what ties it to your site hierarchy) and defines the plan's dimensions. All floorplan measurements are in centimeters.
- Layer - an optional background image for a floorplan: an architectural drawing, a CAD export, or a photo. A layer carries the image plus its calibration - how many pixels represent one centimeter, where the image's origin sits, and its rotation - so the drawing lines up with the placed equipment.
- Shape - a placed object. A shape ties a NetBox object (today, a rack) to a position on a floorplan: x/y coordinates, footprint (width and depth), and orientation in degrees. Shapes are how "rack R101 exists" becomes "rack R101 sits here, facing this way."
Because geometry is regular NetBox data, it versions and audits like everything else, and it is shared: place a rack once and everyone sees it.
Two practical consequences of the model:
- A site needs at least one location before it can have a floorplan. If your site has none, Visual Explorer offers to create one during floorplan creation - you don't need to leave the tool.
- Racks placed on a floorplan are associated with the floorplan's location, keeping your NetBox hierarchy consistent with the picture.
Setting up visually (recommended)
Everything below happens in the Floorplan view, and no API work is required.
Create a floorplan
Select a site. If the scope has no floorplan yet, Visual Explorer shows a Create Floorplan prompt directly on the canvas. The dialog asks for:
- a name for the floorplan,
- the location it represents - pick an existing one, or name a new location to create on the spot,
- the room's dimensions (with sensible defaults you can adjust later).
Place racks
Switch the floorplan into edit mode. Racks that exist in NetBox for the site but haven't been positioned appear in an unplaced racks panel - drag them onto the canvas, rotate as needed, and Save. Rack footprints come from your NetBox rack data, so the plan stays to scale.
Placements aren't written to NetBox until you save, so you can experiment freely.
Add a background image
From the floorplan's layer manager, upload an architectural drawing or CAD export (common image formats and PDF are supported). Then calibrate it so the drawing matches reality:
- Scale - tell Visual Explorer how distance on the image maps to real distance, and it computes the pixels-per-centimeter scale.
- Position and rotation - drag and rotate the image until walls and rows line up with your placed racks. You can also crop the image to just the relevant area.
Calibration is saved with the layer, so it's done once per drawing. Layers can be toggled, reordered, and have their opacity adjusted - useful when comparing the drawing against placements.
View in 2D and 3D
The floorplan renders in 2D for planning and editing, and in 3D for a walkable picture of the room - same data, two projections. Selecting a rack in either mode opens the details panel, from which you can jump to the rack's elevation or its NetBox page.
Setting up via the API
Floorplan geometry is exposed under the NetBox REST API at:
/api/plugins/physical-geometry/with floorplans/, layers/, and shapes/ endpoints that behave like standard NetBox REST endpoints (same authentication, pagination, and filtering conventions).
The geometry API is under active development. The shapes below reflect the current release; expect additive refinement, and re-check field details when upgrading.
Create a floorplan
A floorplan requires a name and a location. Dimensions are in centimeters.
POST /api/plugins/physical-geometry/floorplans/
{
  "name": "DC East — Floor 1",
  "location": 12,
  "base_unit": "cm",
  "width": 3000,
  "depth": 2000
}
Floorplan names are unique per location.
Place racks with shapes
Each placed rack is a shape referencing the rack by content type and id. Coordinates and footprint are in centimeters; orientation is in degrees.
POST /api/plugins/physical-geometry/shapes/
{
  "floorplan": 4,
  "layer": 7,
  "type": "rack",
  "object_type": "dcim.rack",
  "object_id": 118,
  "x": 450,
  "y": 320,
  "width": 60,
  "depth": 120,
  "orientation": 90
}
A typical migration script iterates your racks, computes positions from an existing source (a spreadsheet, a DCIM export), and posts one shape per rack. Shapes belong to a layer, so create (or look up) a layer on the floorplan first - a layer does not need an image to hold shapes.
Upload and calibrate an image layer
Layers with images are created via multipart upload, then calibrated:
POST /api/plugins/physical-geometry/layers/   (multipart)
  floorplan: 4
  name: "Architectural drawing"
  image: <file>

PATCH /api/plugins/physical-geometry/layers/7/
{
  "image_scale": "5.9055",
  "image_scale_unit": "cm",
  "image_origin_x": 120,
  "image_origin_y": 80,
  "image_rotation": "0.00"
}
image_scale is pixels per unit (image_scale_unit is cm or in), and the origin offsets are in centimeters. In practice, calibrating visually in Visual Explorer is much faster than computing these numbers by hand - even API-driven setups usually finish calibration in the UI.
Requirements checklist
Before floorplans light up for a site, you need:
- A location on the site (Visual Explorer can create one for you).
- A floorplan attached to that location - created in Visual Explorer or via the API.
- Racks in NetBox for the site, with realistic dimensions on the rack records (footprints are drawn from them).
- Placements - racks dragged into position (or shapes created via API).
- Optionally, a calibrated background image for the architectural context.
Troubleshooting
"Create Floorplan" prompt won't go away. The selected scope has no floorplan yet - create one, or check that you're scoped to the site/location you expect.
My racks are all in the unplaced panel. That's the starting state: NetBox knows the racks exist but not where they sit. Drag them into place and save.
Rack sizes look wrong on the plan. Footprints come from the width/depth on your NetBox rack records - correct them in NetBox and reload.
The background image doesn't line up with the racks. Recalibrate the layer: verify the scale first (a known distance on the drawing is the quickest check), then adjust origin and rotation. If the image was replaced with a different resolution export, the scale must be redone.
Placements I made didn't persist. Placements save when you click Save in edit mode - leaving edit mode without saving discards them. If a save reported success but a reload disagrees, let NetBox Labs support know.
API shape creation is rejected. Check that coordinates are non-negative integers (centimeters), that object_type is the string "dcim.rack", and that the referenced floorplan and layer ids exist and belong together.