Getting Started
This guide will help you set up and start using the Infoblox NIOS Integration for NetBox.
- Prerequisites
- Host Requirements
- NetBox Setup
- Agent Setup and Configuration
- View and Apply Discovered Data in NetBox Assurance
- View the Infoblox NIOS Data in NetBox
- Additional Resources
Prerequisites
Before you begin, ensure you have the following:
- NetBox Cloud or NetBox Enterprise with NetBox Assurance
- Orb Agent Pro credentials (required to download the integration agent image)
- Infoblox NIOS with WAPI access enabled
- Host System with Docker support
- Network connectivity between your host(s) and both NetBox instance and the Infoblox NIOS Grid Master
Host Requirements
System
- Operating System: Linux, macOS, or Windows with Docker support
- Memory: Minimum 2GB RAM (4GB recommended)
- Storage: 1GB free disk space
- Network: Stable internet connection for pulling Docker images
- Docker: Version 20.10 or later
Network
- Outbound gRPC/gRPCS access to Diode on your NetBox instance (typically port 443 for gRPCS)
- Outbound HTTP/HTTPS access to your Infoblox NIOS Grid Master (typically port 443 for HTTPS)
- DNS resolution for both NetBox and Infoblox NIOS hostnames
- Firewall rules configured to allow the above connections from your agent host
NetBox Setup
Generate Diode Client Credentials
- Log into your NetBox instance
- Navigate to Diode → Client Credentials
- Click + Add a Credential
- Enter a descriptive name (e.g., "Infoblox Integration")
- Click Create
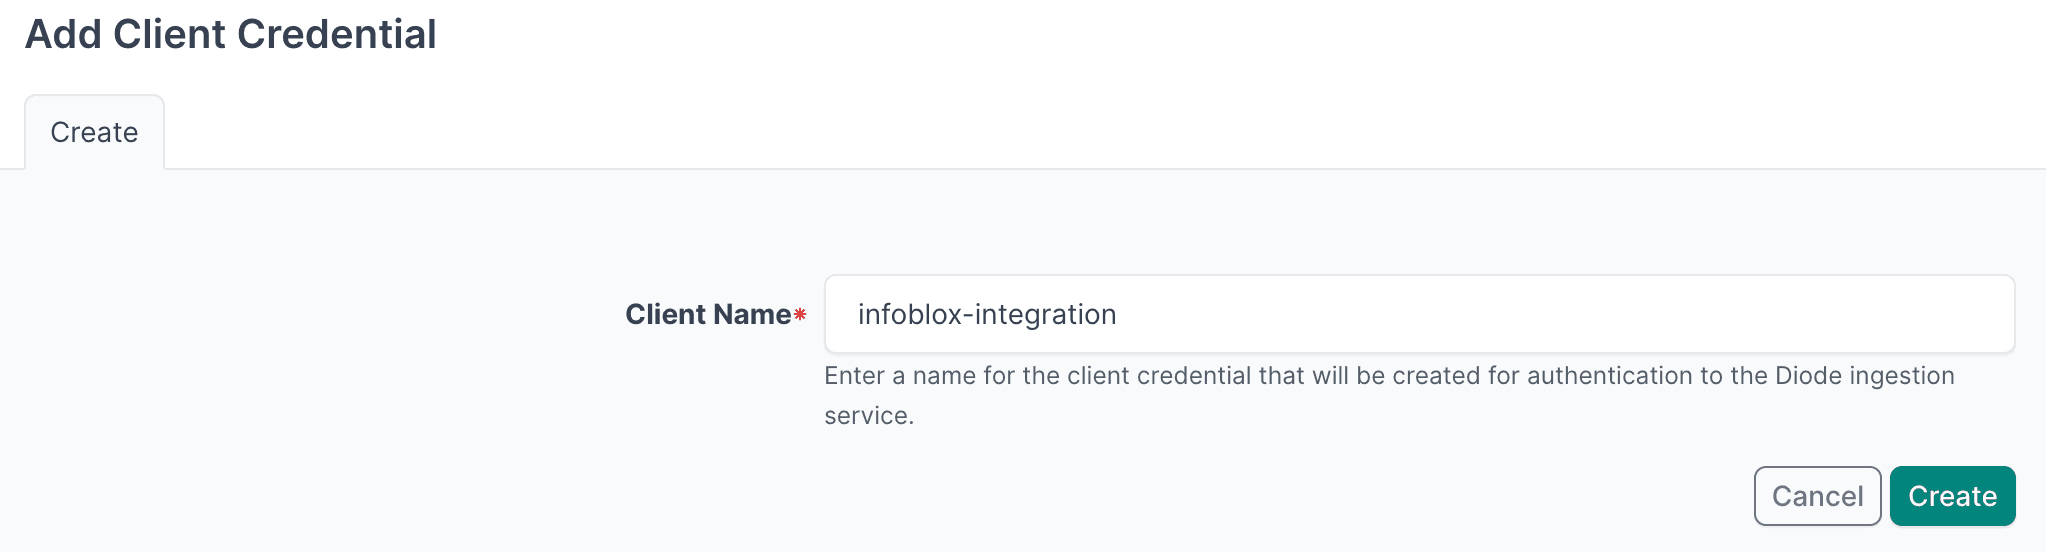
- Important: Copy and securely store the Client ID and Client Secret as you will reference this in the agent configuration file in later steps
- Navigate to Diode → Settings
- Copy the value of the Diode target as you will reference this in the agent configuration file in later steps

Agent Setup and Configuration
If you have multiple Network Views in Infoblox NIOS, you can configure the agent to sync data from specific views or all views. Data from each network view will be tagged in NetBox so it's easily searchable.
Step 1: Authenticate to the NetBox Labs Image Registry
From your host machine, authenticate to the NetBox Labs registry, using the CUSTOMER-IDENTIFIER and Token that you have been provided by the NetBox Labs team:
docker login quay.io -u netboxlabs+<CUSTOMER-ID> -p <TOKEN>Example session
% docker login quay.io -u netboxlabs+org-abc123def456 -p <token>

Login Succeeded
Then pull the agent image:
docker pull quay.io/netboxlabs/orb-agent-proStep 2: Configure the Agent
- Create the configuration file (you can name the file anything you like):
touch agent.yaml- Edit the configuration file with your preferred editor and add the following configuration. Important: Replace
grpcs://your-instance.netboxcloud.com/diodewith the value from Diode > Settings > Diode target in the NetBox UI:
orb:
  config_manager:
    active: local
  backends:
    worker:
    common:
      diode:
        target: grpcs://your-instance.netboxcloud.com/diode # Get this value from Diode > Settings > Diode target
        client_id: ${DIODE_CLIENT_ID}
        client_secret: ${DIODE_CLIENT_SECRET}
        agent_name: infoblox_agent_1  # Use a meaningful name to identify this agent
  policies:
    worker:
      infoblox_nios_worker:
        config:
          package: nbl_infoblox_nios
          schedule: "0 2 * * *" # Daily at 2:00 AM. Set your desired schedule (see examples below)
          INFOBLOX_HOST: ${INFOBLOX_HOST}
          INFOBLOX_USER: ${INFOBLOX_USER}
          INFOBLOX_PWD: ${INFOBLOX_PWD}
          BOOTSTRAP: True  # Set to True for initial setup, False for regular operation
          # INFOBLOX_VERSION: "2.11"  # Optional: specify WAPI version (default: 2.11)
          # INFOBLOX_SSL_VERIFY: false  # Optional: enable/disable SSL verification (default: false)
          # INFOBLOX_SYNC_LEASES: false  # Optional: set to true to sync active DHCP leases as IP addresses (default: false)
        scope:
          network_views: ["*"]  # Optional: ["*"] for all views (default), or specify views like ["default", "prod"]
          # network_to_dns_view_mapping: {}  # Optional: Map network views to DNS views for host records
          # site_ea_name: "Site"  # Optional: EA name used to derive NetBox site (default: "Site")
          # ea_tags: []  # Optional: list of EA names to emit as tags, e.g. ["Environment", "Owner"]
Schedule Examples
The schedule field uses cron syntax. Here are some common examples:
"0 */6 * * *"- Every 6 hours (e.g., 00:00, 06:00, 12:00, 18:00)"0 2 * * *"- Daily at 2:00 AM"0 9 * * 1"- Weekly on Monday at 9:00 AM
Scope Configuration
The scope section allows you to limit the data synchronization to specific network views and configure DNS view mappings for host record queries.
Configuration Options:
network_views:
["*"]or omitted: Syncs all network views (default)["default", "prod"]: Syncs only specified network views- Invalid network view names raise an error with available view list
network_to_dns_view_mapping (optional):
- Explicitly maps network views to DNS views for host record (
record:host) queries, overriding what the integration discovers from the grid - Format:
{"network_view": "dns_view"} - You only need this when the automatic discovery does not resolve the correct DNS view. The integration resolves each network view's DNS view in this order: your explicit mapping first, then the DNS-view association discovered from the grid, and only a naming convention (
default→default, others →default.{network_view}) as a last resort if discovery fails
Examples:
Basic network view filtering:
scope:
  network_views: ["default", "production"]  # Only sync these network views
With DNS view mapping:
scope:
  network_views: ["prod", "dev"]
  network_to_dns_view_mapping:
    prod: "prod-dns"
    dev: "dev-dns"
Network View Configuration
Infoblox NIOS uses Network Views to provide multiple isolated instances of network address space. By default, the integration syncs all network views.
Configuration:
| Location | Key | Description | Default |
|---|---|---|---|
scope | network_views | List of network view names to sync. Use ["*"] for all views or specify view names. | ["*"] (all views) |
scope | network_to_dns_view_mapping | Optional explicit mapping of network views to DNS views for host record queries, overriding grid discovery. | Discovered from the grid (see below) |
Network View Synchronization:
- If
network_viewsis["*"]or omitted, all network views are synchronized - If
network_viewscontains specific names, only those views are synchronized - Each network view's data is tagged with
infoblox-network-view:{view_name}for easy filtering in NetBox
DNS View Mapping:
- Host records are queried using DNS views. The integration resolves each network view's DNS view with the following precedence:
- An explicit entry in
network_to_dns_view_mapping(if you provide one) - The DNS-view association discovered from the grid
- A naming convention fallback, used only if grid discovery fails:
defaultnetwork view →defaultDNS view, other network views →default.{network_view}DNS view
- An explicit entry in
- In most deployments you do not need to set
network_to_dns_view_mapping; the grid-discovered association is used automatically
Example 1: Sync specific network views
scope:
  network_views: ["default", "production", "development"]
Example 2: Sync all network views
scope:
  network_views: ["*"]
Example 3: Sync default view only (explicit)
scope:
  network_views: ["default"]  # Explicitly sync only default view
Example 4: Custom DNS view mapping
scope:
  network_views: ["prod", "stage"]
  network_to_dns_view_mapping:
    prod: "production-dns"
    stage: "staging-dns"
Notes:
- Network view names are case-sensitive and must match Infoblox NIOS exactly
- The agent validates network view names at runtime and will error with the list of available views if a name is not found
- Each synced object will be tagged with its network view for easy filtering in NetBox
Bootstrap Mode (First-Time Setup)
Bootstrap mode is used for the initial setup only of the integration. When enabled, it creates static content in NetBox that the integration requires to function properly.
What Bootstrap Mode Does:
- Creates required Custom Fields for storing Infoblox metadata
- Skips data synchronization (no API calls to Infoblox)
- Prepares NetBox schema for regular integration runs
Note: Tags are created automatically during normal operation, not in bootstrap mode.
Configuration:
config:
  BOOTSTRAP: True  # Set to True for initial setup, False for regular operation
First-Time Run Process:
- Run the agent with
BOOTSTRAP: Truein your configuration - Monitor the output for the text
executed successfully - Stop the agent immediately by pressing
Ctrl+Cin your terminal once you seeexecuted successfully - Apply the deviations in NetBox Assurance (see Apply Deviations section below)
- Set
BOOTSTRAP: Falsefor all future runs
Important Notes:
- Bootstrap mode is only for first-time setup - do not run it on a schedule
- You must stop the agent manually with
Ctrl+Cafter seeingexecuted successfully - After bootstrap, you'll see deviations for Custom Fields, Tags, etc. that must be applied
- Once deviations are applied, set
BOOTSTRAP: Falsefor regular operation
Optional - Dry Run Mode
The agent can be run in Dry Run mode, which means discovered data is written to a json formatted file instead of to NetBox. This can be useful for troubleshooting - for example you could share the file with the NetBox Labs support team to investigate issues ingesting certain data.
Enable this in the Diode section of your agent configuration file, by adding the dry_run key and setting the value to true (it is false by default) and set the dry_run_output_dir value to the location you want the file to be saved.
      diode:
        dry_run: true
        dry_run_output_dir: /opt/orb/ # this will save the output file into the same directory that you run the agent from
Step 3: Run the Agent
Run the agent to synchronize data from Infoblox NIOS into NetBox:
Method 1: Set Environment Variables Manually
- Export Diode credentials as environment variables:
export DIODE_CLIENT_ID="your-client-id"
export DIODE_CLIENT_SECRET="your-client-secret"- Export Infoblox credentials as environment variables:
export INFOBLOX_HOST="infoblox.example.com"
export INFOBLOX_USER="your-infoblox-username"
export INFOBLOX_PWD="your-infoblox-password"- Run the agent with the following command:
docker run \
  -v $PWD:/opt/orb/ \
  -e DIODE_CLIENT_SECRET \
  -e DIODE_CLIENT_ID \
  -e INFOBLOX_HOST \
  -e INFOBLOX_USER \
  -e INFOBLOX_PWD \
  quay.io/netboxlabs/orb-agent-pro \
  run -c /opt/orb/agent.yaml
Method 2: Use a .env File (Recommended)
- Create a
.envfile in your current directory:
touch .env- Edit the
.envfile with your preferred editor and add the following content:
# NetBox Diode credentials (from Step 1)
DIODE_CLIENT_ID=your-client-id
DIODE_CLIENT_SECRET=your-client-secret

# Infoblox NIOS credentials
INFOBLOX_HOST=infoblox.example.com
INFOBLOX_USER=your-infoblox-username
INFOBLOX_PWD=your-infoblox-password
Important
Replace the placeholder values with your actual credentials:
your-client-idandyour-client-secretfrom the NetBox Diode setupinfoblox.example.comwith your Infoblox NIOS Grid Master hostname or IPyour-infoblox-usernameandyour-infoblox-passwordwith your Infoblox NIOS credentials
- Run the agent with the following command:
docker run \
  -v $PWD:/opt/orb/ \
  --env-file .env \
  quay.io/netboxlabs/orb-agent-pro \
  run -c /opt/orb/agent.yaml
Security Best Practice
When using Method 2, add .env to your .gitignore file to prevent accidentally committing sensitive credentials to version control:
echo ".env" >> .gitignoreExpected Output
After you issue the command to run the agent, depending on the schedule you defined in the configuration file, you should see similar to the output below:
{"time":"2025-09-09T10:15:22.487755639Z","level":"INFO","msg":"worker stderr","log":"    tags {"}
{"time":"2025-09-09T10:15:22.487756472Z","level":"INFO","msg":"worker stderr","log":"      name: \"discovered\""}
{"time":"2025-09-09T10:15:22.48775743Z","level":"INFO","msg":"worker stderr","log":"    }"}
{"time":"2025-09-09T10:15:22.487758389Z","level":"INFO","msg":"worker stderr","log":"  }"}
{"time":"2025-09-09T10:15:22.487759722Z","level":"INFO","msg":"worker stderr","log":"  tags {"}
{"time":"2025-09-09T10:15:22.487761264Z","level":"INFO","msg":"worker stderr","log":"    name: \"infoblox\""}
{"time":"2025-09-09T10:15:22.487762805Z","level":"INFO","msg":"worker stderr","log":"  }"}
{"time":"2025-09-09T10:15:22.487768389Z","level":"INFO","msg":"worker stderr","log":"  tags {"}
{"time":"2025-09-09T10:15:22.487769764Z","level":"INFO","msg":"worker stderr","log":"    name: \"discovered\""}
{"time":"2025-09-09T10:15:22.487771097Z","level":"INFO","msg":"worker stderr","log":"  }"}
{"time":"2025-09-09T10:15:22.487772639Z","level":"INFO","msg":"worker stderr","log":"}"}
{"time":"2025-09-09T10:15:22.487774305Z","level":"INFO","msg":"worker stderr","log":"] chunks"}
{"time":"2025-09-09T10:15:22.487777639Z","level":"INFO","msg":"worker stderr","log":"INFO:apscheduler.executors.default:Job \"PolicyRunner.run (trigger: date[2025-09-09 10:13:48 UTC], next run at: 2025-09-09 10:13:48 UTC)\" executed successfully"}
Monitoring and Testing
Success Indicators: Look for the text Successful ingestion in the output, which confirms that data was successfully sent to your NetBox instance via Diode.
Testing Mode: For testing purposes, you can run the agent once and then stop it:
- Press
Ctrl+Cin your terminal to stop the agent - This is useful for verifying configuration before setting up continuous operation
Continuous Operation: The agent will continue running according to your schedule until manually stopped or the container is terminated.
View and Apply Discovered Data in NetBox Assurance
You can now work with the Infoblox NIOS data that has been discovered by the agent in the NetBox Assurance UI.
NetBox Assurance gives you control over operational drift by identifying deviations between your operational state and NetBox, and analytics to understand drift and plan for remediation, and ultimately take action.
Understanding Deviations
Deviations are the delta between the data already in NetBox as the Network Source of Truth, versus the actual operational state of the network as discovered by the controller integration.
From an initial run of the integration it could be that ALL discovered data is a deviation as it may not have existed in NetBox previously. Once the initial sync of data has taken place, and NetBox has been updated, then further integration runs would result in new deviations only.
Accessing NetBox Assurance
- Navigate to the UI of NetBox instance
- Click on Assurance in the main navigation menu
Explore Deviation Types
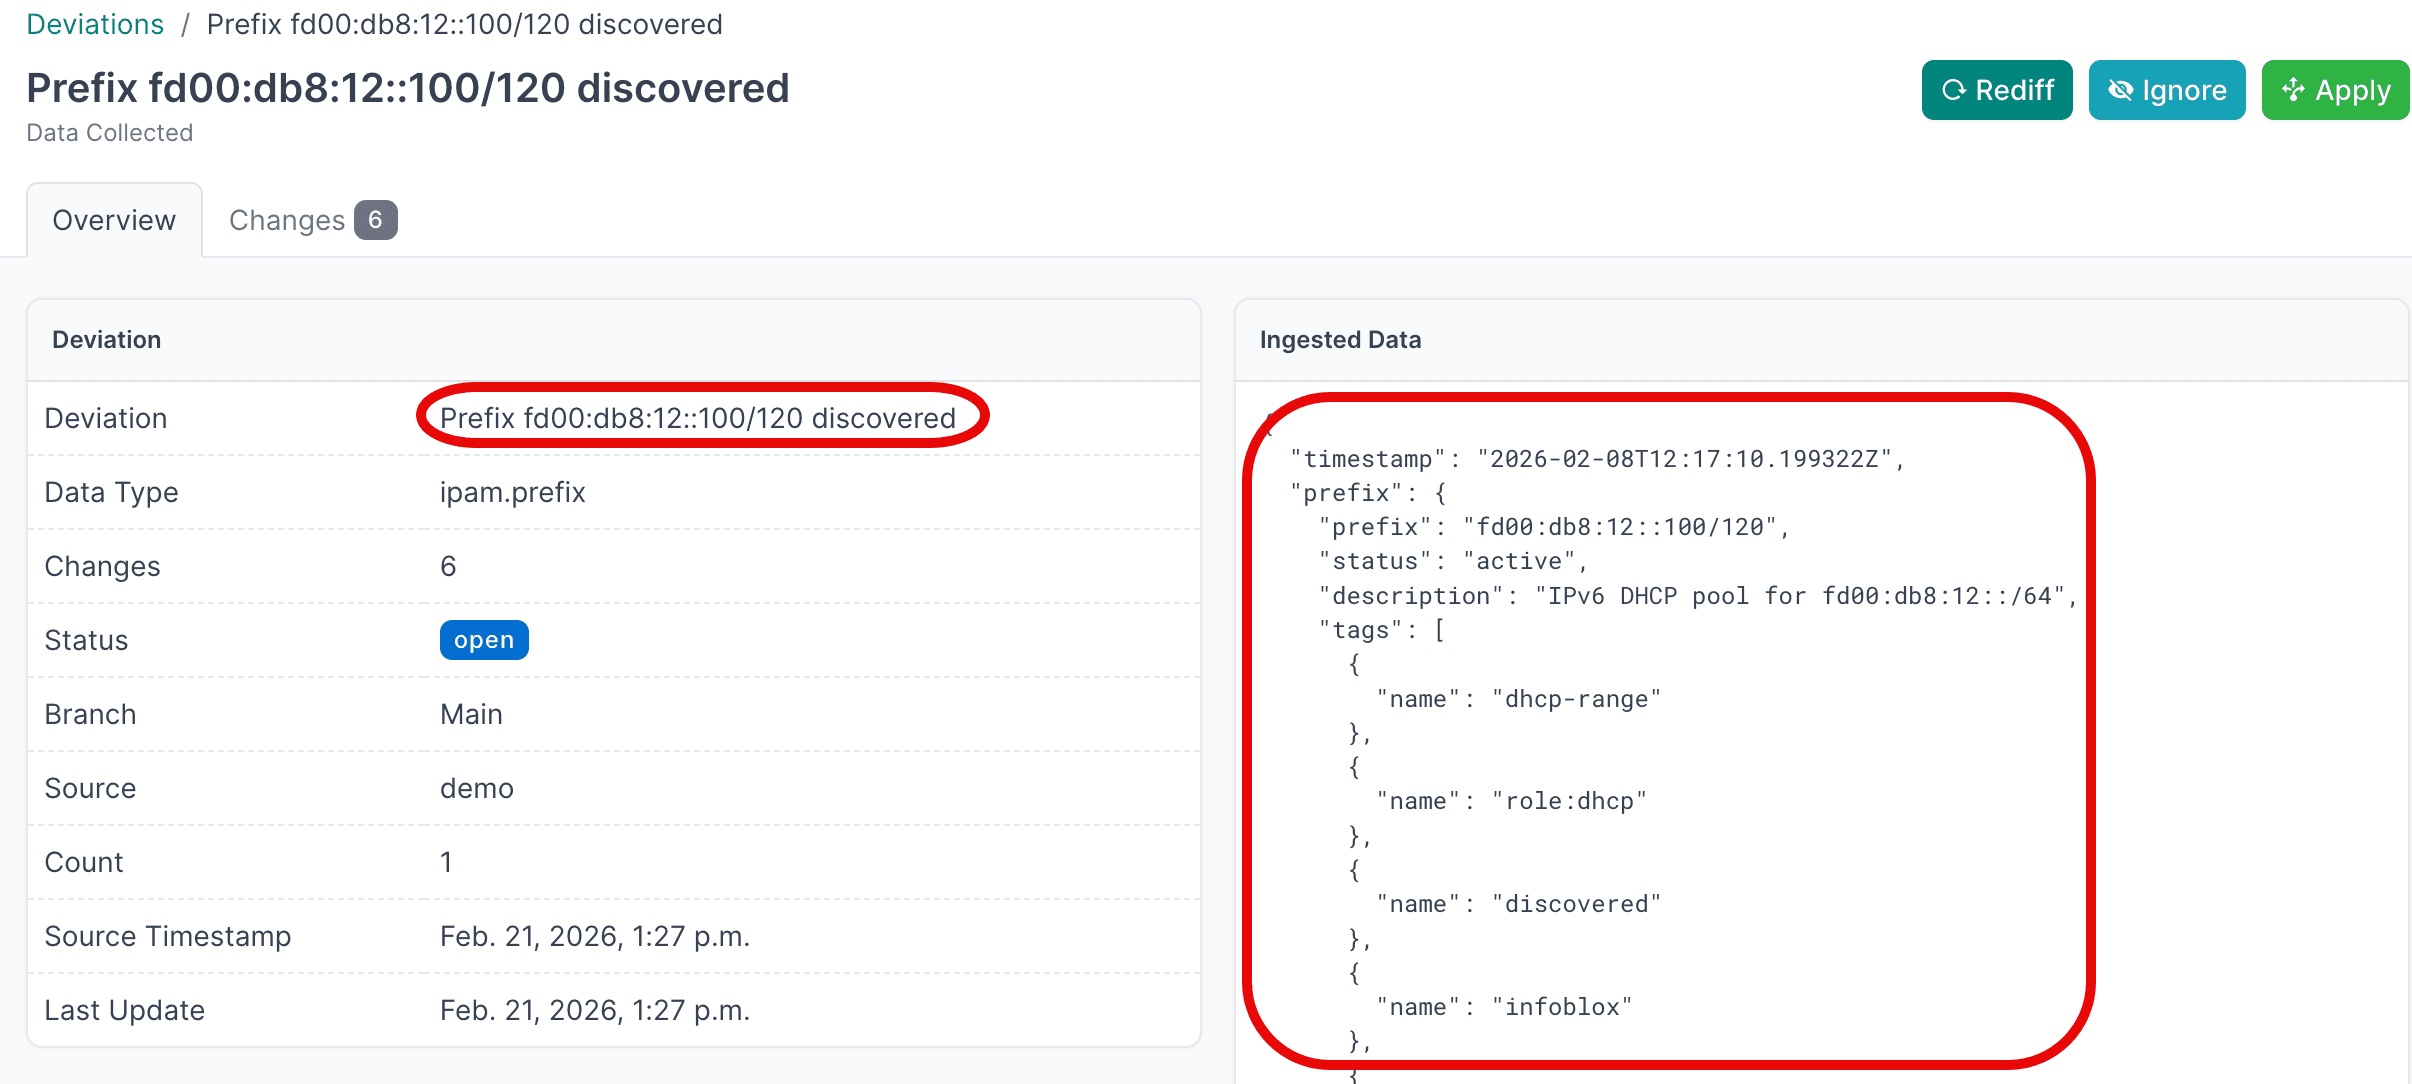
- Click on Deviation Types to view the types of deviations that have been discovered
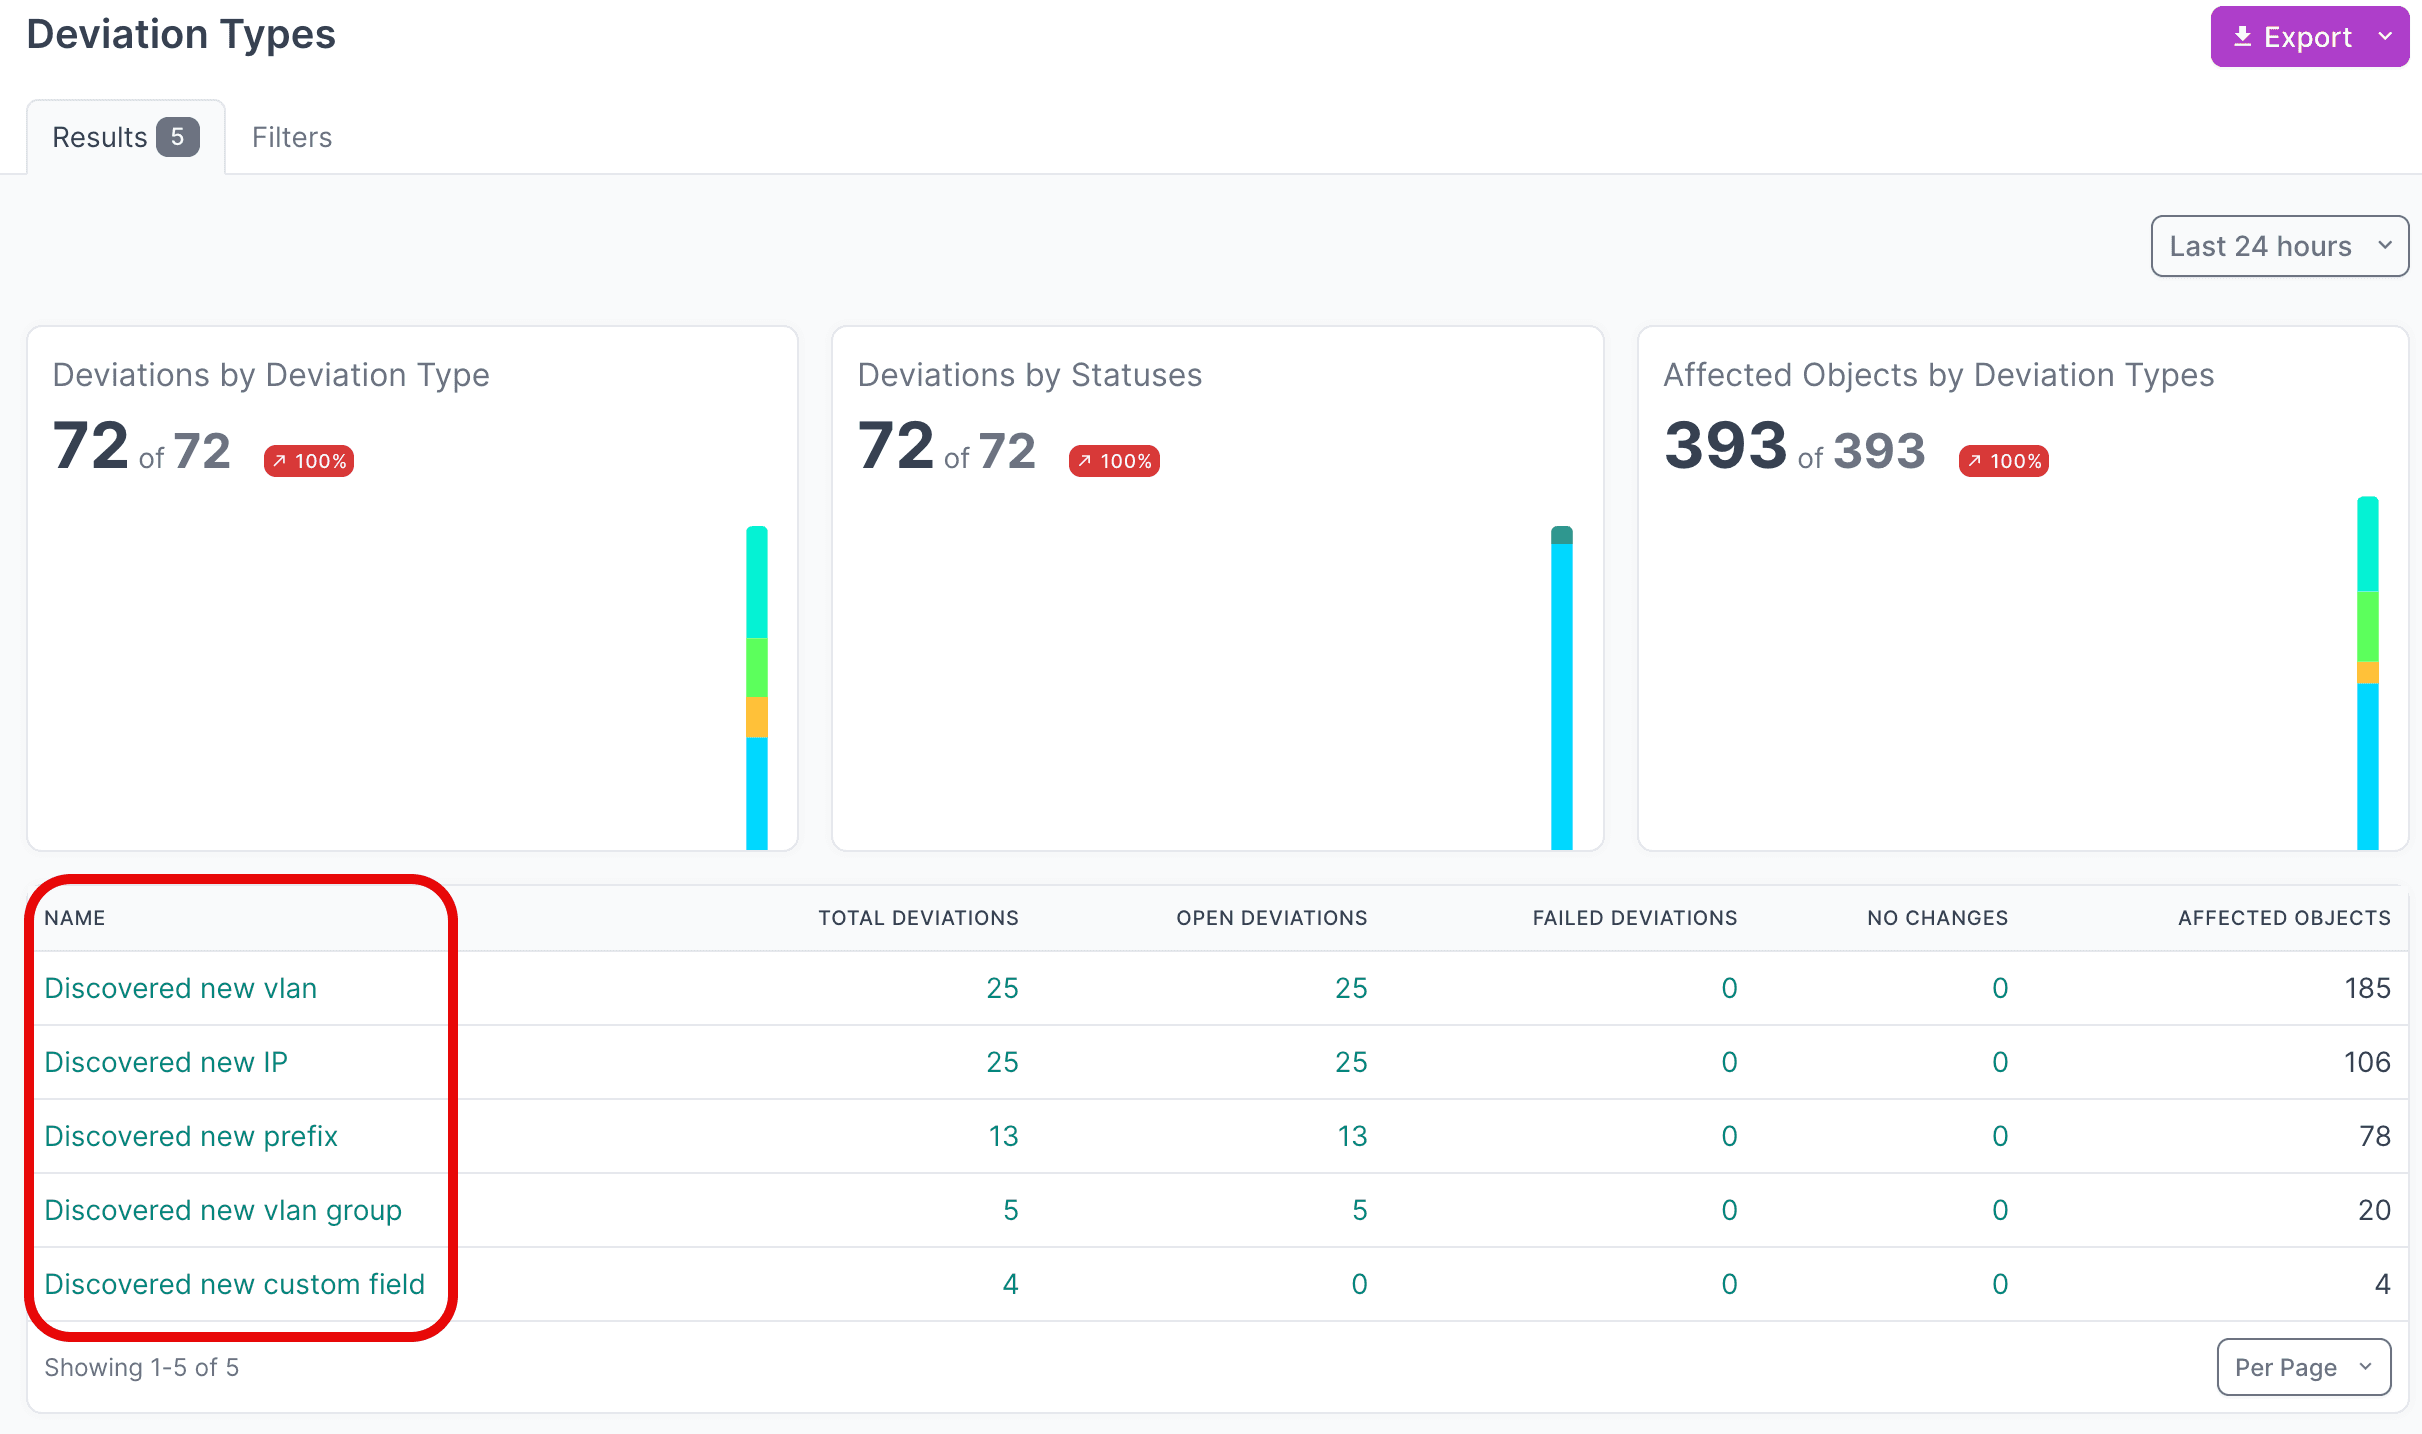
- Click on the Name of a deviation type, to view deviations for a particular type
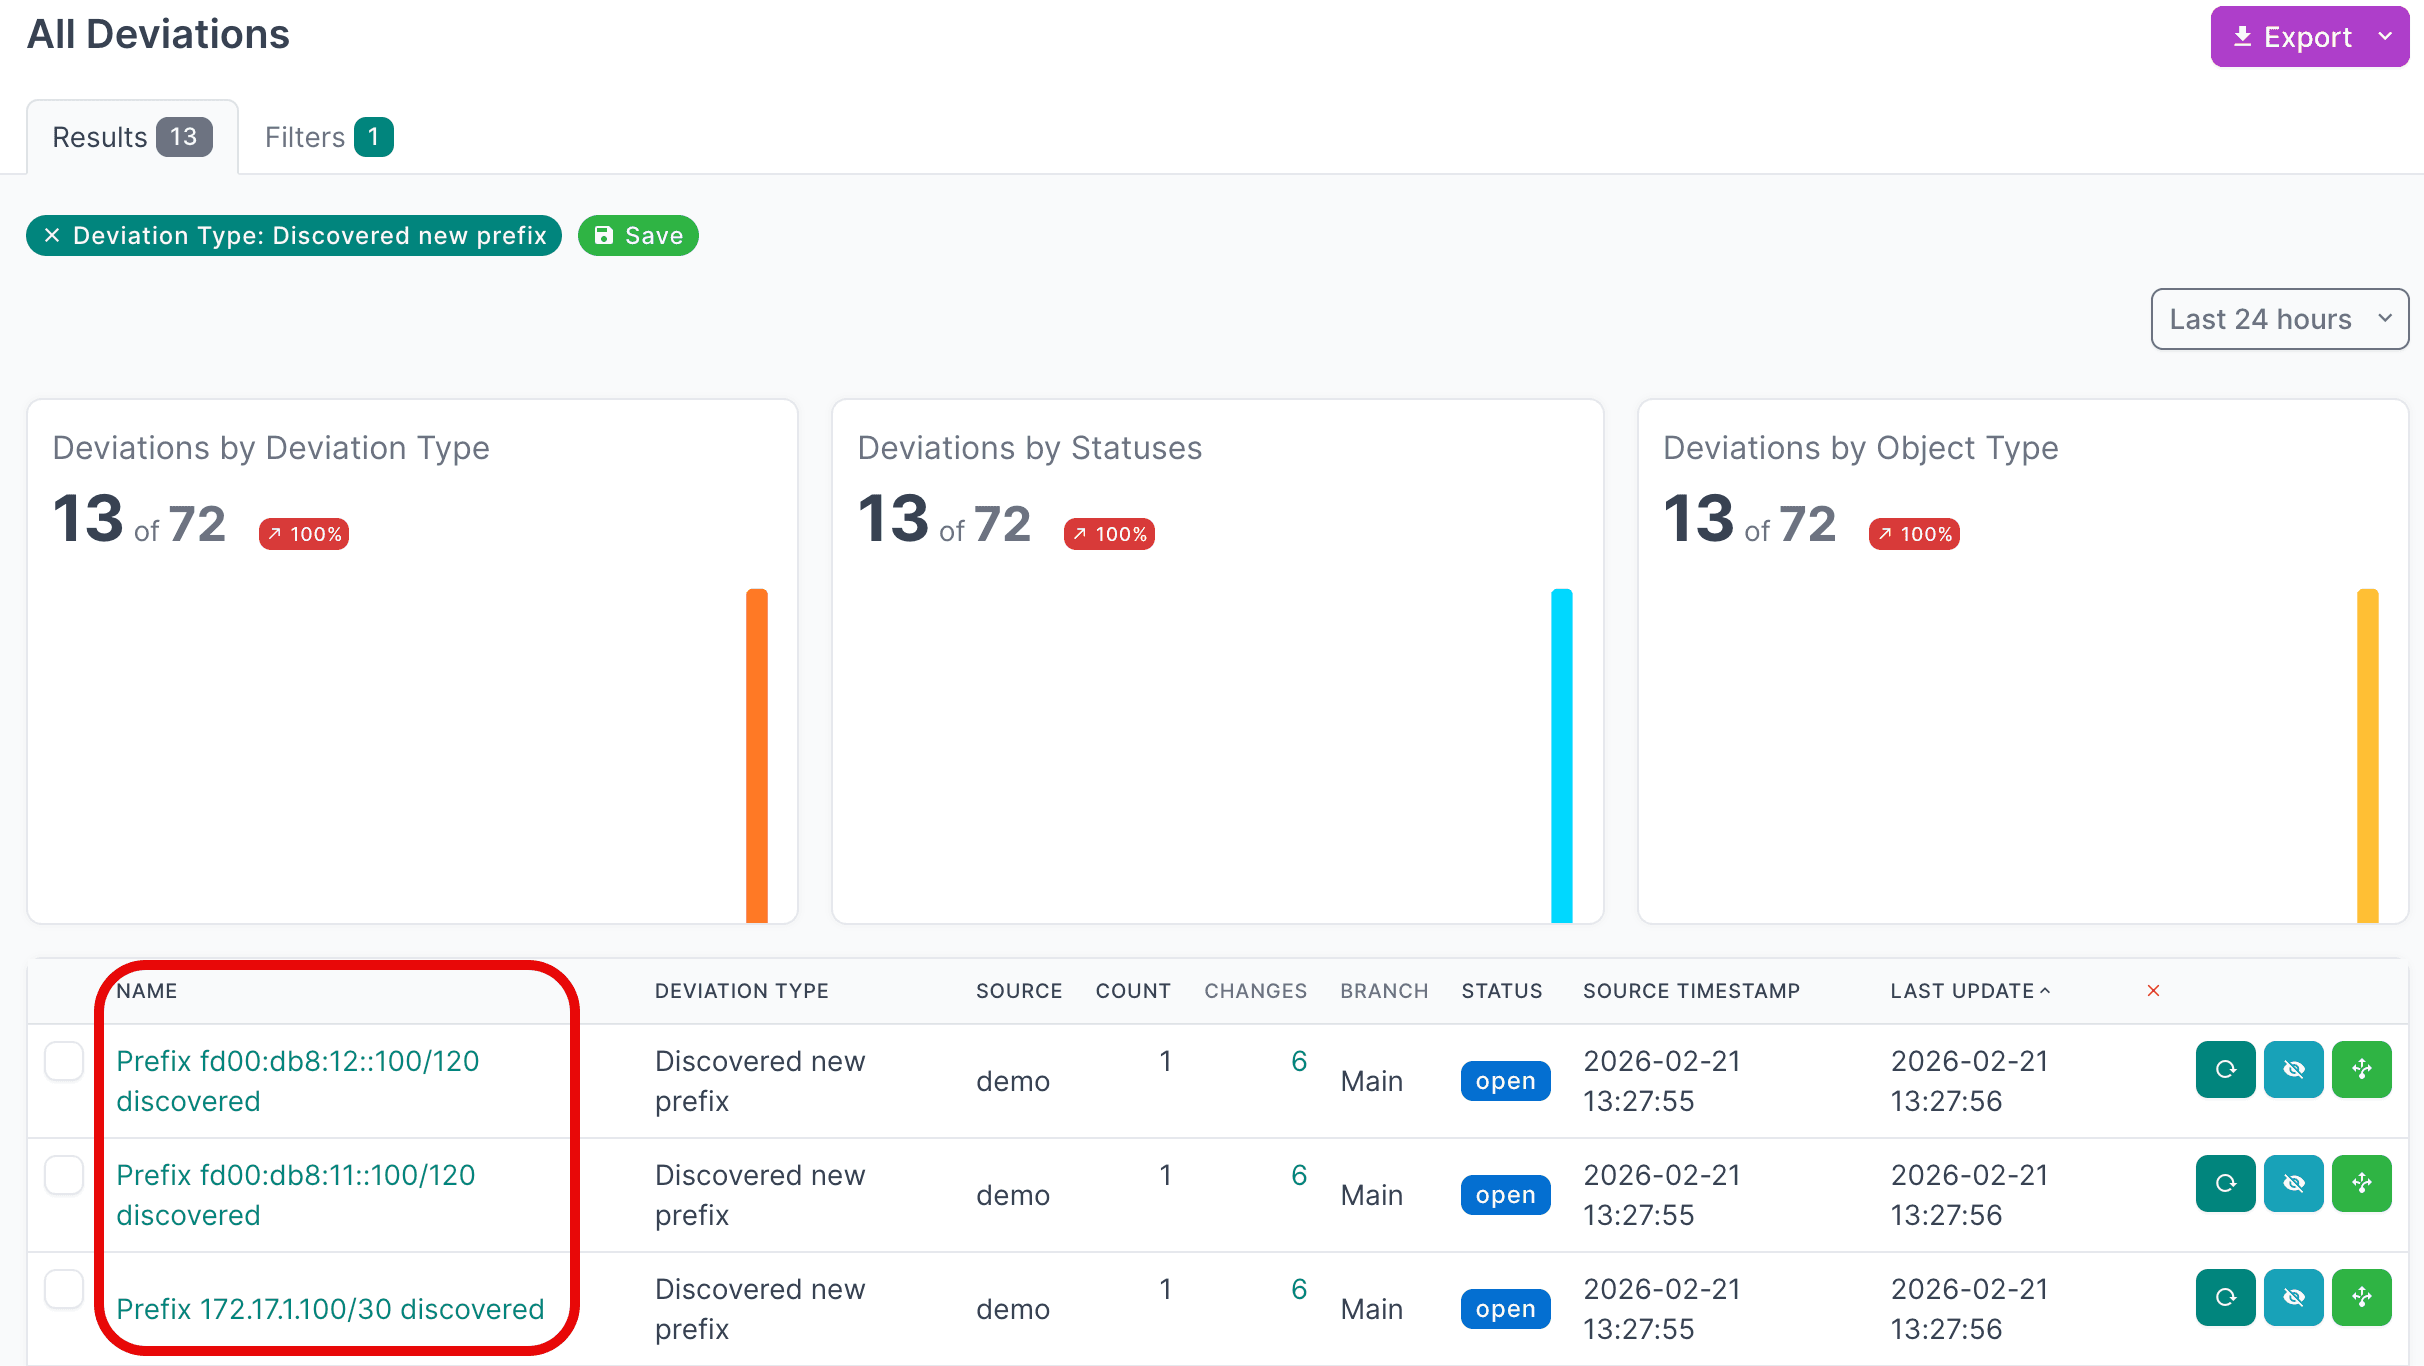
- Click on the Name of an individual deviation, to view the details
View Active Deviations
- Click on Active Deviations to view all the deviations that have not yet been Applied or Ignored
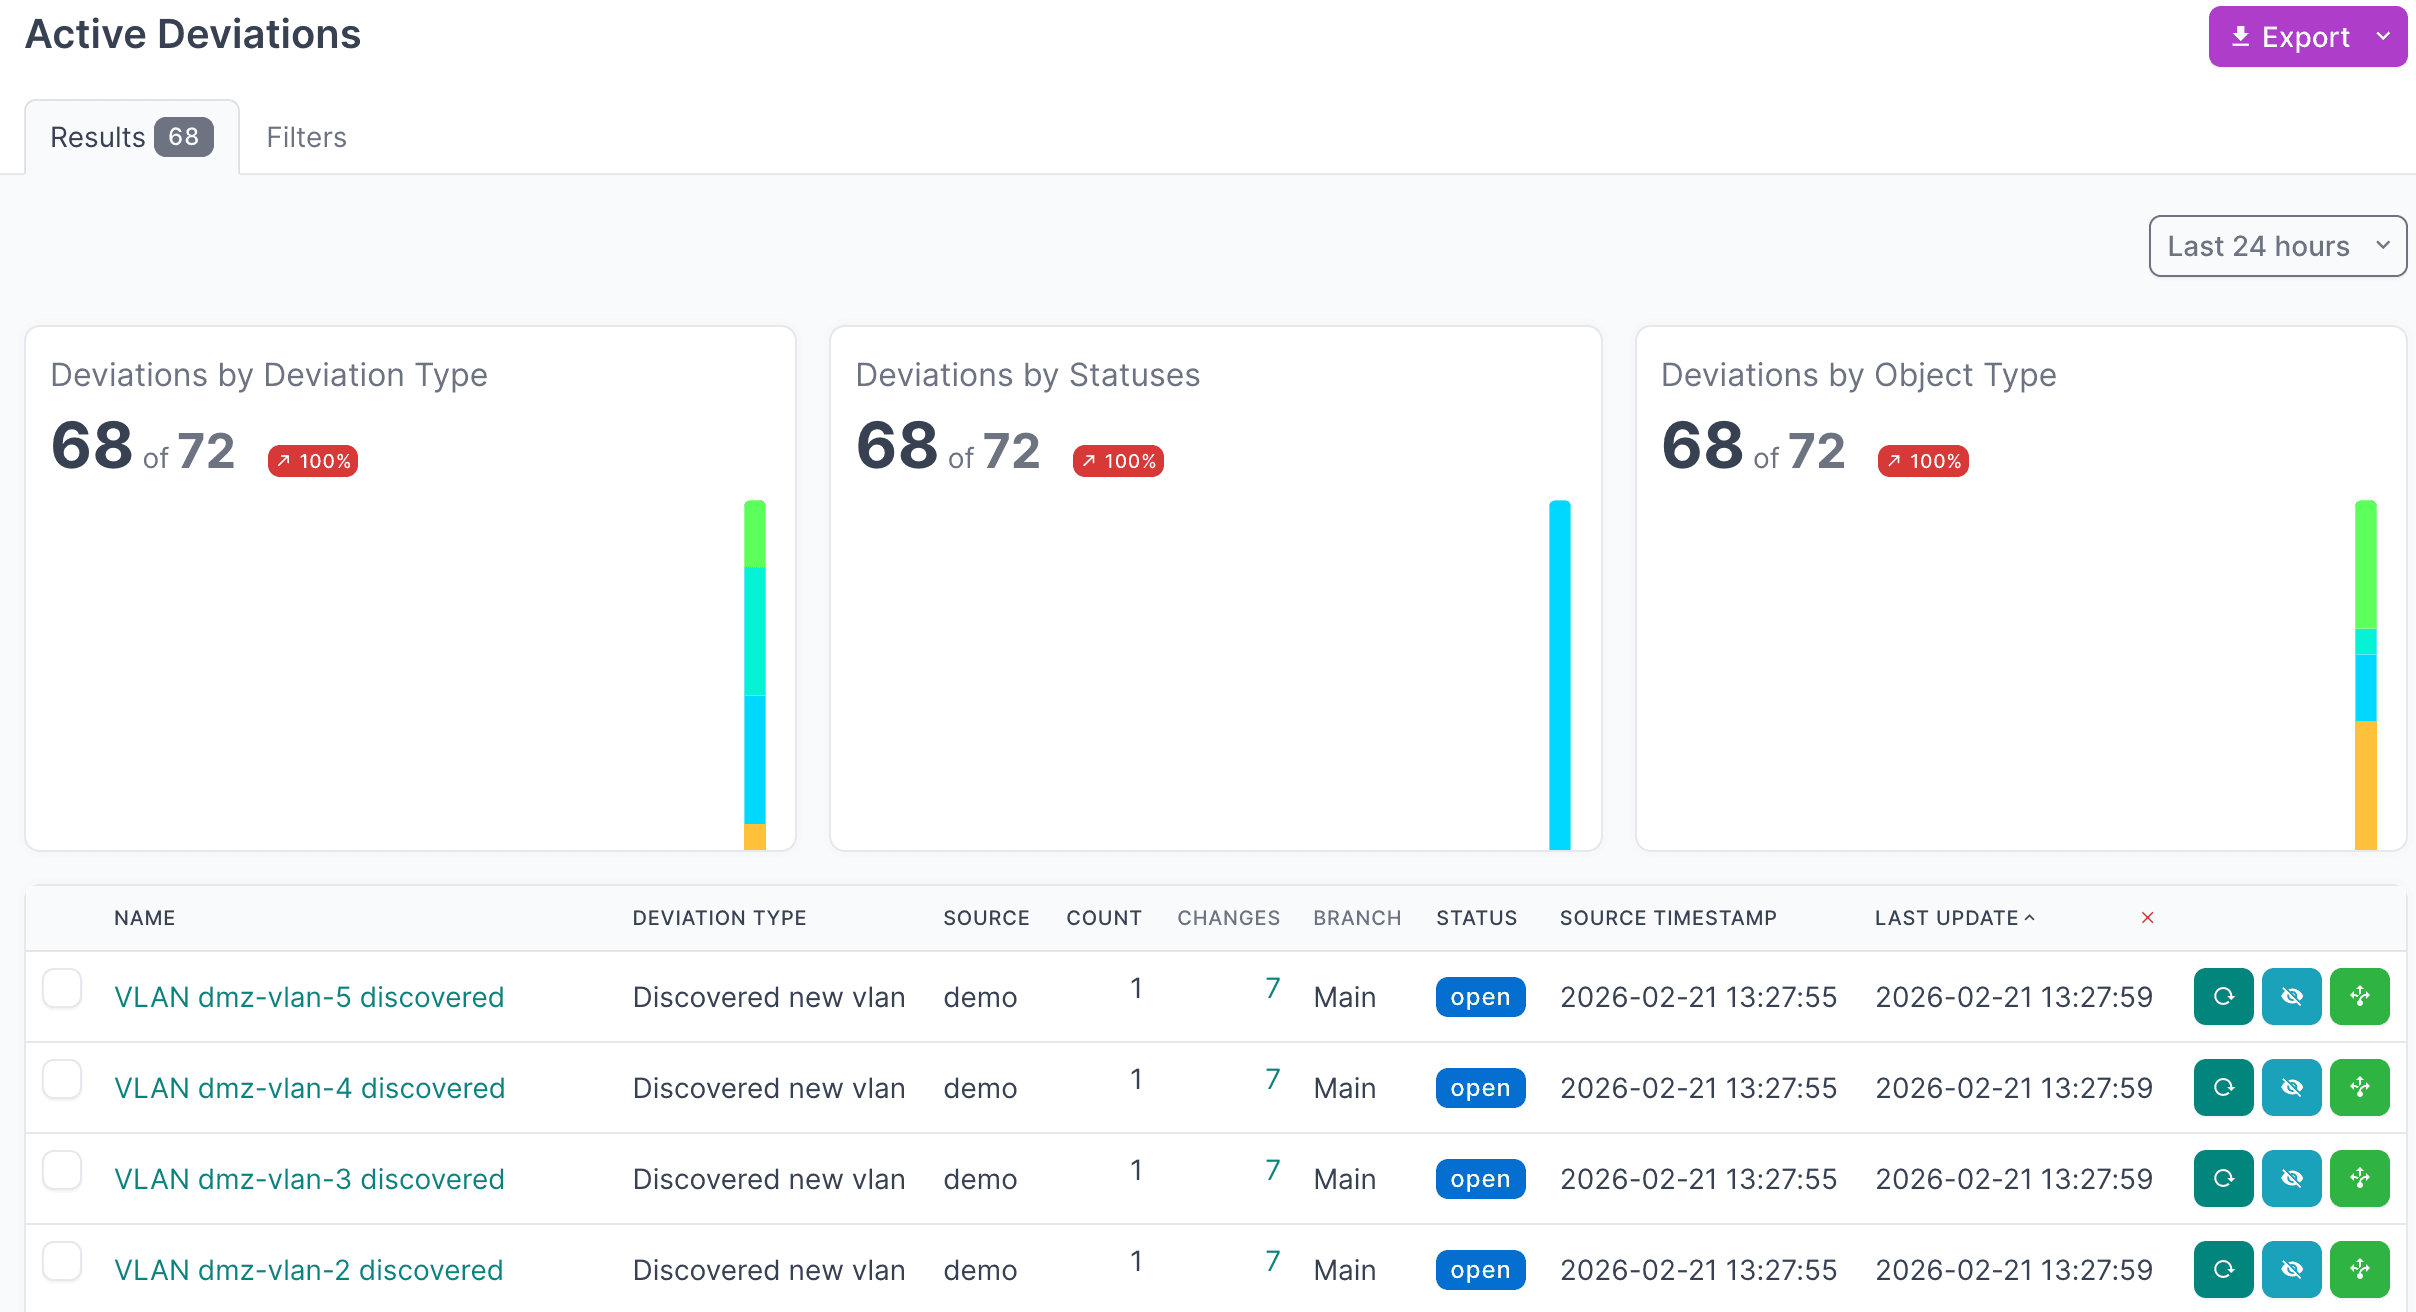
- Click on the Name of a deviation, to view the details
Apply Deviations
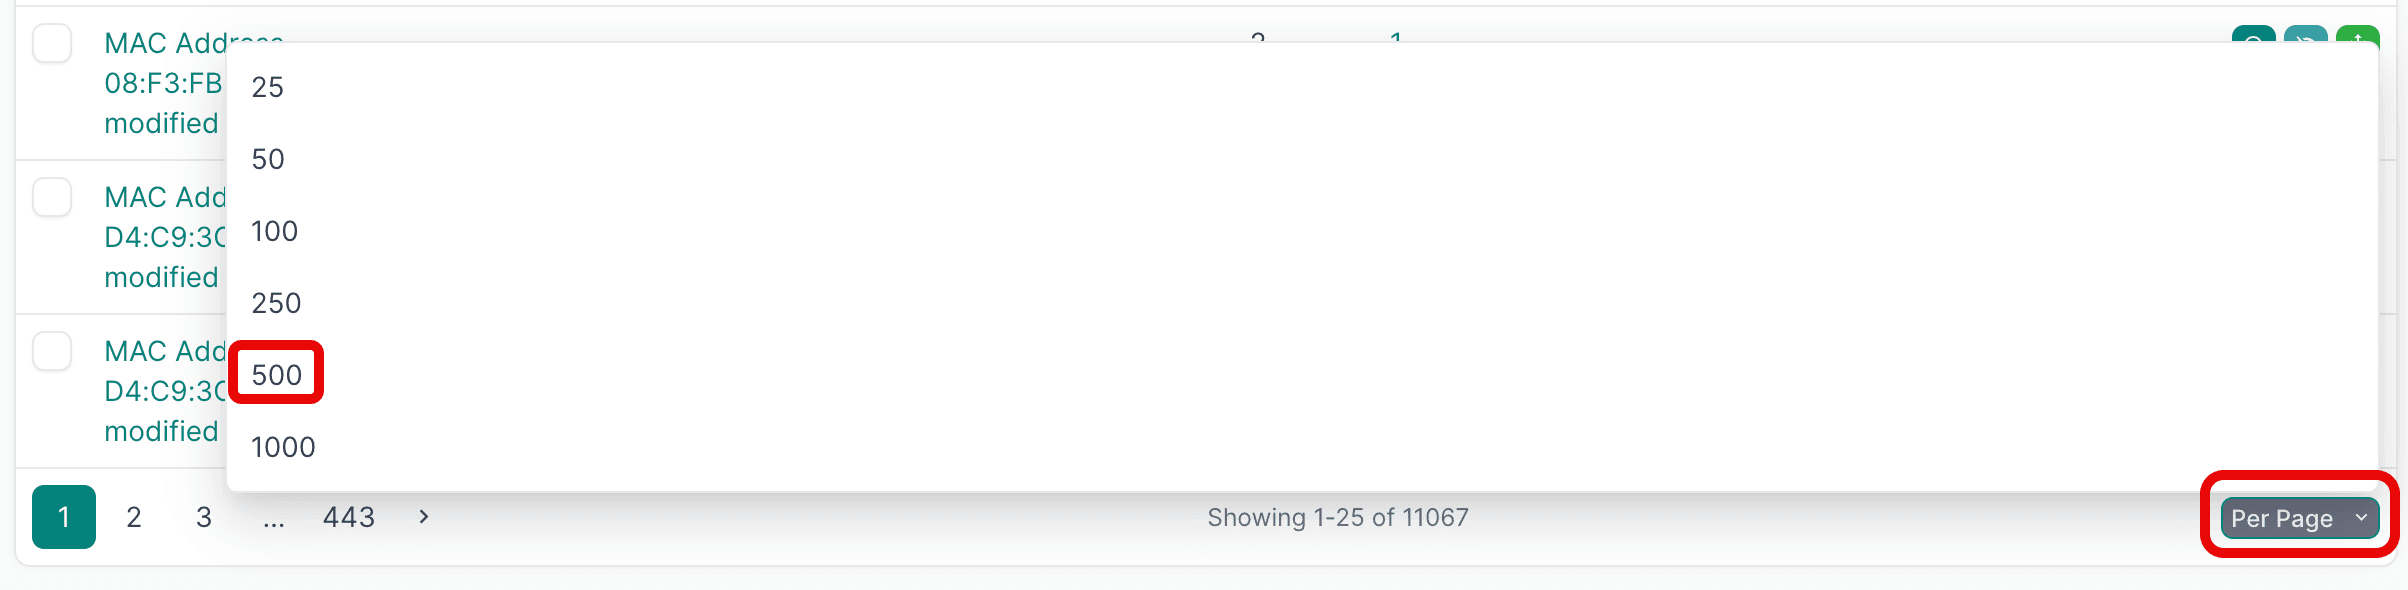
- Select all the deviations that you'd like to apply. If you are working with a large number of deviations, first set the Per Page view to 500:
- Then select the first deviation, hold down
SHIFTand select the last one, and then click Apply Selected: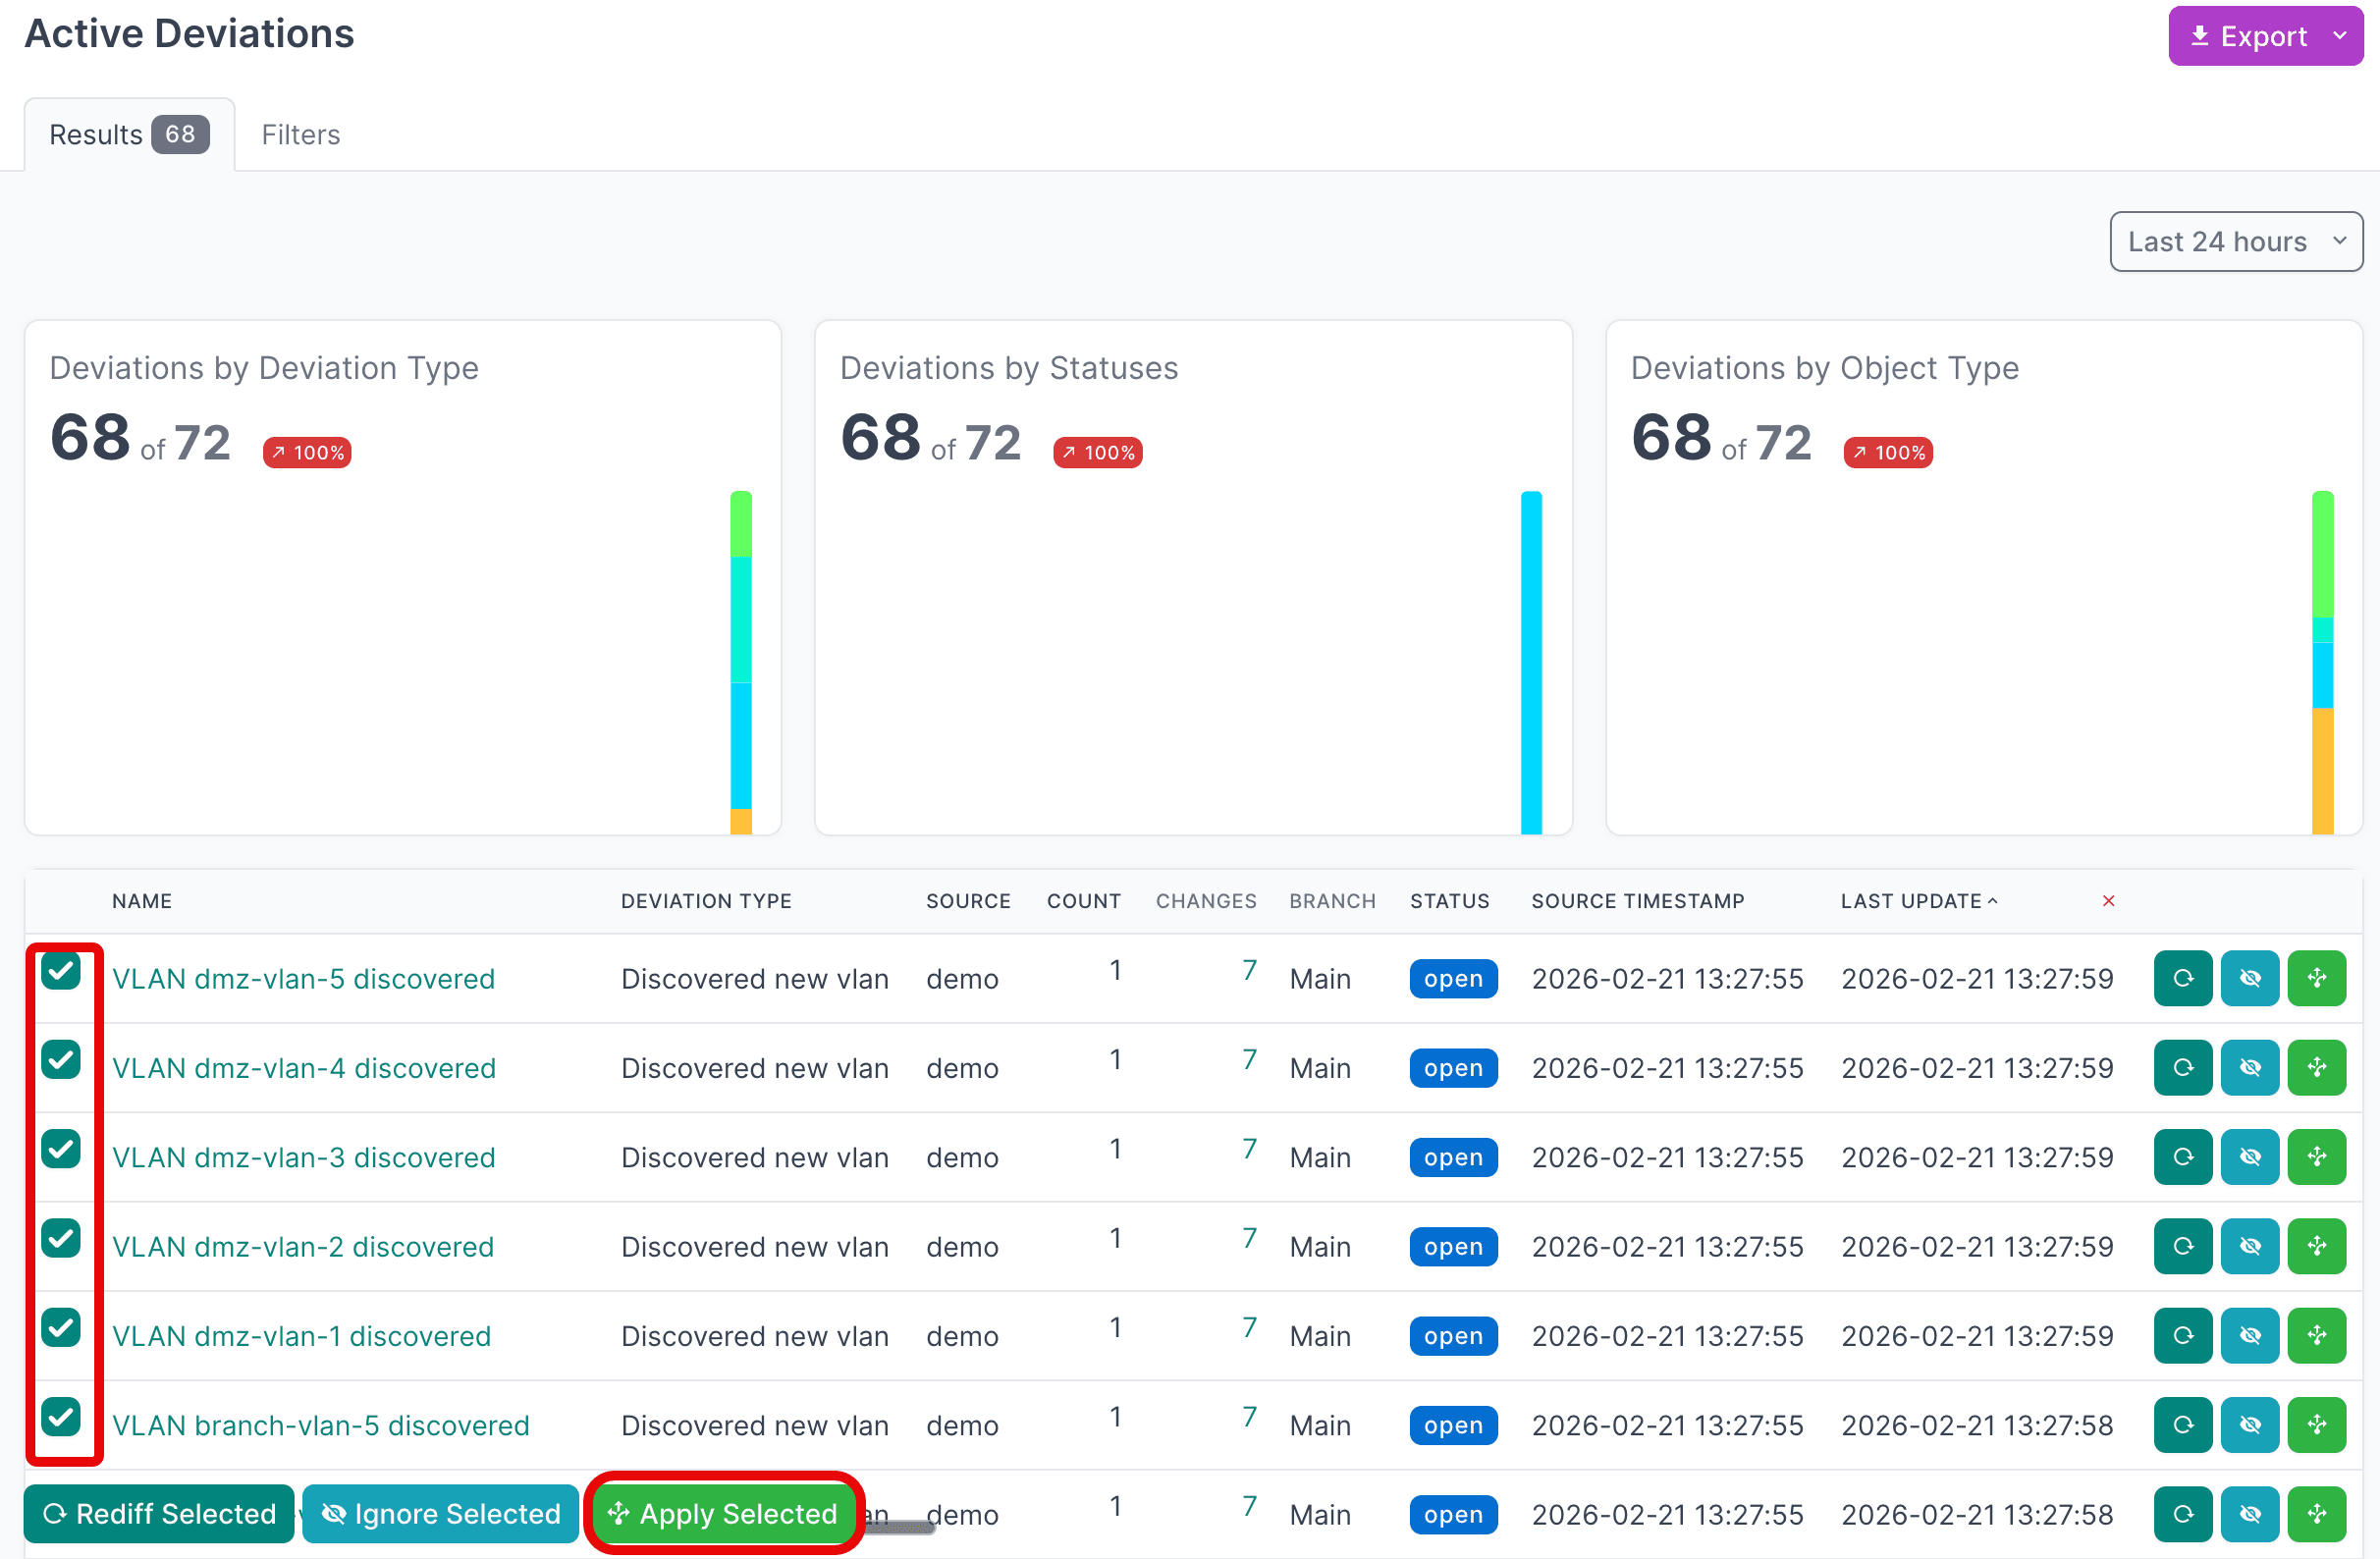
- Click Apply X Deviations to apply the deviations to the NetBox database:
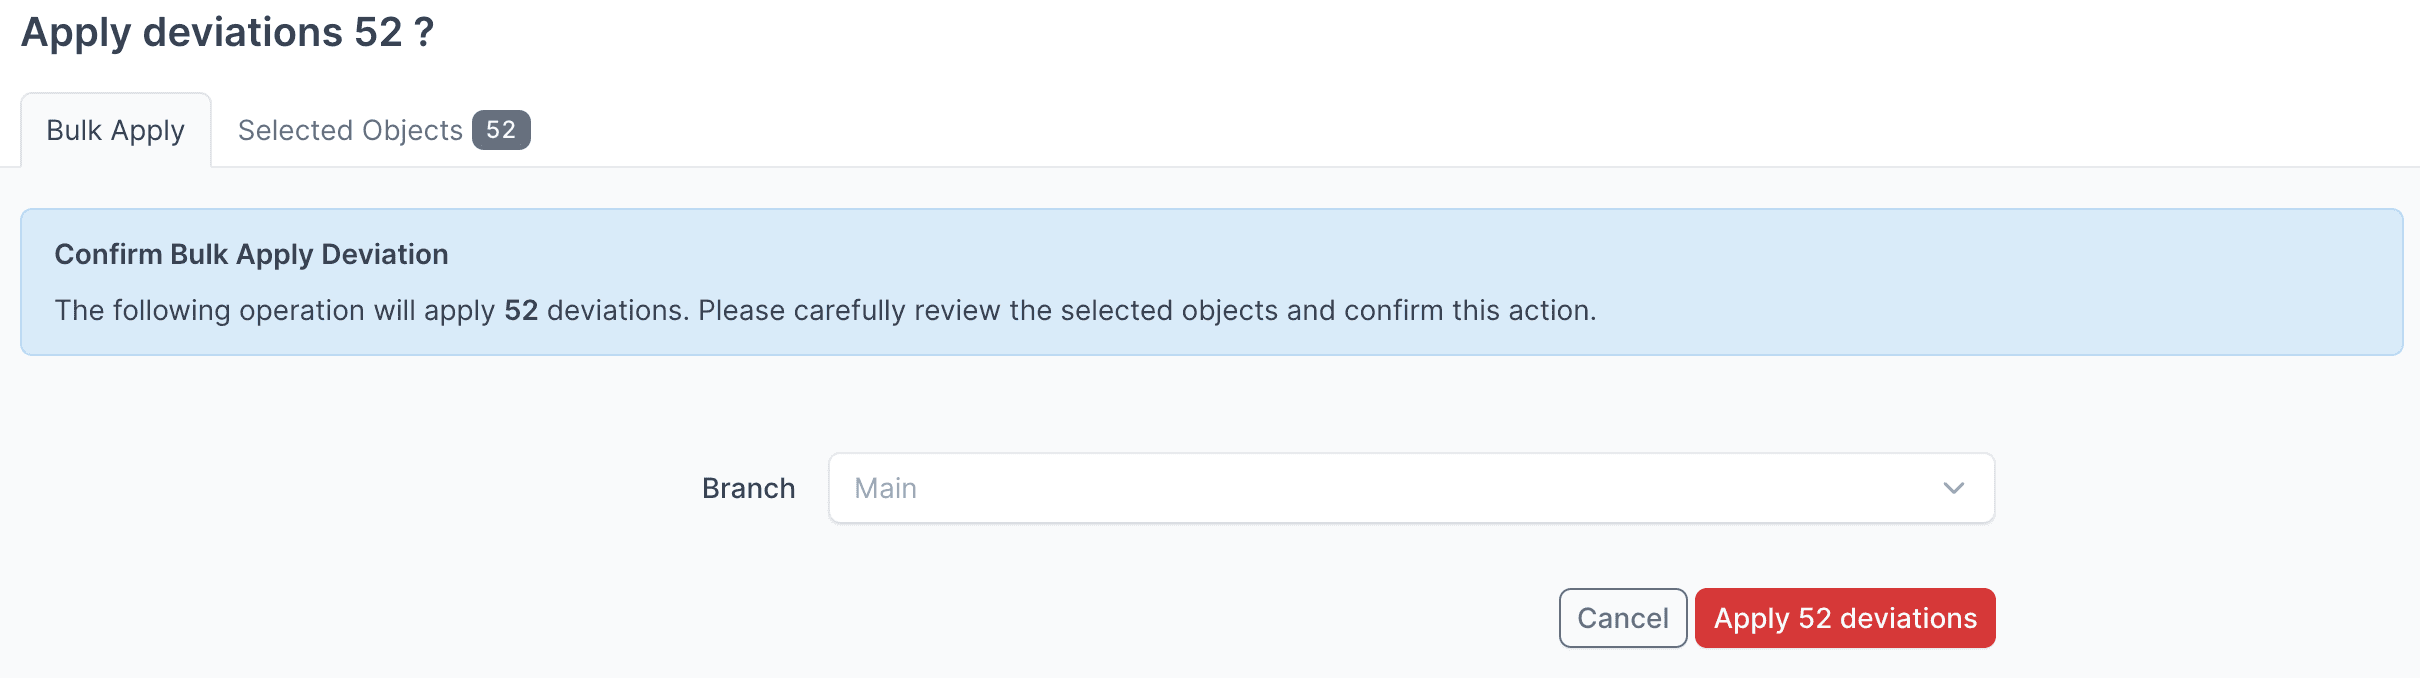 :::tip[Apply Deviations to a Branch]
Instead of writing the deviations to the Main NetBox database branch, you can select another branch from the drop down menu and apply the deviations to that branch.
:::
Assurance Docs
For more detailed information on working with NetBox Assurance, please refer to the documentation
View the Infoblox NIOS Data in NetBox
Now that you have run the integration at least once and applied the discovered data, you can view the data from Infoblox NIOS in the NetBox UI
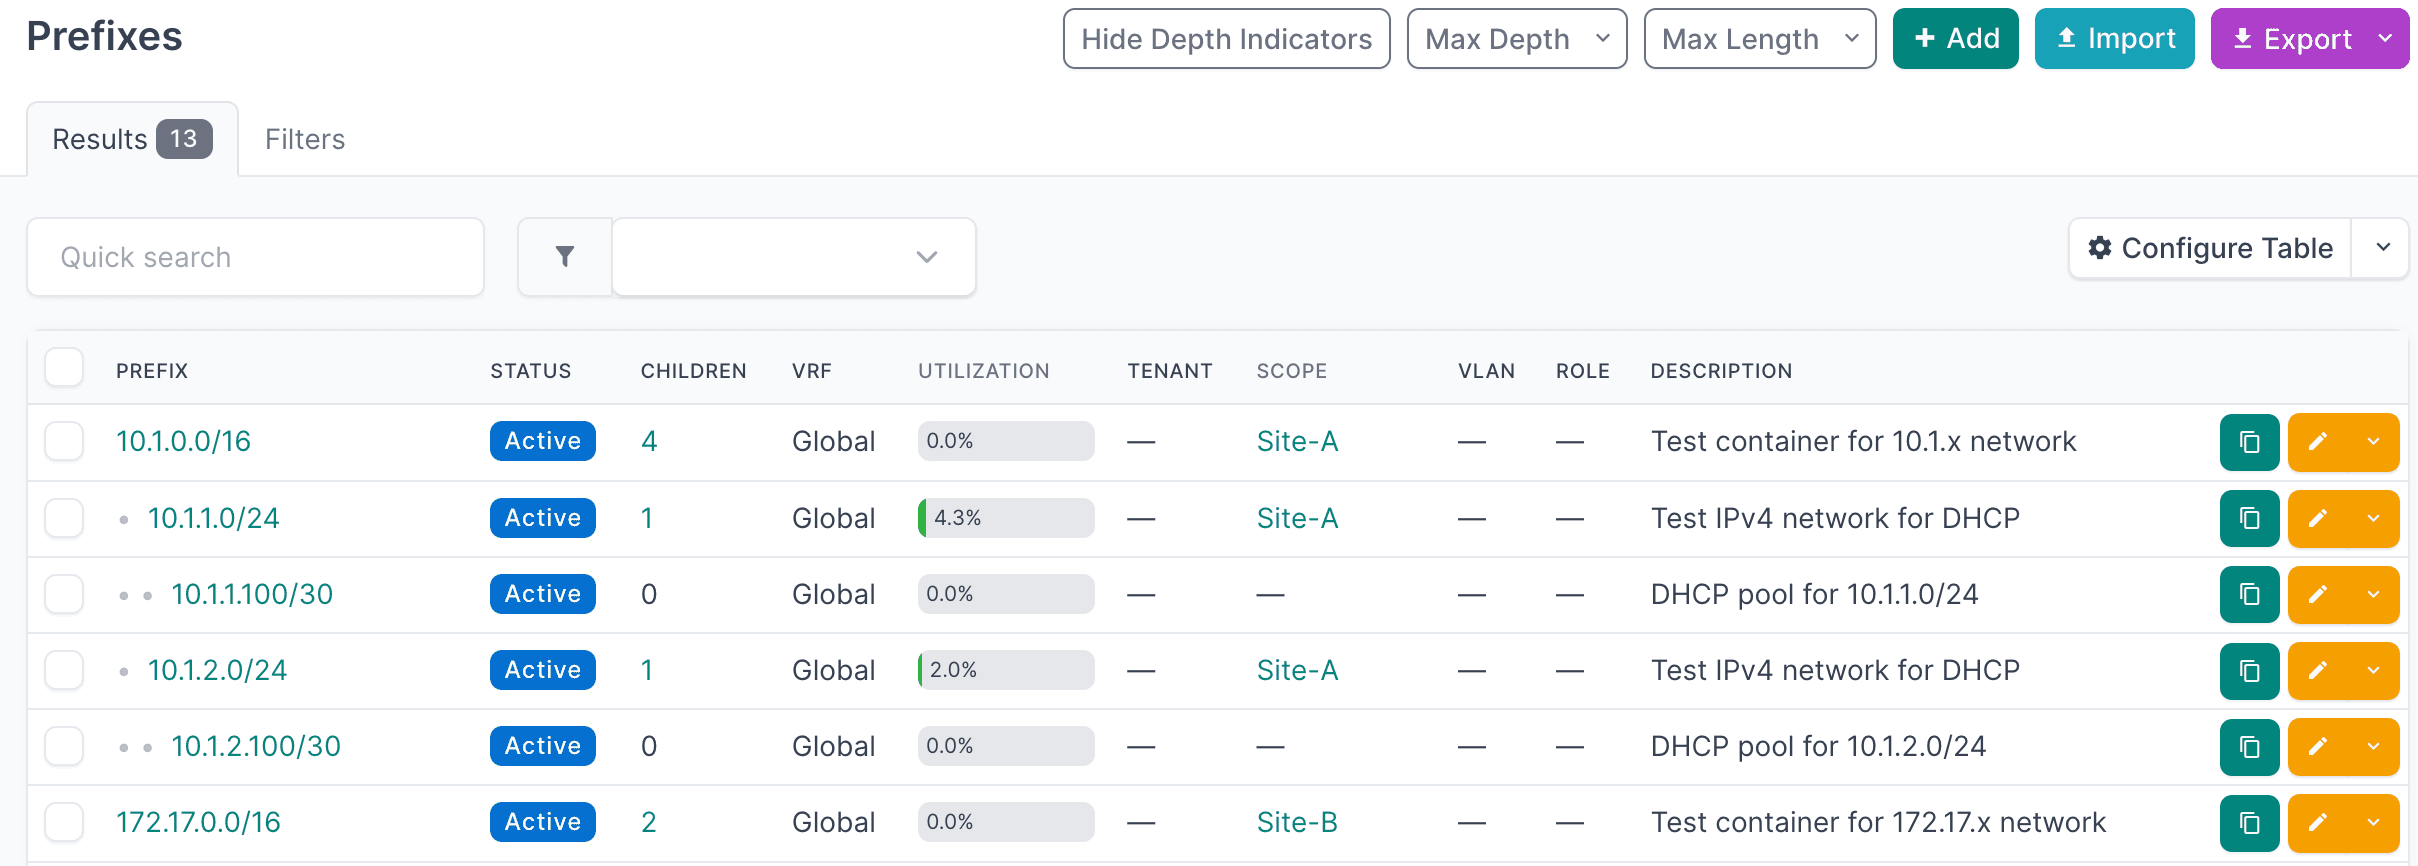
- Start by clicking on IPAM in the main navigation menu, then select Prefixes to view the synchronized networks:
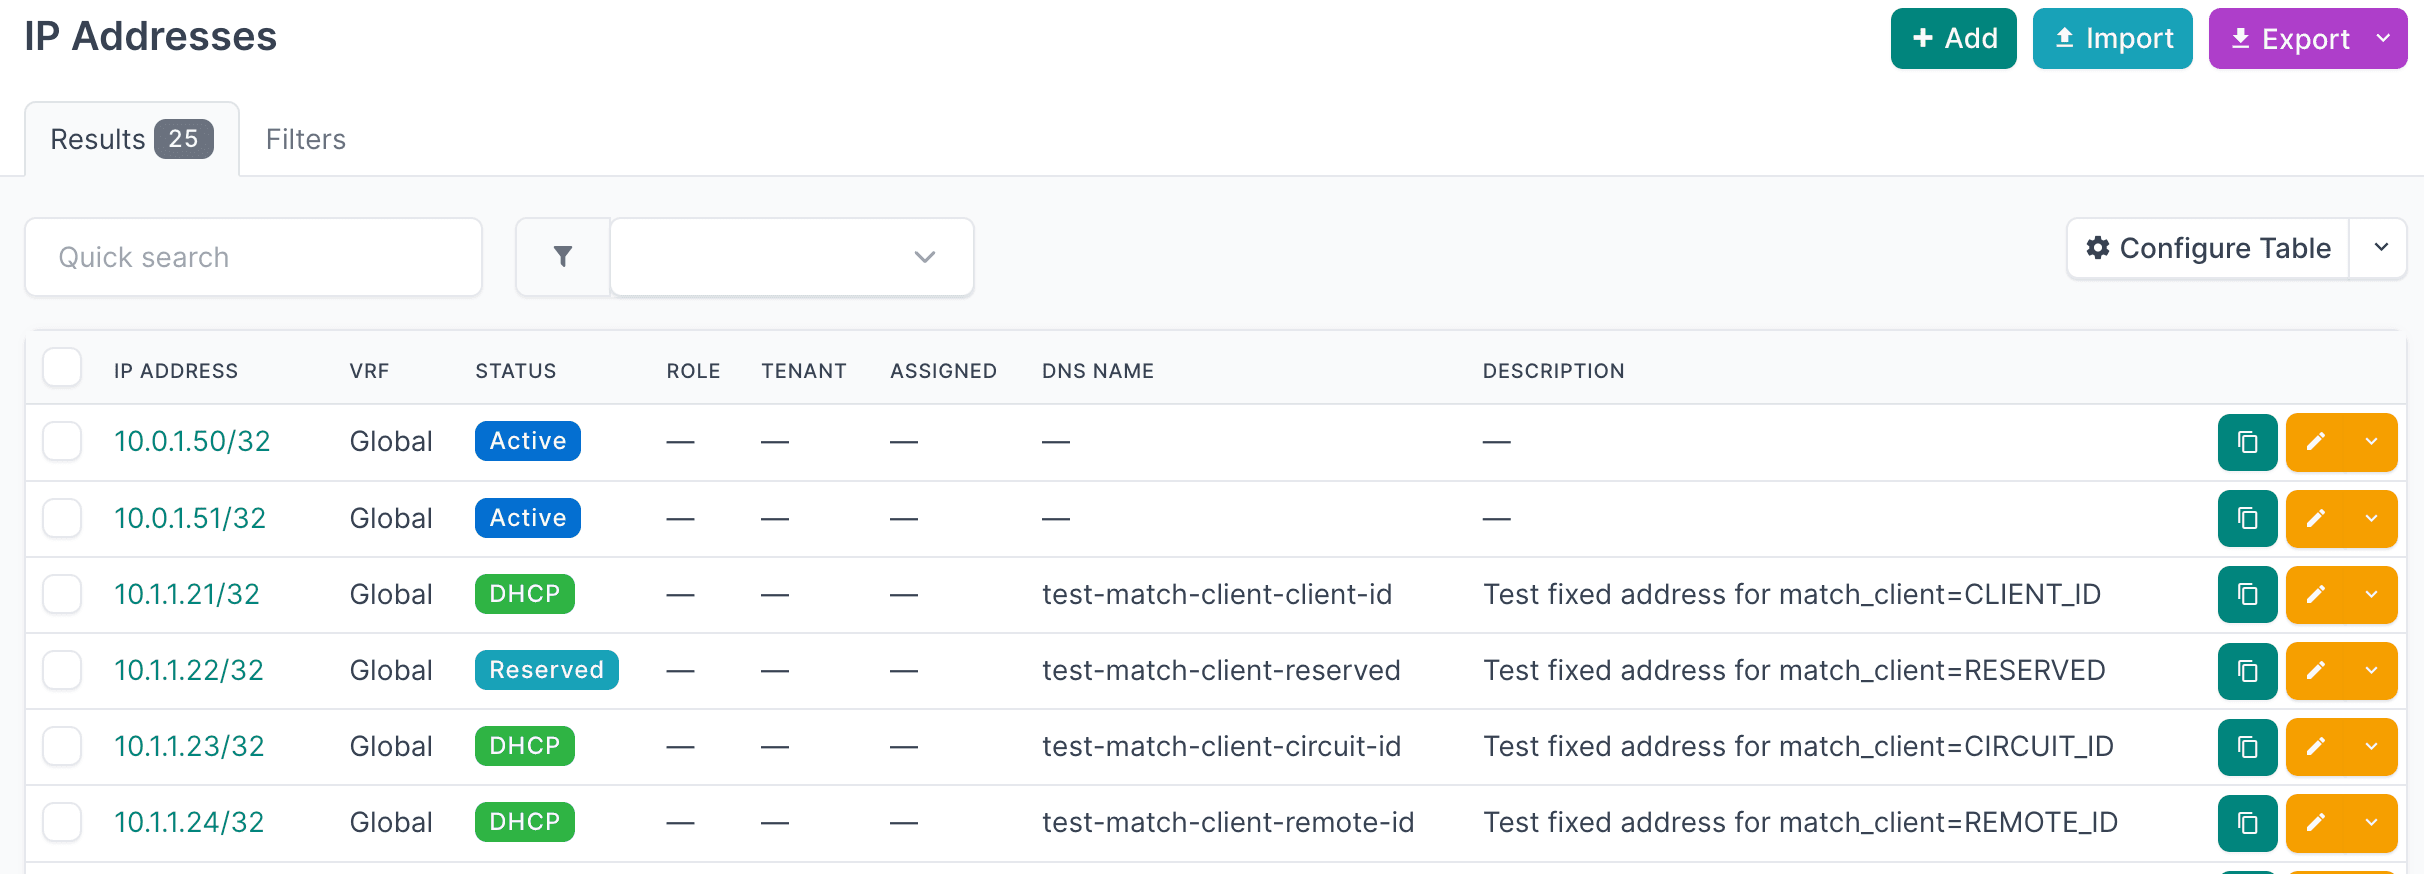
- Click on IP Addresses to view the synchronized IP addresses:
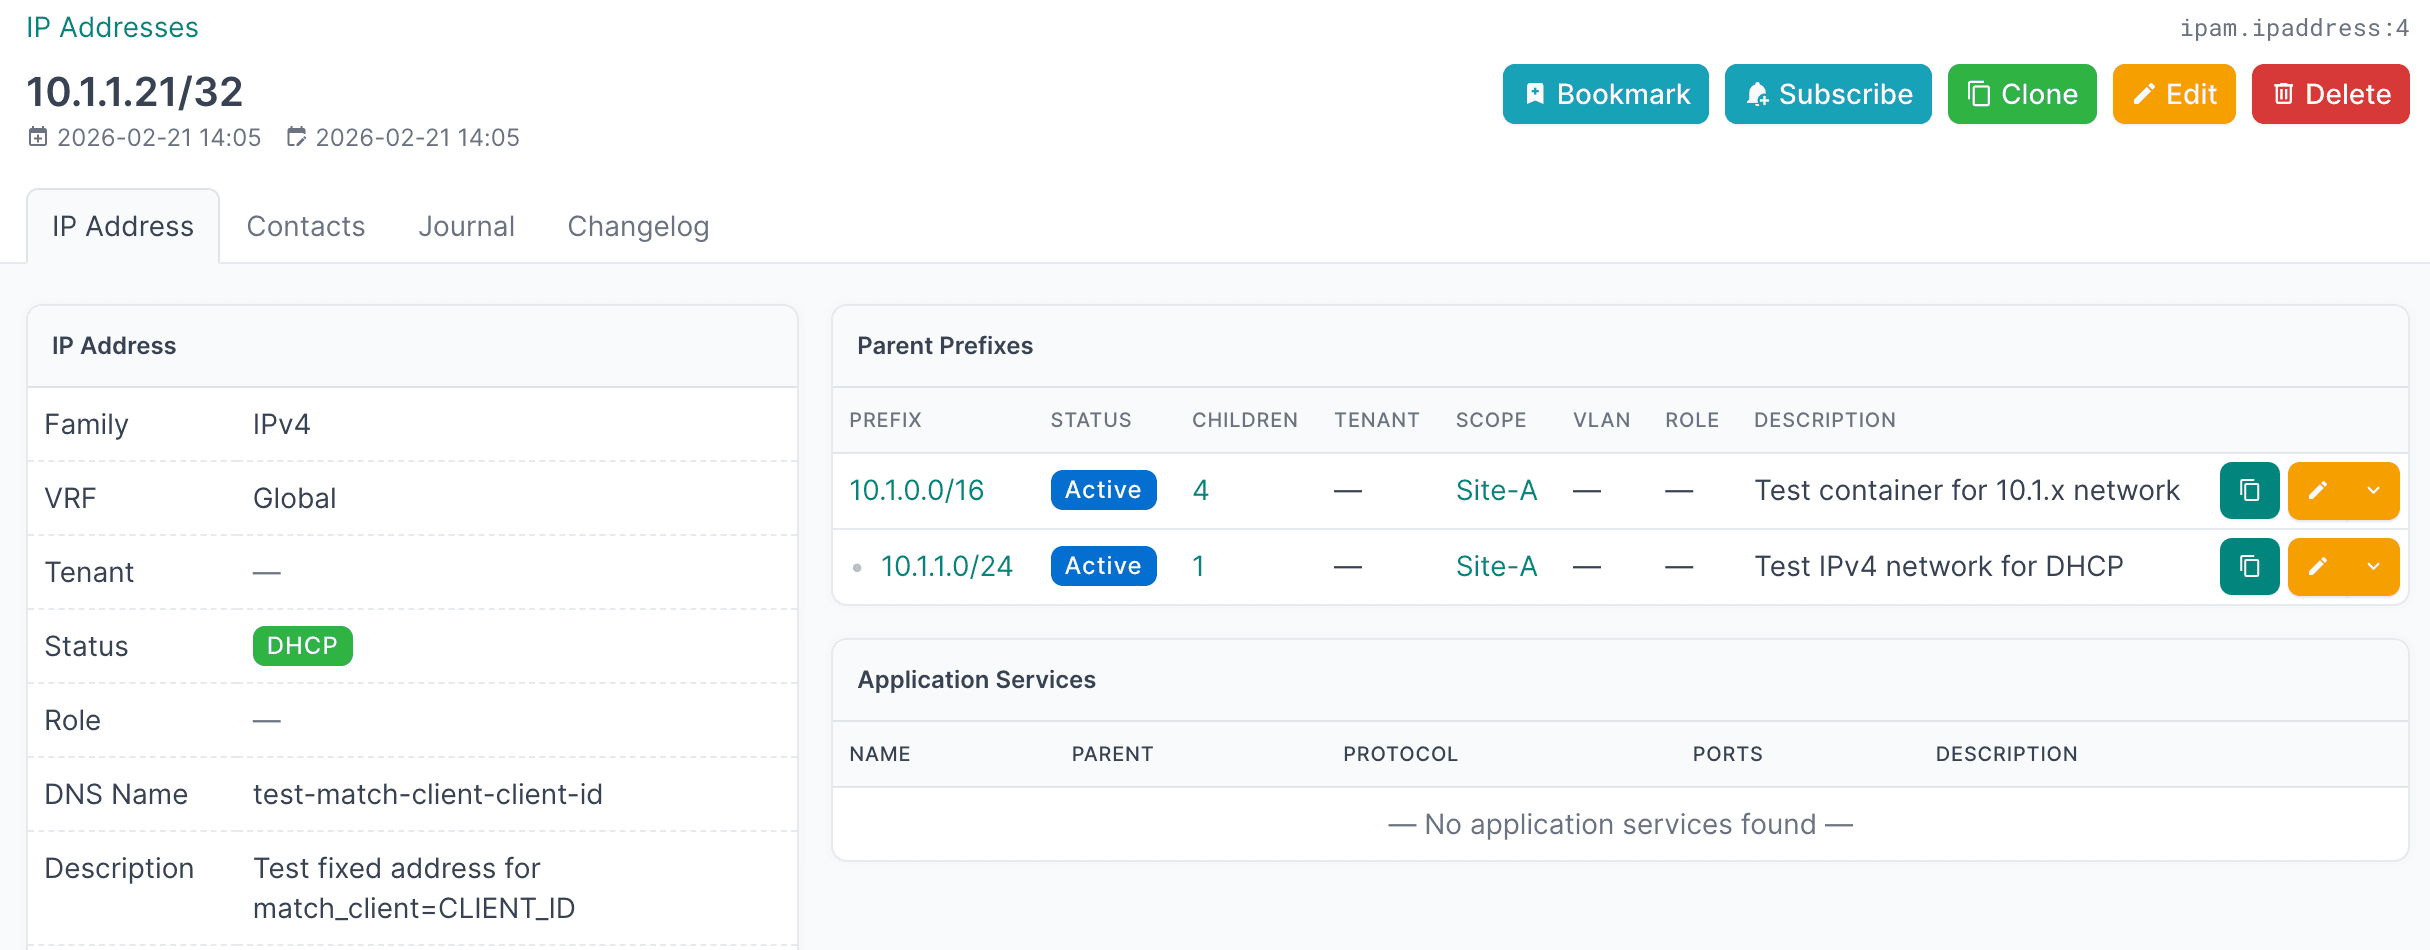
- Select an individual IP Address to view the details including DNS and DHCP information:
Additional Resources
Related Documentation
Support
Email support@netboxlabs.com for support.
Infoblox NIOS Integration
Discover and synchronize Infoblox NIOS IPAM, DHCP, DNS, and VLAN data into NetBox, including networks, IP addresses, forward DNS records, VLANs, VLAN groups, and DHCP ranges.
Technical Information
All objects (prefixes, IP addresses) are tagged with their network view for easy filtering.