Getting Started
Public Preview
The AWS VPC IPAM integration is currently in public preview and is not yet generally available. Contact support@netboxlabs.com to join the preview.
This guide covers how to set up and run the AWS VPC IPAM Integration for NetBox.
- Prerequisites
- Host Requirements
- AWS Requirements
- NetBox Setup
- Agent Setup and Configuration
- Expected Output
- View and Apply Discovered Data in NetBox Assurance
- View the AWS VPC IPAM Data in NetBox
- Additional Resources
Prerequisites
Before you begin, ensure you have the following:
- NetBox Cloud or NetBox Enterprise with NetBox Assurance
- Orb Agent Pro credentials (required to download the integration agent image)
- AWS VPC IPAM enabled in your AWS account (the Advanced Tier is required for private IP management)
- AWS credentials with the read-only IAM permissions listed below
- Host System with Docker support
- Network connectivity between your host and both your NetBox instance and the AWS APIs
Host Requirements
System
- Operating System: Linux, macOS, or Windows with Docker support
- Memory: Minimum 2GB RAM (4GB recommended)
- Storage: 1GB free disk space
- Network: Stable internet connection for pulling Docker images
- Docker: Version 20.10 or later
Network
- Outbound gRPC/gRPCS access to Diode on your NetBox instance (typically port 443 for gRPCS)
- Outbound HTTPS access to the AWS EC2 and STS API endpoints (port 443)
- DNS resolution for both your NetBox instance and the AWS API endpoints
- Firewall rules configured to allow the above connections from your agent host
AWS Requirements
Credential Model
You run the agent, on your own infrastructure, with credentials you control. NetBox Labs never holds your AWS credentials and never assumes a role in your AWS account, so there is no External ID to configure.
AWS_ROLE_ARN exists for reaching your own accounts: the agent assumes a role you own, in another AWS account you own. That is what makes a hub-and-spoke IPAM layout readable from a single policy.
Least-Privilege IAM Policy
The integration only reads. The six actions below are the complete set it calls, so the identity you give it needs no write, modify, or delete permission anywhere in your account:
{
  "Version": "2012-10-17",
  "Statement": [
    {
      "Effect": "Allow",
      "Action": [
        "ec2:DescribeIpams",
        "ec2:DescribeIpamScopes",
        "ec2:DescribeIpamPools",
        "ec2:GetIpamPoolCidrs",
        "ec2:GetIpamPoolAllocations",
        "ec2:GetIpamResourceCidrs"
      ],
      "Resource": "*"
    }
  ]
}
If you use cross-account access (see Multi-Region and Cross-Account), the source identity also needs permission to assume the target role, and the target role carries the IPAM read permissions above:
{
  "Effect": "Allow",
  "Action": "sts:AssumeRole",
  "Resource": "arn:aws:iam::222222222222:role/netbox-ipam-reader"
}
Choose an Authentication Method
Credentials are read from the policy config block. Pick the option that fits where the agent runs. In every case you must also set the AWS region (or regions) through the AWS_VPC_IPAM_REGION config key.
| Option | When to use it | What to set |
|---|---|---|
| Instance or task role | The agent runs inside AWS (EC2, ECS) | Nothing. Leave both credential keys unset and the attached role is picked up. |
| Long-term read-only IAM user key | The agent runs on-premises with no role assumption | AWS_ACCESS_KEY_ID and AWS_SECRET_ACCESS_KEY |
| Role assumption | IPAM lives in another account you own, or you want short-lived credentials you can revoke centrally | AWS_ROLE_ARN, plus one of the two options above as the source identity |
Prefer an instance role or role assumption where you can. Neither leaves a long-lived secret in your agent host's configuration.
When both credential keys are unset, no credentials are passed to boto3 and its standard credential chain applies. Inside AWS that resolves the attached instance or task role; elsewhere it resolves whatever that chain finds in the agent's own environment or AWS config files.
Keep secrets out of the policy file
Write ${AWS_SECRET_ACCESS_KEY} in the policy rather than the secret itself. When the agent loads the policy, a config value that is exactly a ${...} reference is replaced with the matching environment variable from the agent process. The .env file in Step 3 is what supplies those variables.
Two details matter in practice:
- The reference must be the whole value.
${AWS_SECRET_ACCESS_KEY}is substituted;prefix-${AWS_SECRET_ACCESS_KEY}is not. - An unset variable is not caught as a missing credential. If the environment variable does not exist, the literal text
${AWS_SECRET_ACCESS_KEY}is passed through as the credential and the run fails when AWS rejects it. See FAQ & Troubleshooting for that message.
Orb Agent can also resolve secrets from an external secret store, including HashiCorp Vault, configured under a separate orb.secrets_manager section of the agent config. Those references use a different form (${vault://...}) - see the Orb Agent documentation for setup.
AWS_SESSION_TOKEN is only valid alongside AWS_ACCESS_KEY_ID and AWS_SECRET_ACCESS_KEY, and only applies to temporary credentials. Temporary credentials expire, which breaks a scheduled sync partway through, so use them for ad hoc testing only. For production, use a durable IAM user key or AWS_ROLE_ARN.
The AWS region is supplied through AWS_VPC_IPAM_REGION in the policy config, not through the AWS_DEFAULT_REGION credential chain variable.
Credential Rotation
- An instance or task role rotates automatically. There is nothing for you to do.
AWS_ROLE_ARNissues short-lived credentials on every run, and the role is re-assumed once per region. Revoking or editing the role takes effect on the next run.- A long-term IAM user key is the only option you rotate yourself. Create the replacement key, update the environment variable that the
${...}reference reads from, restart the agent, then deactivate and delete the old key in AWS. Because the policy references the secret rather than embedding it, rotation never means editing the policy file.
Nothing about the credential is stored in NetBox, so rotation needs no NetBox-side change.
NetBox Setup
Generate Diode Client Credentials
- Log into your NetBox instance
- Navigate to Diode → Client Credentials
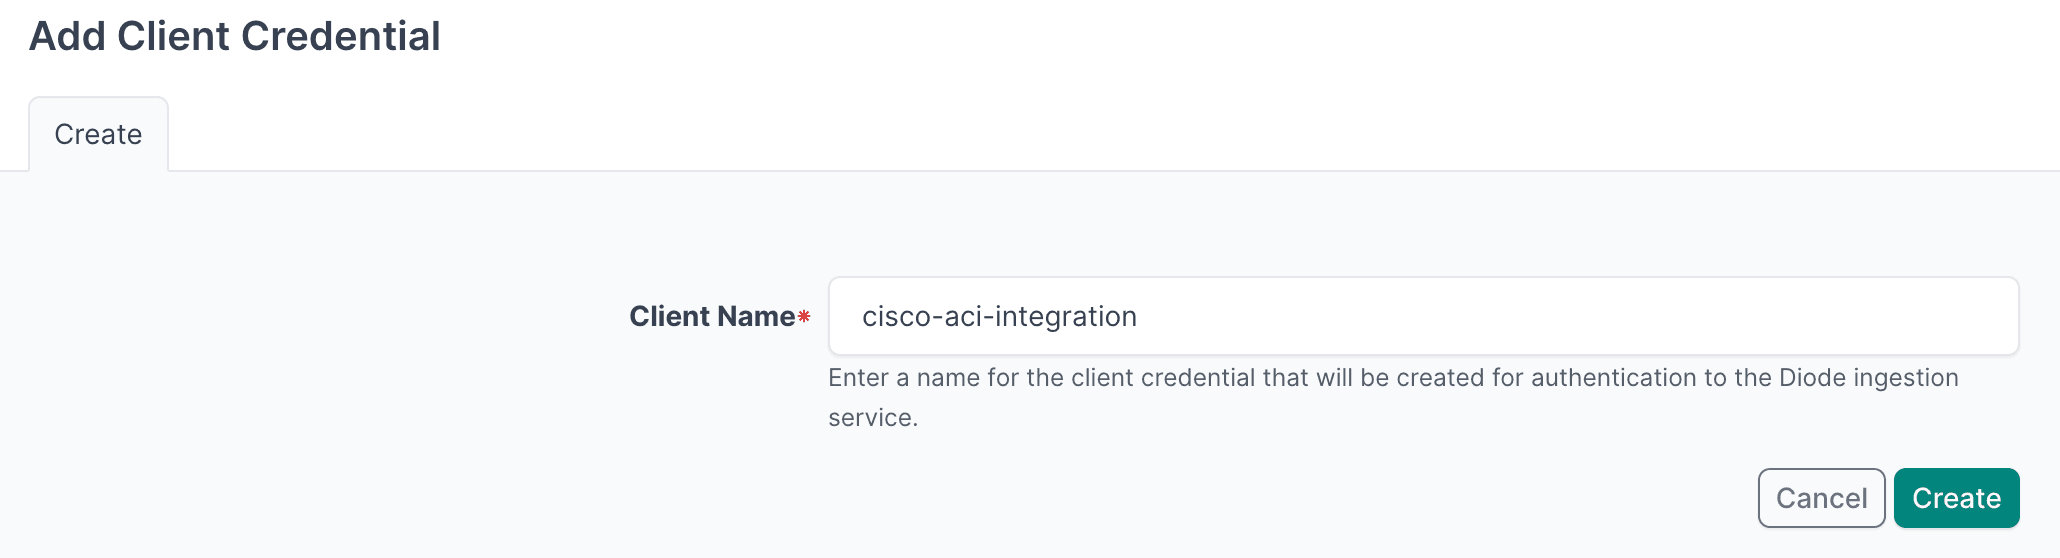
- Click + Add a Credential
- Enter a descriptive name (e.g., "AWS VPC IPAM Integration")
- Click Create
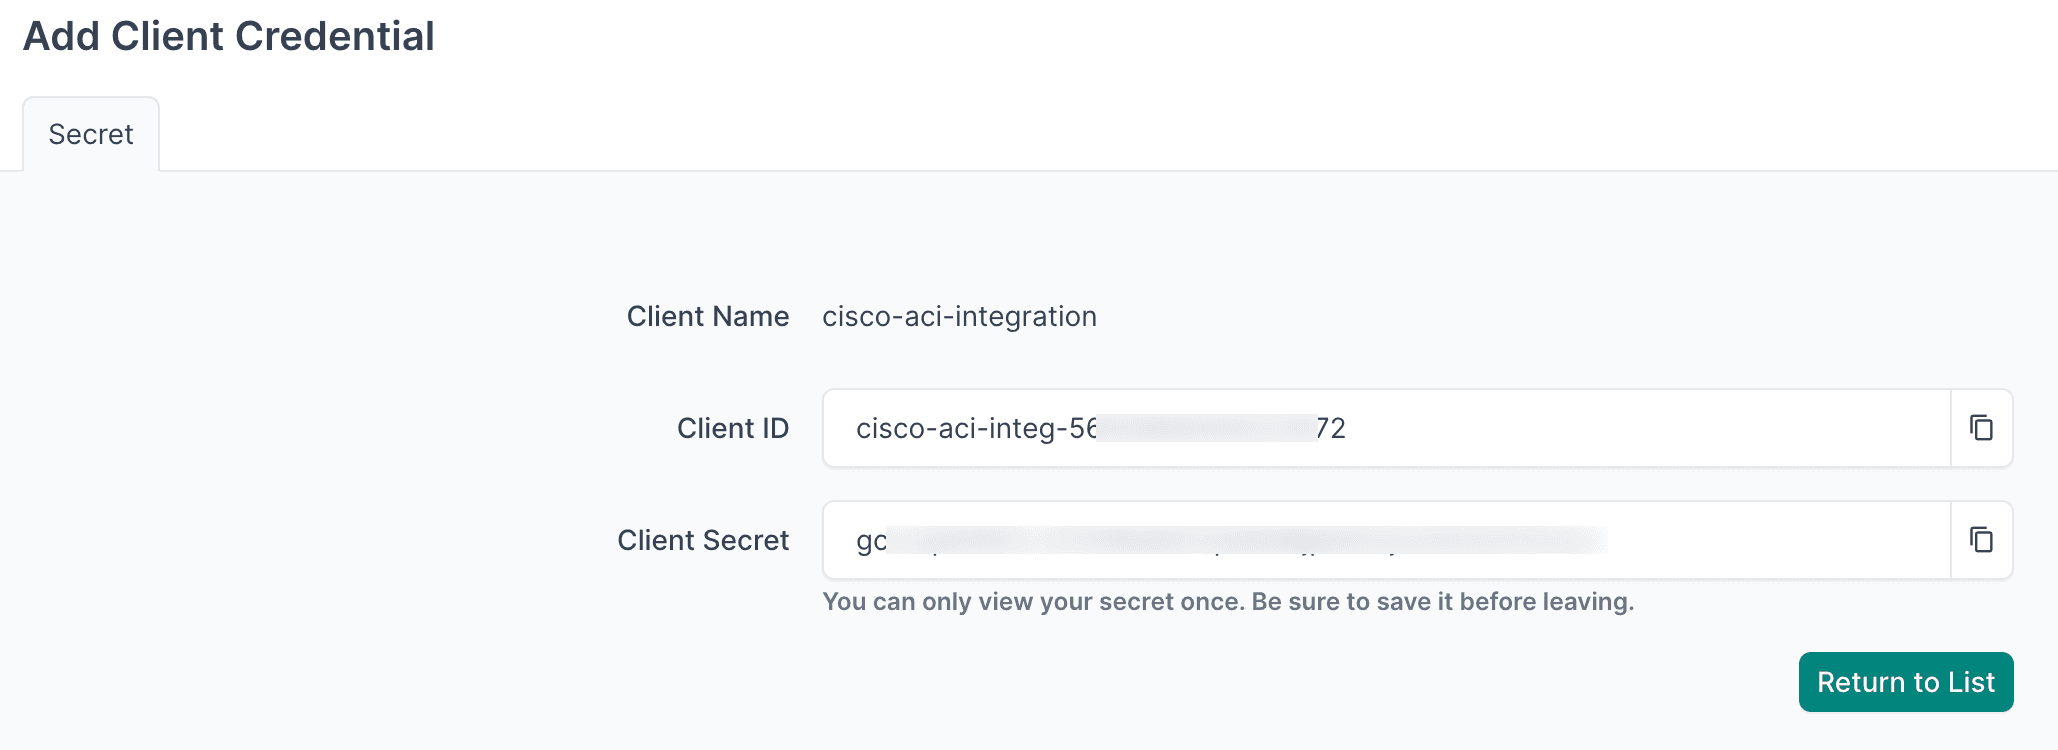
- Important: Copy and securely store the Client ID and Client Secret - you will need these in the agent configuration
- Navigate to Diode → Settings
- Copy the value of the Diode target - you will need this in the agent configuration

Agent Setup and Configuration
You can deploy multiple agents, each configured to sync data from a different AWS account or set of regions.
Step 1: Authenticate to the NetBox Labs Image Registry
From your host machine, authenticate to the NetBox Labs registry using the CUSTOMER-IDENTIFIER and Token provided by the NetBox Labs team:
docker login quay.io -u netboxlabs+<CUSTOMER-ID> -p <TOKEN>Example session
% docker login quay.io -u netboxlabs+org-abc123def456 -p <token>
Login Succeeded
Then pull the agent image:
docker pull quay.io/netboxlabs/orb-agent-pro:developStep 2: Configure the Agent
- Create the configuration file (you can name the file anything you like):
touch agent.yaml- Edit the configuration file with your preferred editor and add the following configuration. Important: Replace
grpcs://your-instance.netboxcloud.com/diodewith the value from Diode > Settings > Diode target in the NetBox UI:
orb:
  config_manager:
    active: local
  backends:
    worker:
    common:
      diode:
        target: grpcs://your-instance.netboxcloud.com/diode # Get this value from Diode > Settings > Diode target
        client_id: ${DIODE_CLIENT_ID}
        client_secret: ${DIODE_CLIENT_SECRET}
        agent_name: aws_vpc_ipam_01  # Use a meaningful name to identify this agent
  policies:
    worker:
      aws_vpc_ipam_worker:
        config:
          package: nbl_aws_vpc_ipam
          schedule: "0 2 * * *" # Daily at 2:00 AM. Set your desired schedule (see examples below)
          AWS_VPC_IPAM_REGION: us-east-1        # Required: single region, comma-separated list, or YAML list
          AWS_ACCESS_KEY_ID: ${AWS_ACCESS_KEY_ID}          # Omit both key lines to use an attached instance/task role
          AWS_SECRET_ACCESS_KEY: ${AWS_SECRET_ACCESS_KEY}  # Resolved from the agent environment, never written in plain text
          # AWS_VPC_IPAM_SCOPE_TYPE: private    # Optional: private (default), public, or all
          # AWS_VPC_IPAM_SCOPE_IDS:             # Optional: only ingest these scope IDs
          #   - ipam-scope-0abc123
          # AWS_VPC_IPAM_RESOURCE_TYPES:        # Optional: only ingest these resource-CIDR types
          #   - vpc
          #   - subnet
          # AWS_ROLE_ARN: arn:aws:iam::222222222222:role/netbox-ipam-reader  # Optional: cross-account role
          # AWS_ROLE_SESSION_NAME: netbox-prod-ipam                          # Optional: assumed-role session name
        scope:            # Required - leave empty (AWS VPC IPAM filtering is done via the config keys above)
Schedule Examples
The schedule field uses cron syntax. Here are some common examples:
"0 */6 * * *"- Every 6 hours (e.g., 00:00, 06:00, 12:00, 18:00)"0 2 * * *"- Daily at 2:00 AM"0 9 * * 1"- Weekly on Monday at 9:00 AM
No bootstrap step required
Unlike some integrations, the AWS VPC IPAM integration does not create custom fields or other static content, so there is no bootstrap mode. You can run it directly with your normal configuration.
Ingestion Filters
Three optional config keys narrow what gets synced into NetBox. All are unset by default, which means everything is ingested (subject to the scope type default of private).
AWS_VPC_IPAM_SCOPE_TYPE- one ofprivate(default),public, orall. Filters IPAM scopes by type. Most customers only want private scopes in NetBox.AWS_VPC_IPAM_SCOPE_IDS- a comma-separated string or YAML list of IPAM scope IDs. When set, only those scopes are ingested. Applied on top ofAWS_VPC_IPAM_SCOPE_TYPE. Useful for keeping legacy or test scopes out of NetBox.AWS_VPC_IPAM_RESOURCE_TYPES- a comma-separated string or YAML list matched case-insensitively against each resource CIDR'sResourceType(vpc,subnet,eip,eni,public-ipv4-pool,ipv6-pool,anycast-ip-list). Large fleets can drop per-address noise (eip,eni) while keepingvpcandsubnetprefixes.
Example: only private scopes, only VPC and subnet CIDRs
config:
  AWS_VPC_IPAM_SCOPE_TYPE: private
  AWS_VPC_IPAM_RESOURCE_TYPES:
    - vpc
    - subnet
Multi-Region and Cross-Account
To sync more than one region in a single policy, pass a comma-separated list or a YAML list to AWS_VPC_IPAM_REGION. Each region is processed independently. A per-region AWS failure (throttling, IAM denial, or IPAM not enabled) is logged and skipped, and the run continues with the remaining regions. Missing or incomplete credentials abort the whole run, since they apply globally.
config:
  AWS_VPC_IPAM_REGION:
    - us-east-1
    - eu-west-1
    - ap-south-1
To read IPAM data from another AWS account you own (for example a hub-and-spoke setup where IPAM is centralized), set AWS_ROLE_ARN. Before querying IPAM the integration assumes that role via sts:AssumeRole using your source credentials. The role is re-assumed once per region, so credentials stay fresh on a long multi-region run. Optionally set AWS_ROLE_SESSION_NAME; it defaults to netbox-orb-agent-aws-vpc-ipam and surfaces in the target account's CloudTrail.
Both accounts are yours, and both sides of the trust relationship are yours to configure, so no External ID is involved. A failure to assume the role aborts the whole run rather than skipping a region, because the role and its trust policy apply to every region equally.
config:
  AWS_VPC_IPAM_REGION: us-east-1
  AWS_ROLE_ARN: arn:aws:iam::222222222222:role/netbox-ipam-reader
  AWS_ROLE_SESSION_NAME: netbox-prod-ipam
Optional - Dry Run Mode
The agent can be run in Dry Run mode, which writes discovered data to a JSON file instead of sending it to NetBox. This is useful for troubleshooting or reviewing what the integration will ingest before committing to your NetBox instance.
Enable dry run in the diode section of your agent configuration file:
      diode:
        dry_run: true
        dry_run_output_dir: /opt/orb/ # saves the output file to this directory
Step 3: Run the Agent
Run the agent to synchronize data from AWS VPC IPAM into NetBox.
Method 1: Set Environment Variables Manually
- Export Diode credentials as environment variables:
export DIODE_CLIENT_ID="your-client-id"
export DIODE_CLIENT_SECRET="your-client-secret"- Export AWS credentials as environment variables. These are the values that the
${...}references in your policy config resolve to. Skip this step if the agent uses an attached instance or task role:
export AWS_ACCESS_KEY_ID="your-access-key-id"
export AWS_SECRET_ACCESS_KEY="your-secret-access-key"- Run the agent with the following command:
docker run \
  -v $PWD:/opt/orb/ \
  -e DIODE_CLIENT_SECRET \
  -e DIODE_CLIENT_ID \
  -e AWS_ACCESS_KEY_ID \
  -e AWS_SECRET_ACCESS_KEY \
  quay.io/netboxlabs/orb-agent-pro:develop \
  run -c /opt/orb/agent.yaml
Method 2: Use a .env File (Recommended)
- Create a
.envfile in your current directory:
touch .env- Edit the
.envfile with your preferred editor and add the following content:
## NetBox Diode credentials (from NetBox Setup)
DIODE_CLIENT_ID=your-client-id
DIODE_CLIENT_SECRET=your-client-secret

## AWS credentials
AWS_ACCESS_KEY_ID=your-access-key-id
AWS_SECRET_ACCESS_KEY=your-secret-access-key
Important
Replace the placeholder values with your actual credentials:
your-client-idandyour-client-secretfrom the NetBox Diode setupyour-access-key-idandyour-secret-access-keywith the AWS credentials that have the IAM permissions listed above
- Run the agent with the following command:
docker run \
  -v $PWD:/opt/orb/ \
  --env-file .env \
  quay.io/netboxlabs/orb-agent-pro:develop \
  run -c /opt/orb/agent.yaml
Security Best Practice
Add .env to your .gitignore file to prevent accidentally committing credentials to version control:
echo ".env" >> .gitignoreExpected Output
After starting the agent, depending on the schedule you defined, you should see output similar to the following:
{"time":"2026-07-20T02:00:01.123456789Z","level":"INFO","msg":"worker stderr","log":"INFO:nbl_aws_vpc_ipam.aws_vpc_ipam_diode:Found 1 IPAM(s) in region us-east-1"}
{"time":"2026-07-20T02:00:02.234567890Z","level":"INFO","msg":"worker stderr","log":"INFO:nbl_aws_vpc_ipam.aws_vpc_ipam_diode:Region us-east-1 summary: 4 VRFs, 27 Prefixes, 2 IPs to ingest."}
{"time":"2026-07-20T02:00:02.345678901Z","level":"INFO","msg":"worker stderr","log":"INFO:nbl_aws_vpc_ipam.aws_vpc_ipam_diode:AWS VPC IPAM sync complete: 1/1 regions succeeded, 33 entities emitted."}
{"time":"2026-07-20T02:00:03.456789012Z","level":"INFO","msg":"worker stderr","log":"INFO:worker.policy.runner:Policy aws_vpc_ipam_worker: Successfully ingested 33 entities in 1 chunks"}
{"time":"2026-07-20T02:00:03.567890123Z","level":"INFO","msg":"worker stderr","log":"INFO:apscheduler.executors.default:Job \"PolicyRunner.run (trigger: cron[month='*', day='*', day_of_week='*', hour='2', minute='0'], next run at: 2026-07-21 02:00:00 UTC)\" executed successfully"}
Monitoring and Testing
Success Indicators: Look for Successfully ingested in the output, which confirms data was sent to your NetBox instance via Diode.
Testing Mode: For testing purposes, run the agent once and then stop it by pressing Ctrl+C. This is useful for verifying configuration before setting up continuous operation.
Continuous Operation: The agent will continue running according to your schedule until manually stopped or the container is terminated.
View and Apply Discovered Data in NetBox Assurance
Once the agent has run, AWS VPC IPAM data is staged as deviations in the NetBox Assurance UI.
NetBox Assurance gives you control over operational drift by identifying deviations between your operational state and NetBox, and analytics to understand drift, plan for remediation, and ultimately take action.
Understanding Deviations
Deviations are the delta between the data already in NetBox as the Network Source of Truth, versus the actual operational state as discovered by the integration.
From an initial run, all discovered data may appear as deviations since it did not previously exist in NetBox. Once the initial sync is applied, subsequent runs will surface only new or changed data.
Accessing NetBox Assurance
- Navigate to your NetBox instance
- Click on Assurance in the main navigation menu
Explore Deviation Types
- Click on Deviation Types to view the types of deviations discovered
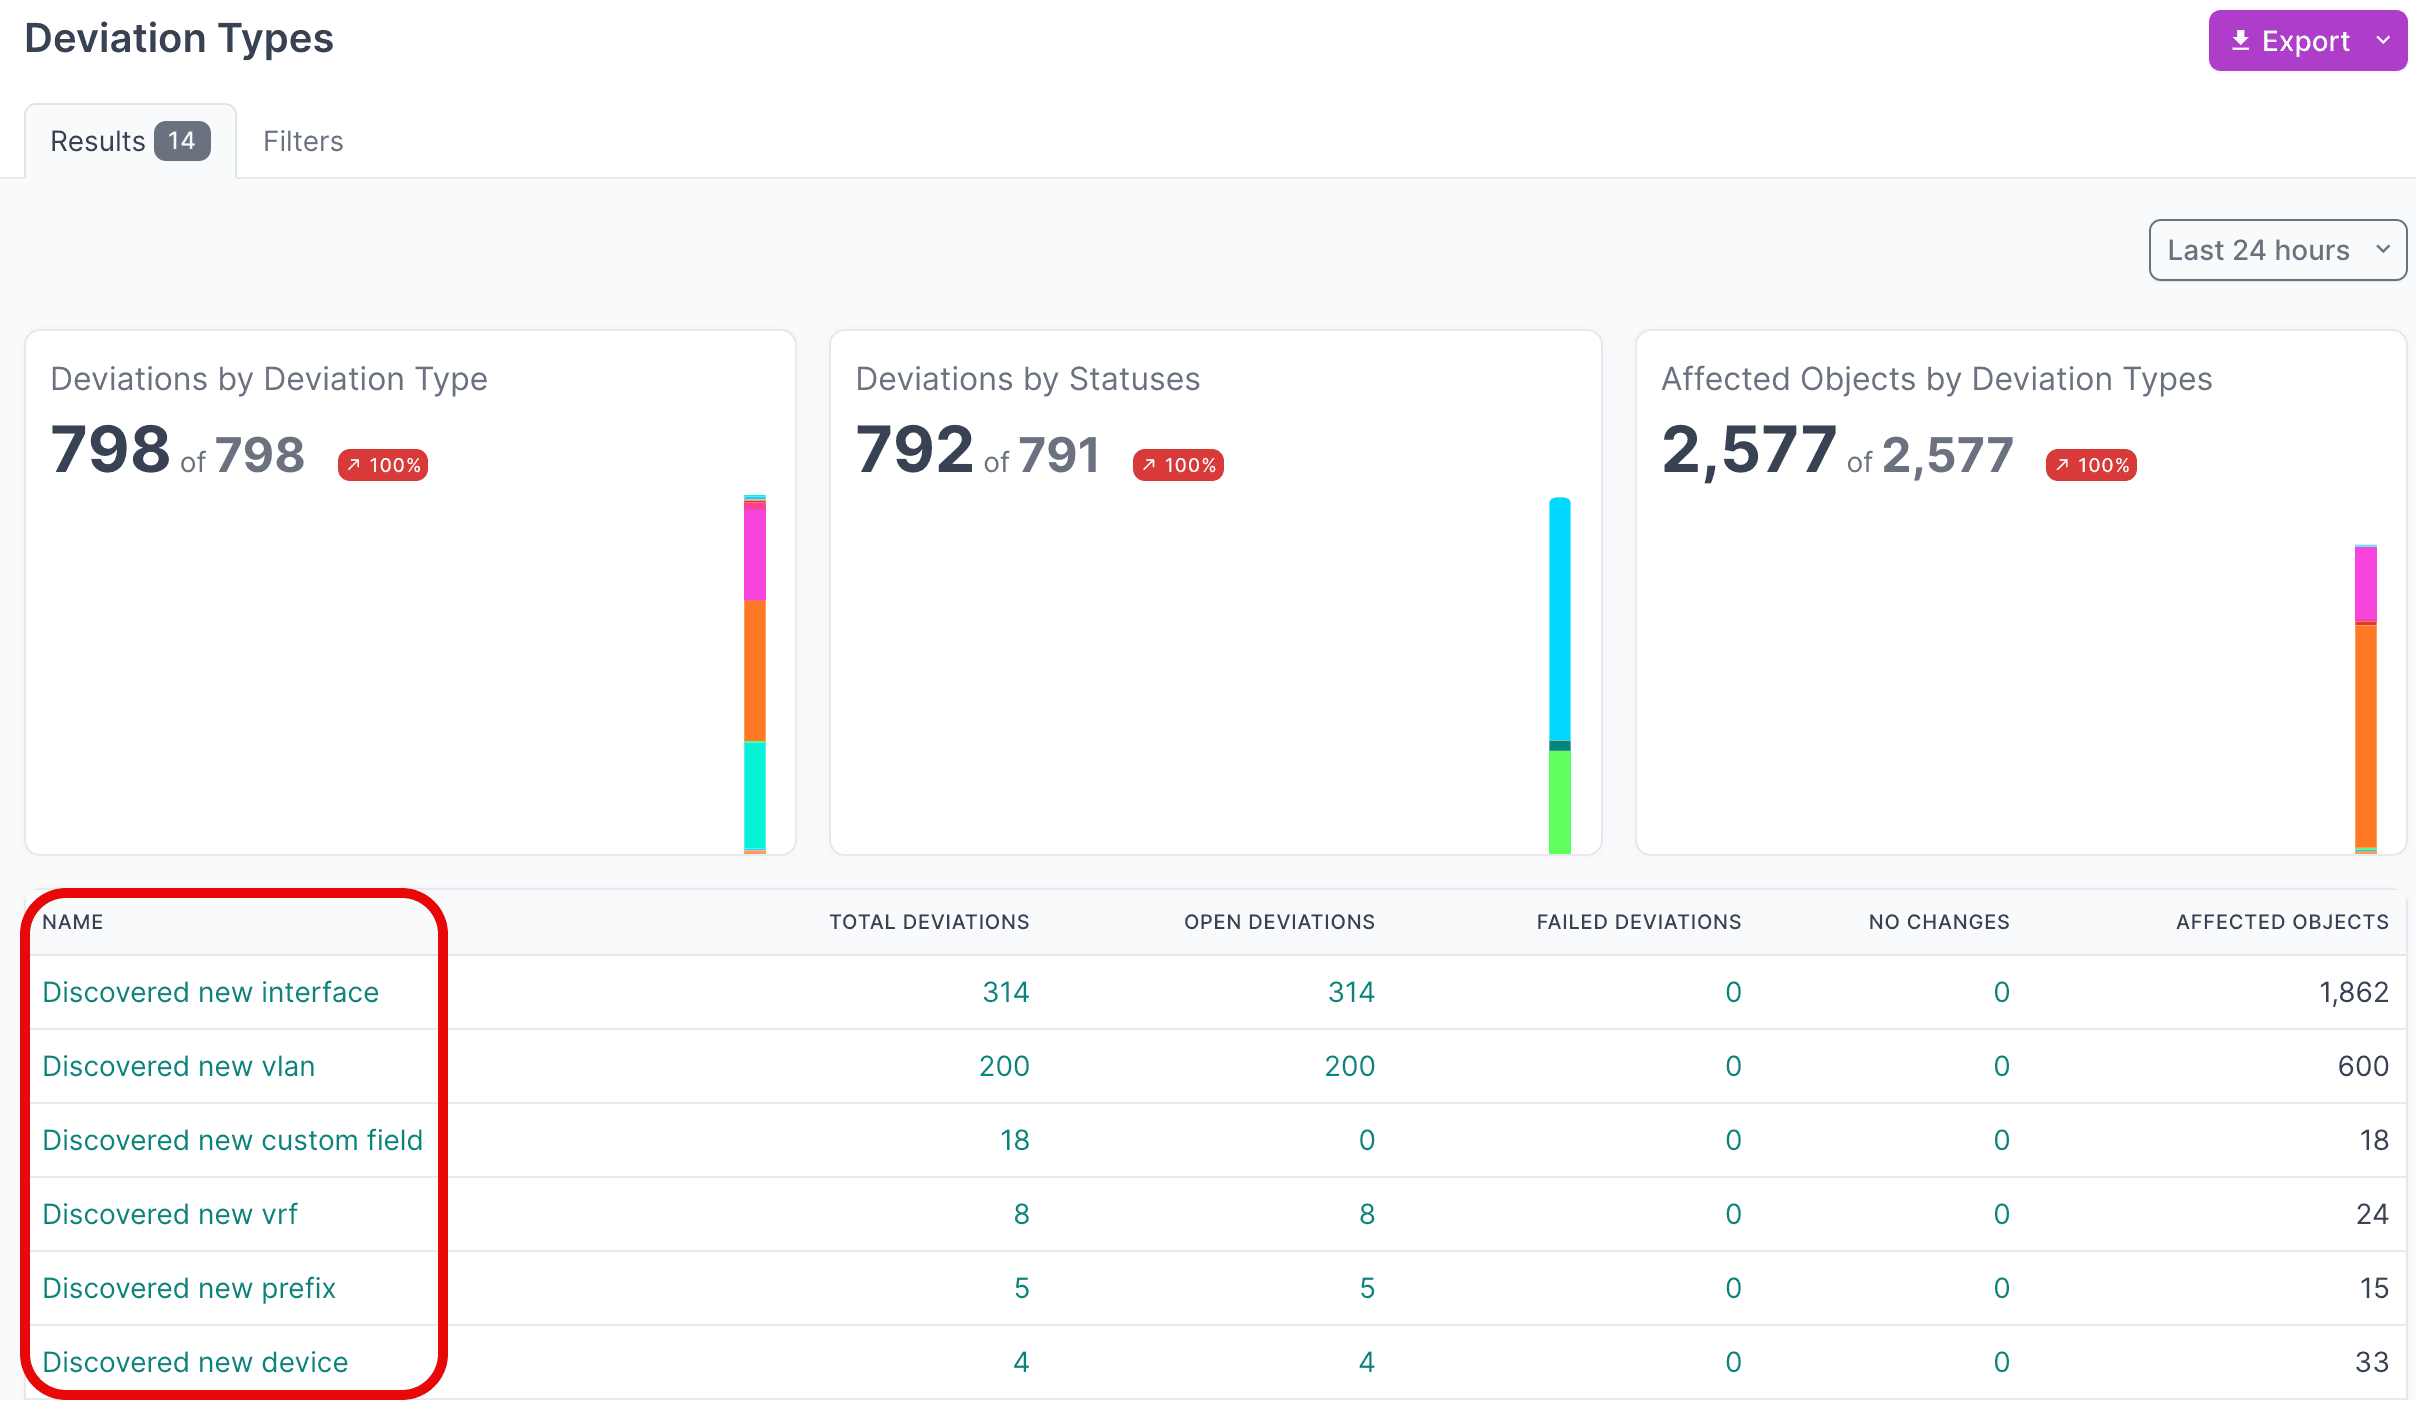
- Click on the Name of a deviation type to view its deviations
- Click on the Name of an individual deviation to view the details
View Active Deviations
- Click on Active Deviations to view all deviations that have not yet been Applied or Ignored
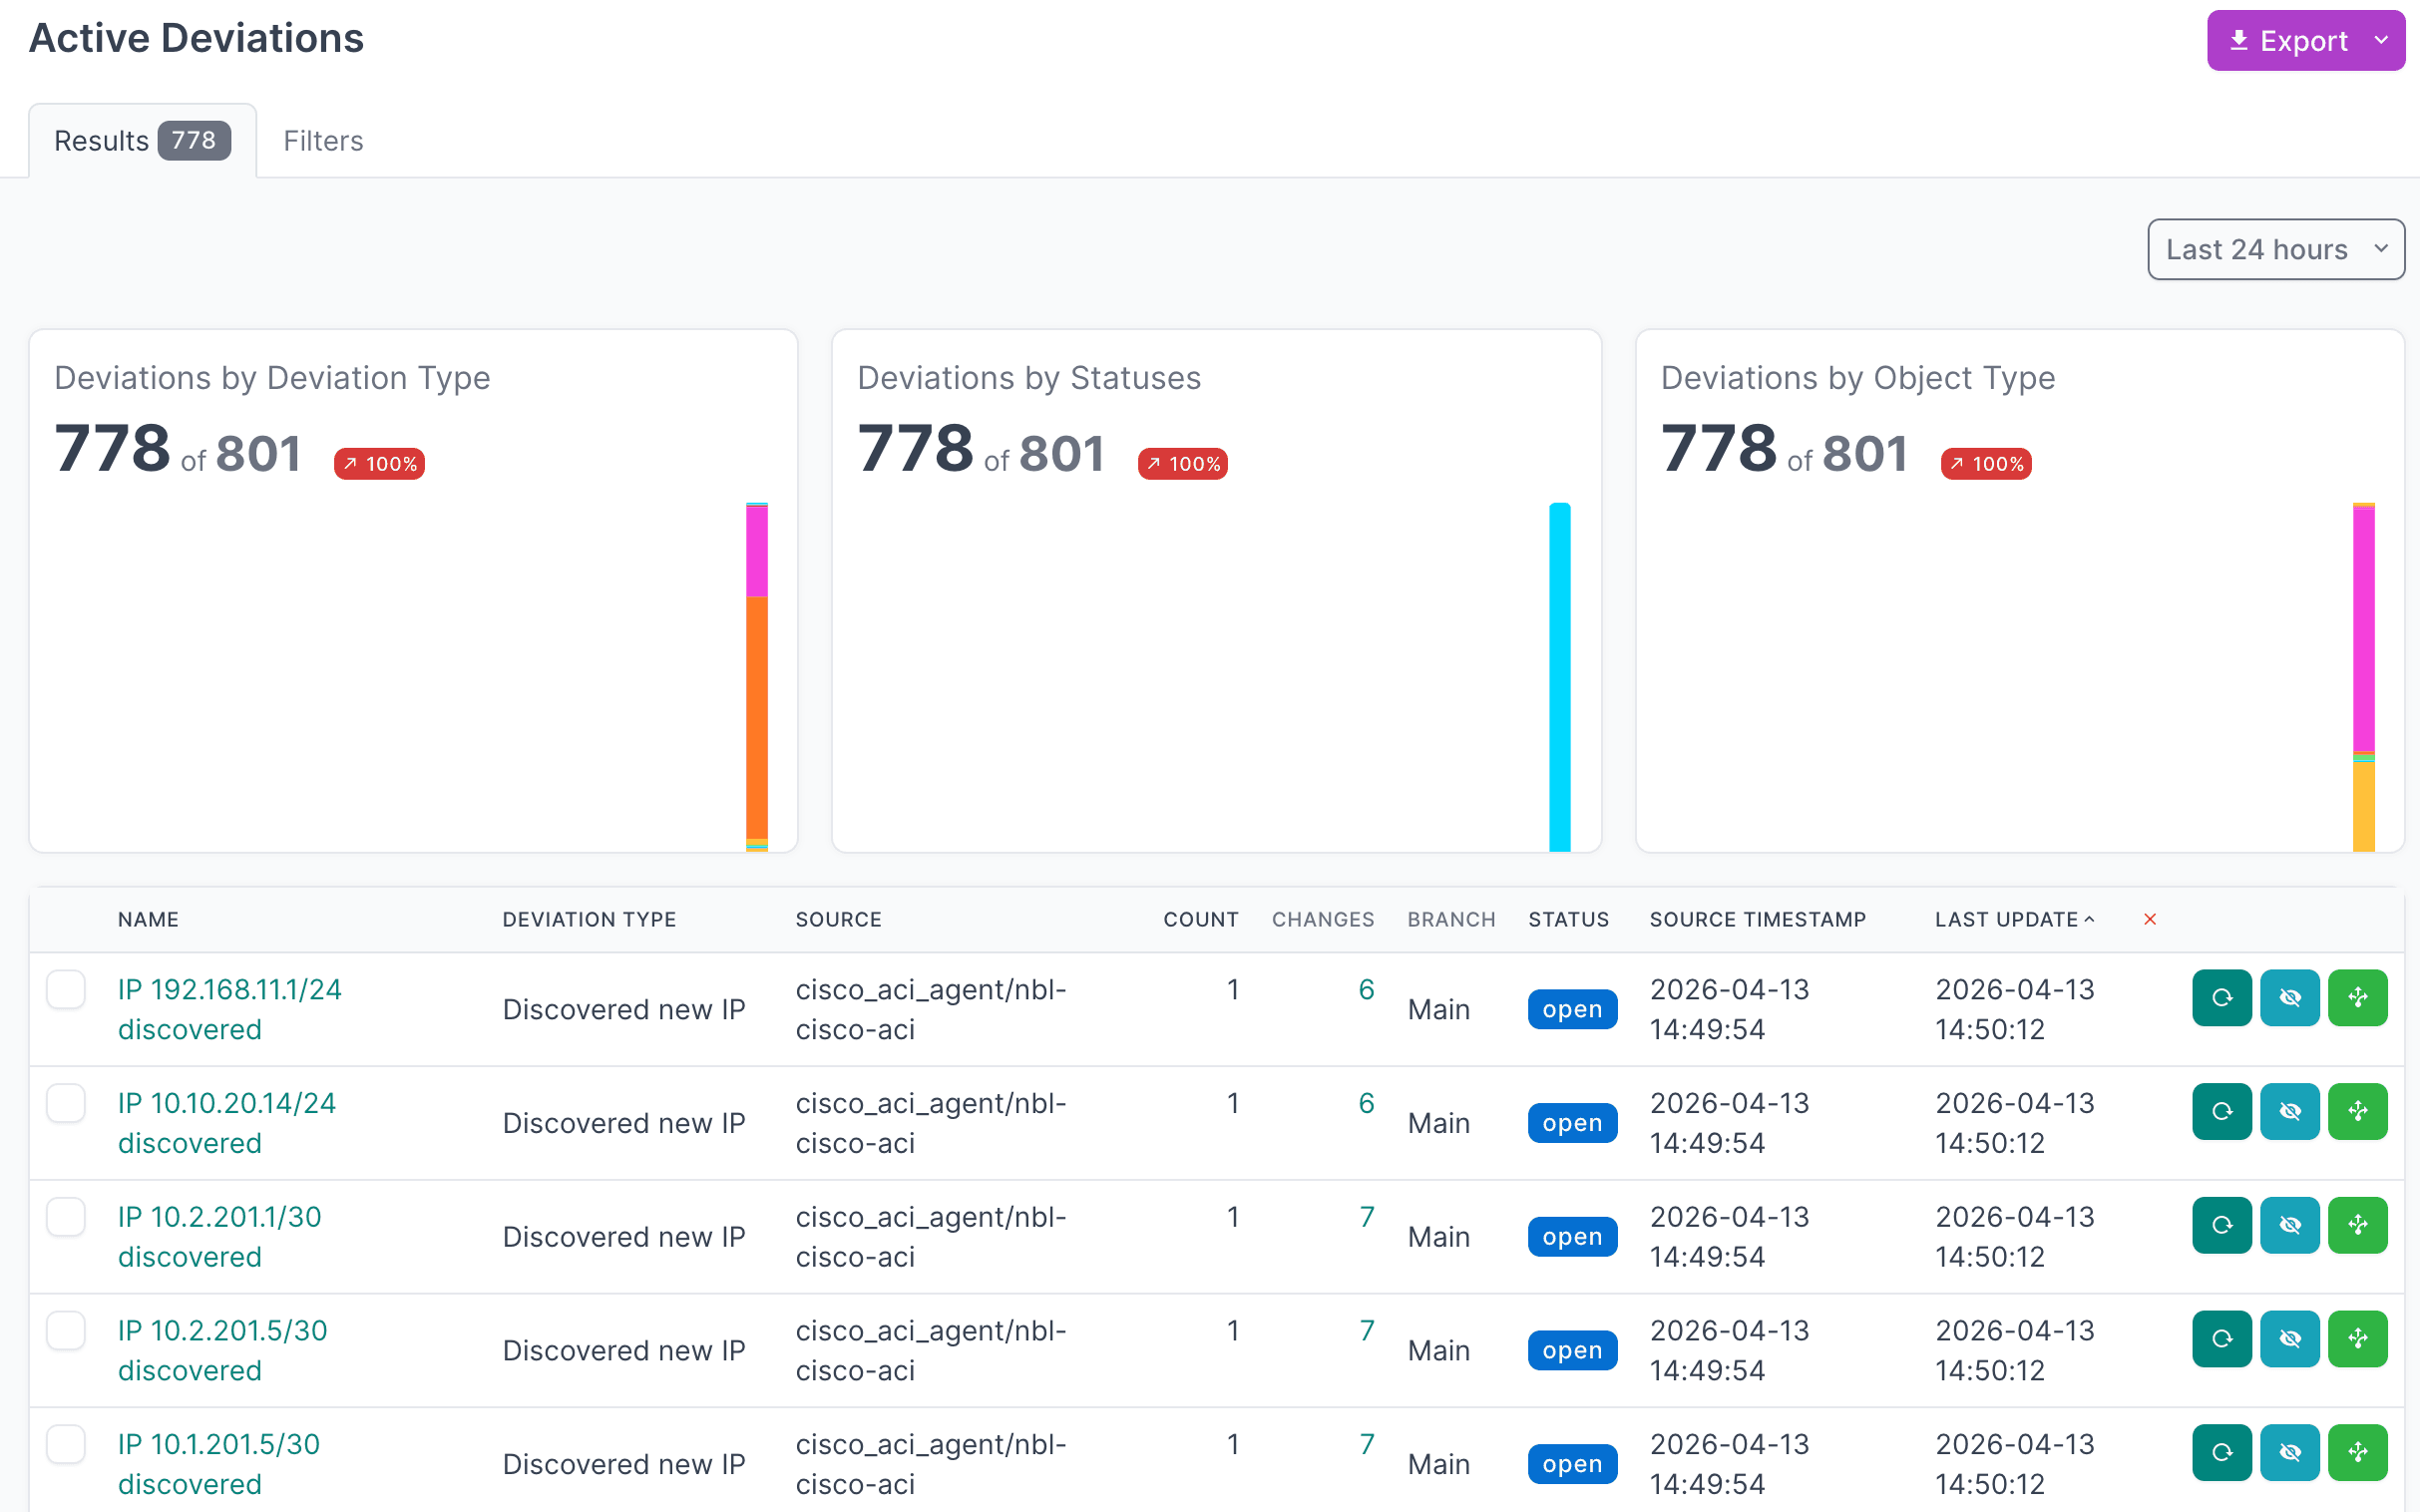
- Click on the Name of a deviation to view the details
Apply Deviations
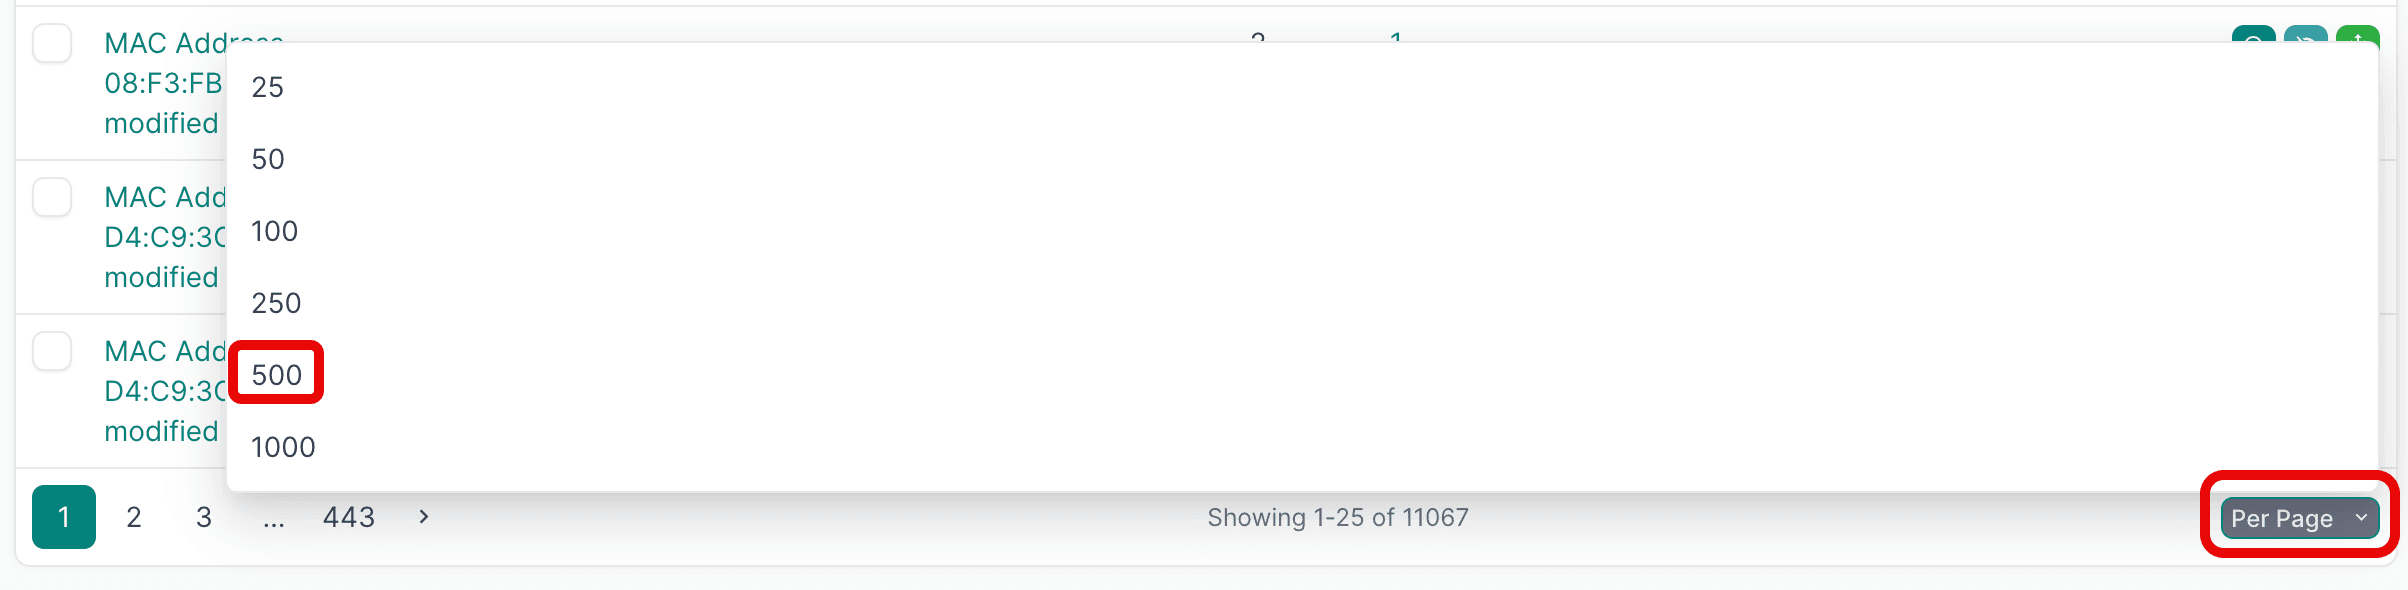
- Select all the deviations you want to apply. If you are working with a large number of deviations, first set the Per Page view to 500:
- Select the first deviation, hold
SHIFTand select the last one, then click Apply Selected: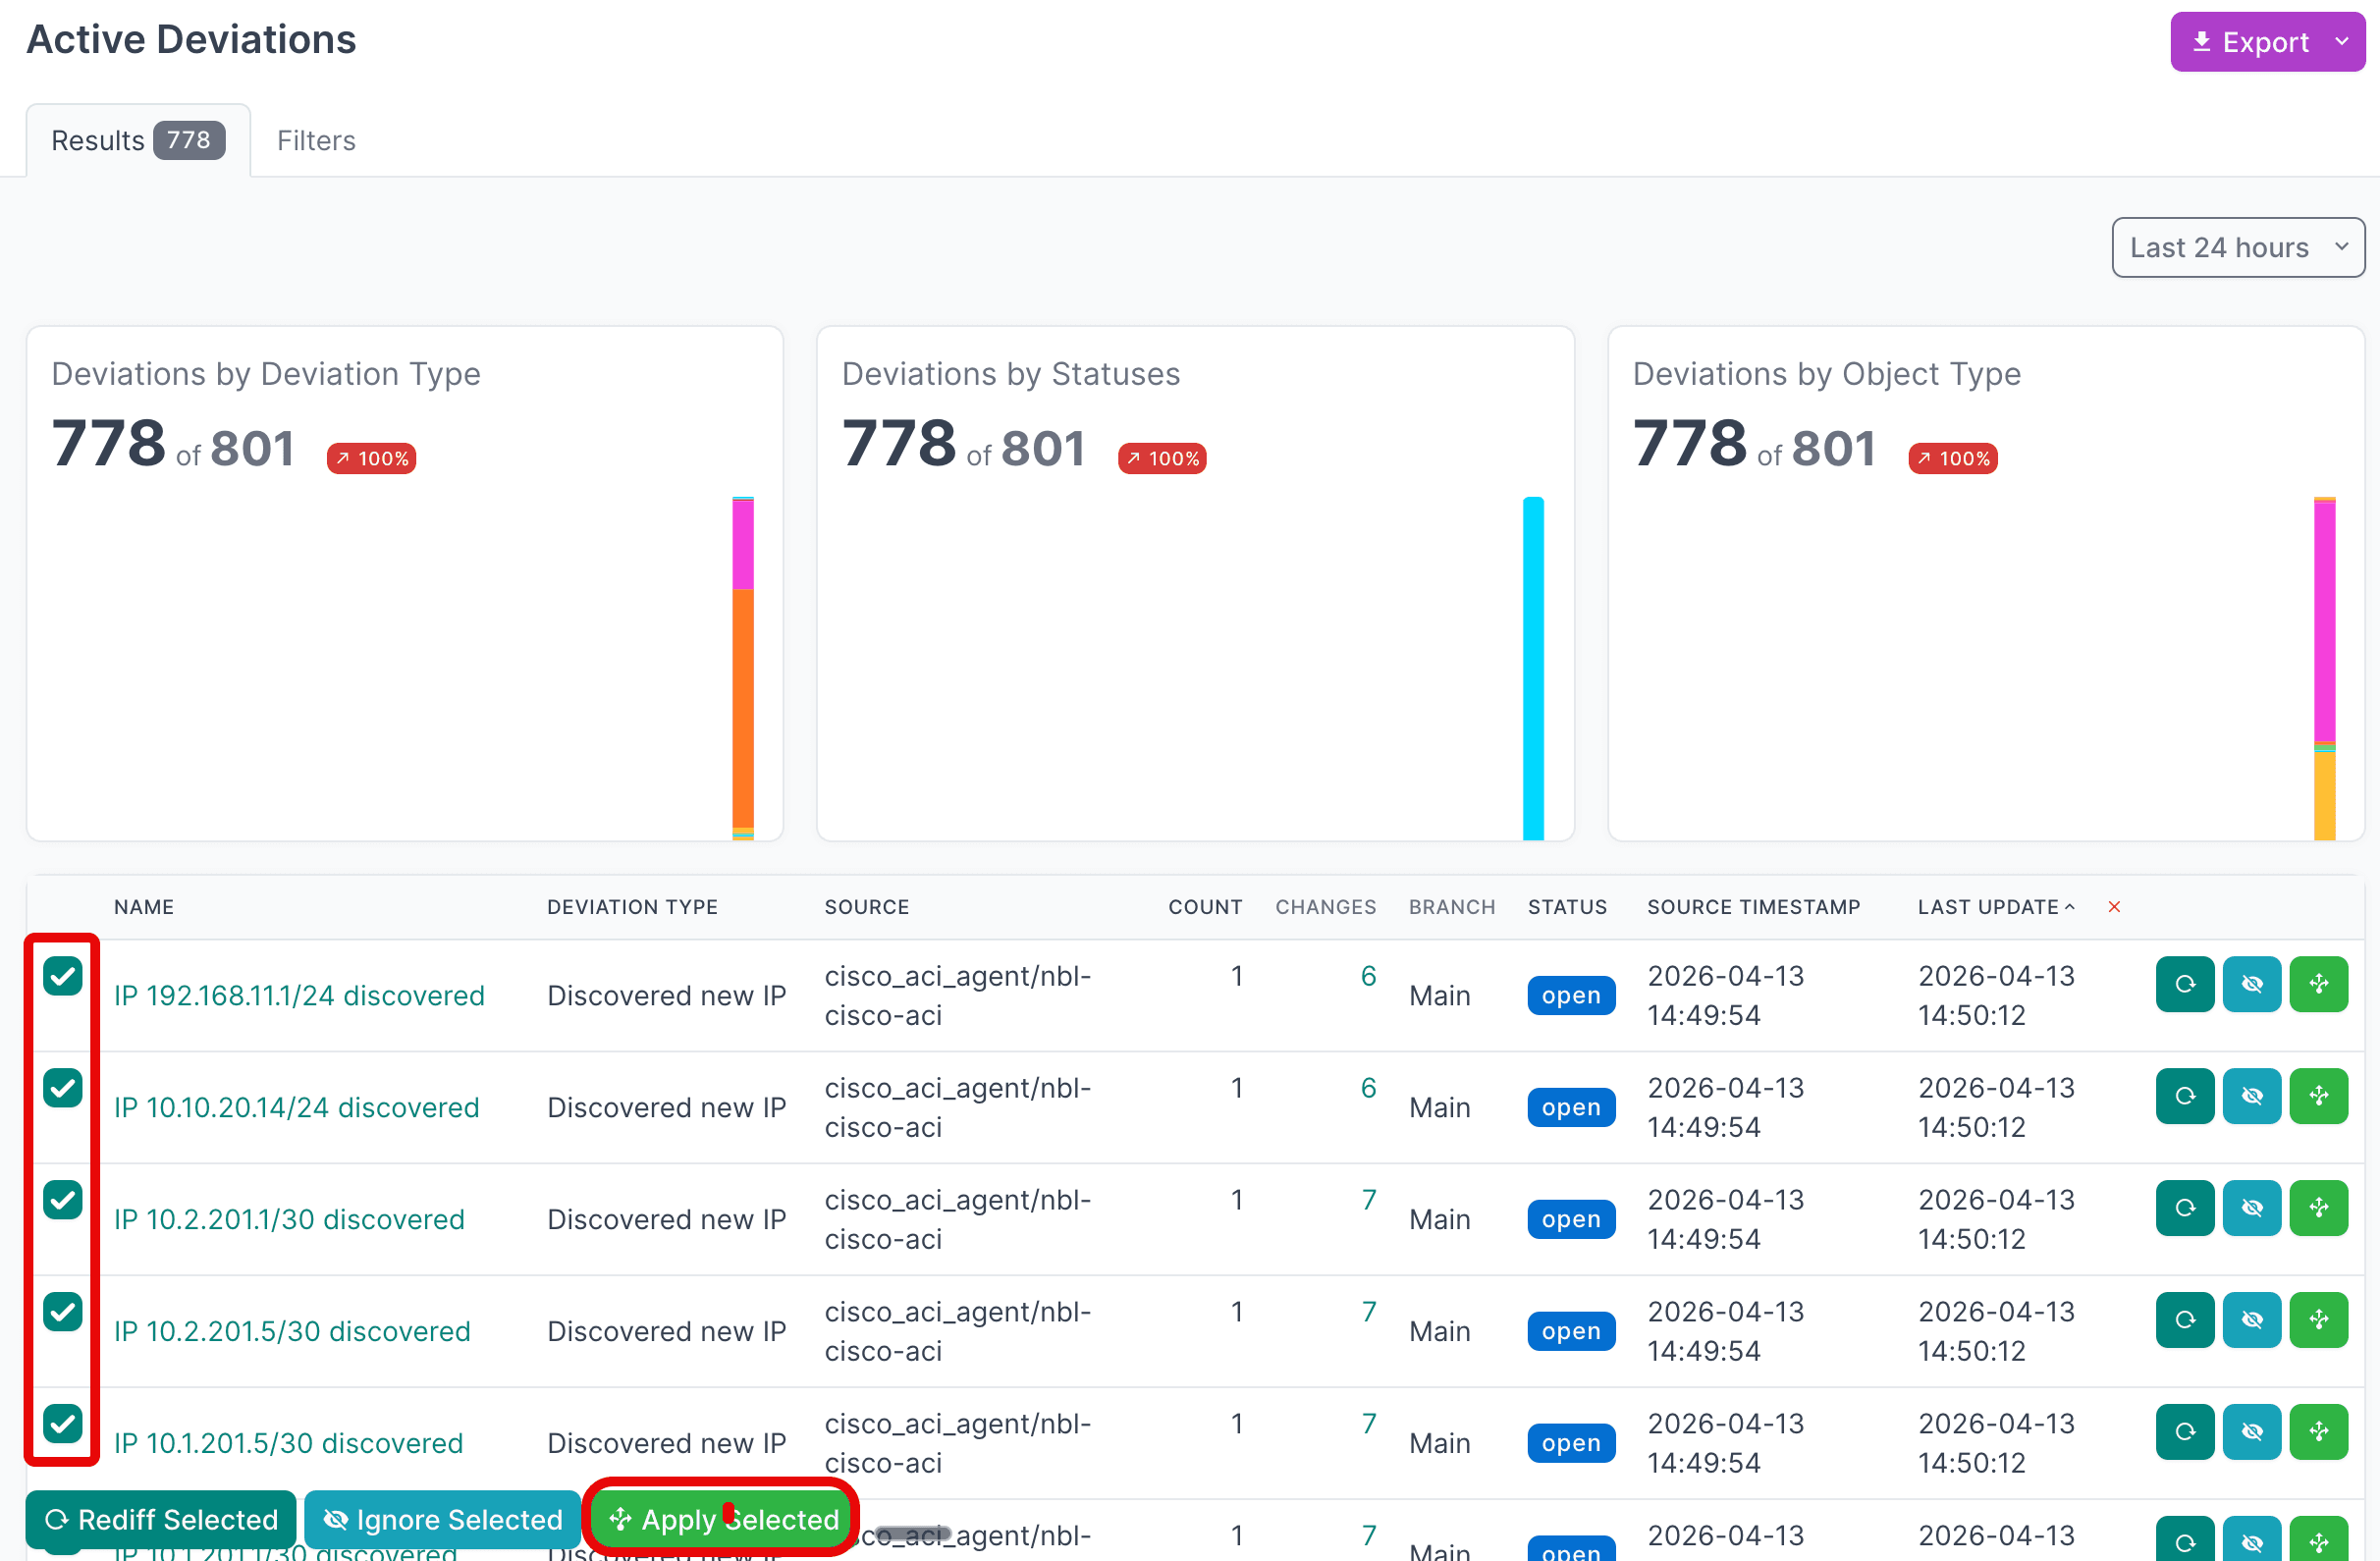
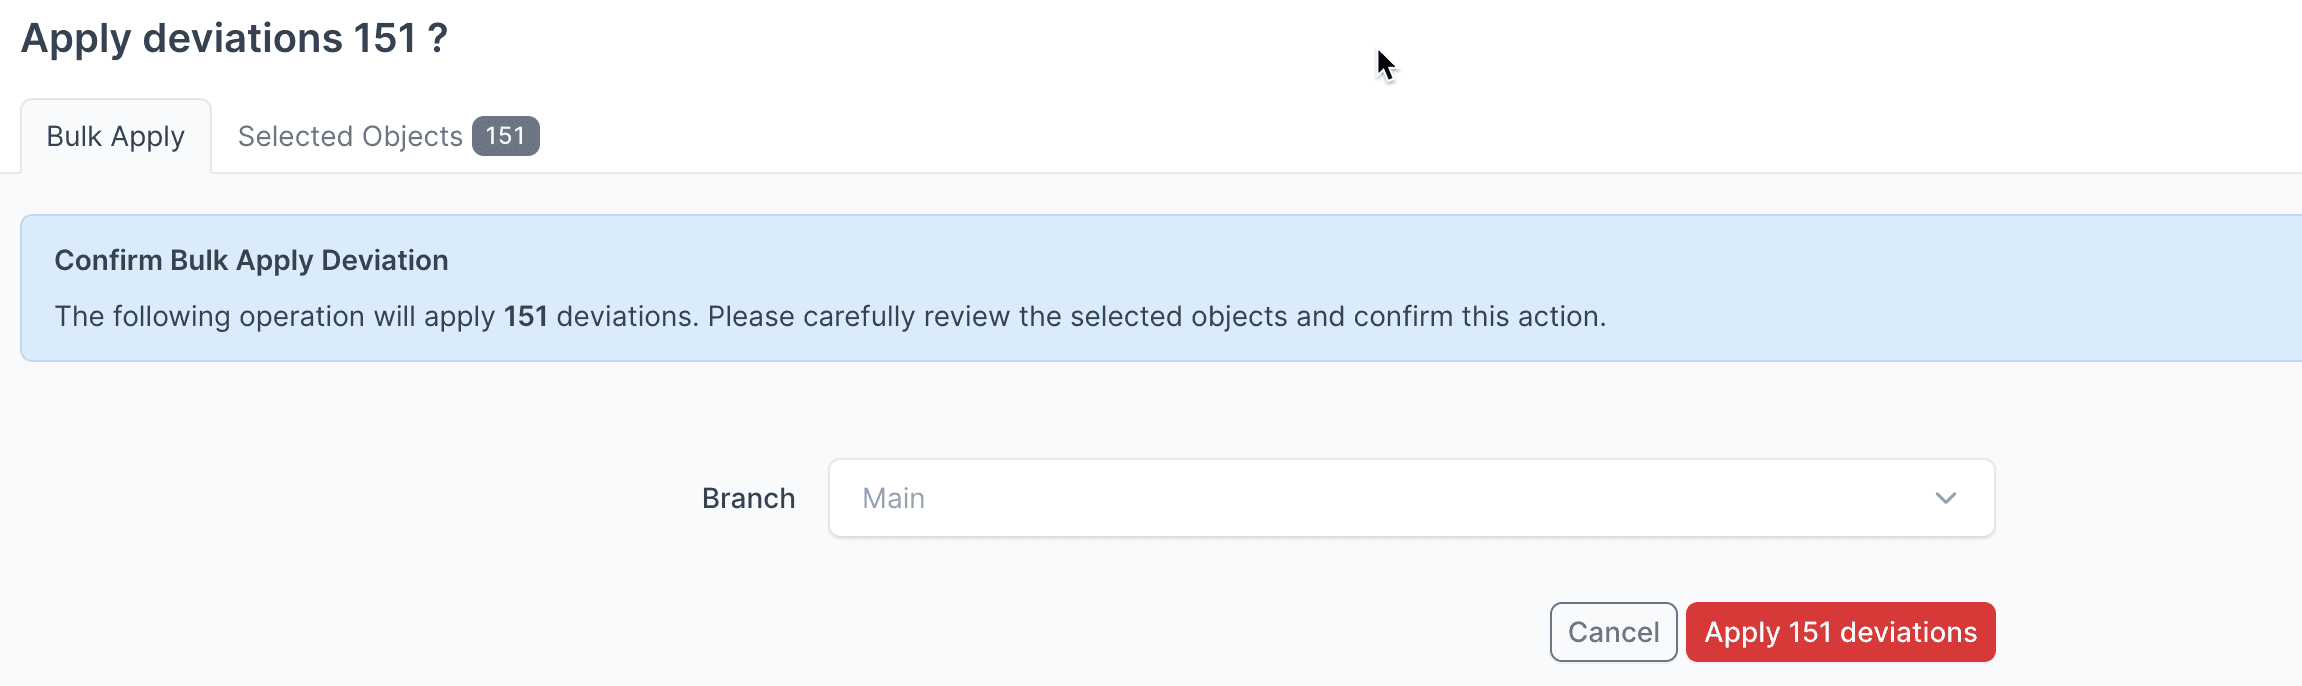
- Click Apply X Deviations to write the deviations to the NetBox database:
Apply Deviations to a Branch
Instead of writing to the Main NetBox database branch, you can select another branch from the drop-down and apply deviations there.
Assurance Docs
For more detailed information on working with NetBox Assurance, refer to the documentation.
View the AWS VPC IPAM Data in NetBox
After running the integration and applying the discovered data, you can view it in the NetBox UI.
- Navigate to IPAM → VRFs to view the VRFs created for each IPAM scope and VPC
- Navigate to IPAM → Prefixes to view the synchronized pool and resource CIDRs
- Navigate to IPAM → IP Addresses to view single-host addresses such as Elastic IPs
Filtering by Tag
Filter the IPAM lists by the aws-vpc-ipam tag to view all objects created by the integration, or by the aws:<region> tag (for example aws:us-east-1) to view objects from a specific region.
Additional Resources
Related Documentation
Support
Email support@netboxlabs.com for support.
AWS VPC IPAM Integration
Read the IP address space tracked by AWS VPC IPAM into NetBox. This integration is currently in public preview. Imports IPAM scopes, pools, and allocated CIDRs as VRFs, prefixes, and IP addresses.
Technical Information
AWS VPC IPAM to NetBox object and attribute mappings, configuration keys, authentication, tags, and behavior notes for the AWS VPC IPAM integration.