Getting Started
Public Preview
The Arista CloudVision integration is currently in public preview and is not yet generally available. Contact support@netboxlabs.com to join the preview.
This guide walks you through setting up the Arista CloudVision Integration for NetBox.
- Prerequisites
- Host Requirements
- NetBox Setup
- Agent Setup and Configuration
- Expected Output
- View and Apply Discovered Data in NetBox Assurance
- View the Arista CloudVision Data in NetBox
- Additional Resources
Prerequisites
Before you begin, ensure you have the following:
- NetBox Cloud or NetBox Enterprise with NetBox Assurance
- Orb Agent Pro credentials (required to download the integration agent image)
- Arista CloudVision access - a CloudVision Portal (CVP) on-premises instance or a CloudVision as a Service (CVaaS) tenant, with a service account token or a username and password that can read device inventory, device tags, and device running configurations (through the CloudVision compliance API). Without access to running configurations, only device-level data is synced
- Host system with Docker support
- Network connectivity between your host and both your NetBox instance and CloudVision
Host Requirements
System
- Operating System: Linux, macOS, or Windows with Docker support
- Memory: Minimum 2 GB RAM (4 GB recommended)
- Storage: 1 GB free disk space
- Docker: Version 20.10 or later
Network
- Outbound gRPC/gRPCS access to Diode on your NetBox instance (typically port 443 for gRPCS)
- Outbound gRPC access to your CloudVision system (port 443 for both CVP and CVaaS)
- DNS resolution for both NetBox and CloudVision hostnames
- Firewall rules configured to allow the above connections from your agent host
NetBox Setup
Generate Diode Client Credentials
- Log in to your NetBox instance.
- Navigate to Diode → Client Credentials.
- Click + Add a Credential.
- Enter a descriptive name (for example, "Arista CloudVision Integration").
- Click Create.
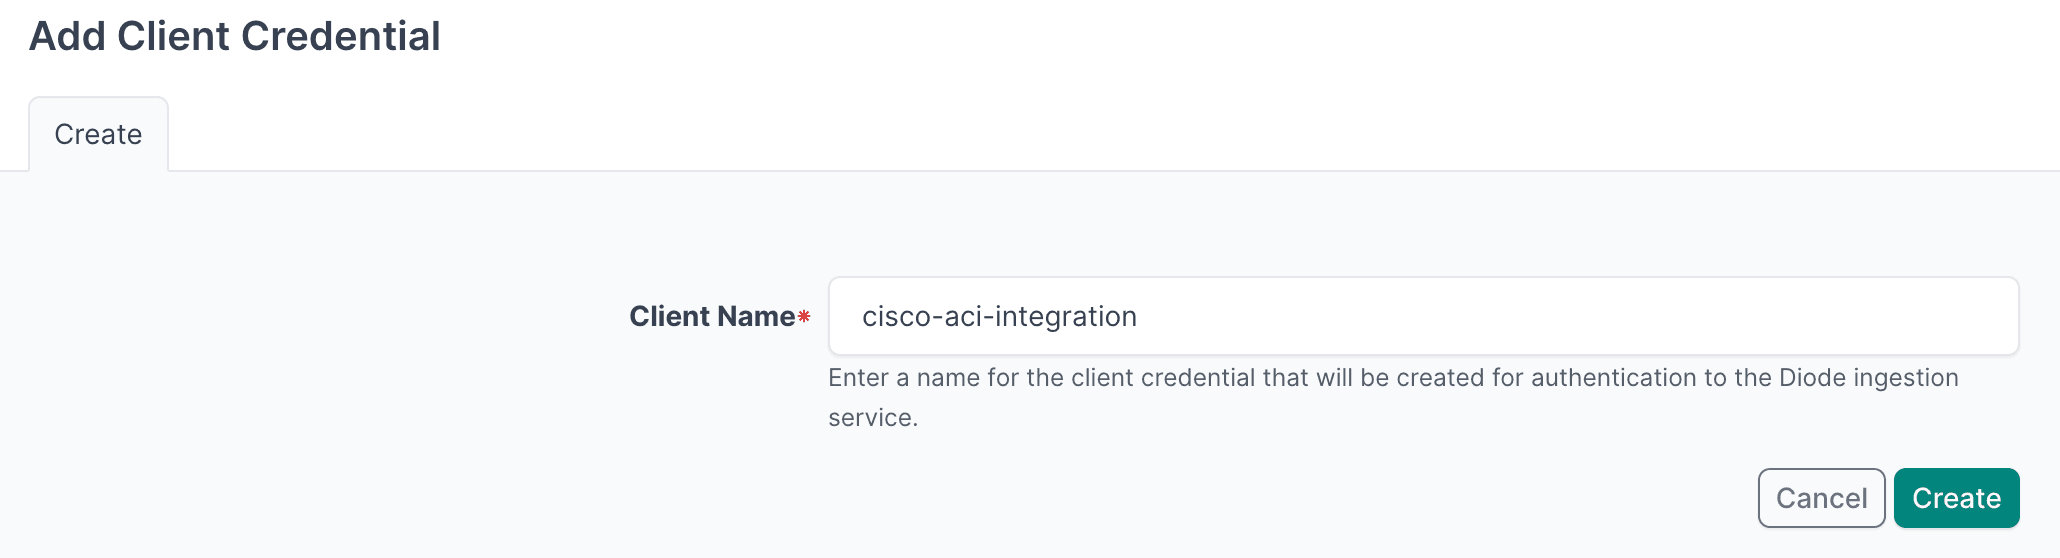
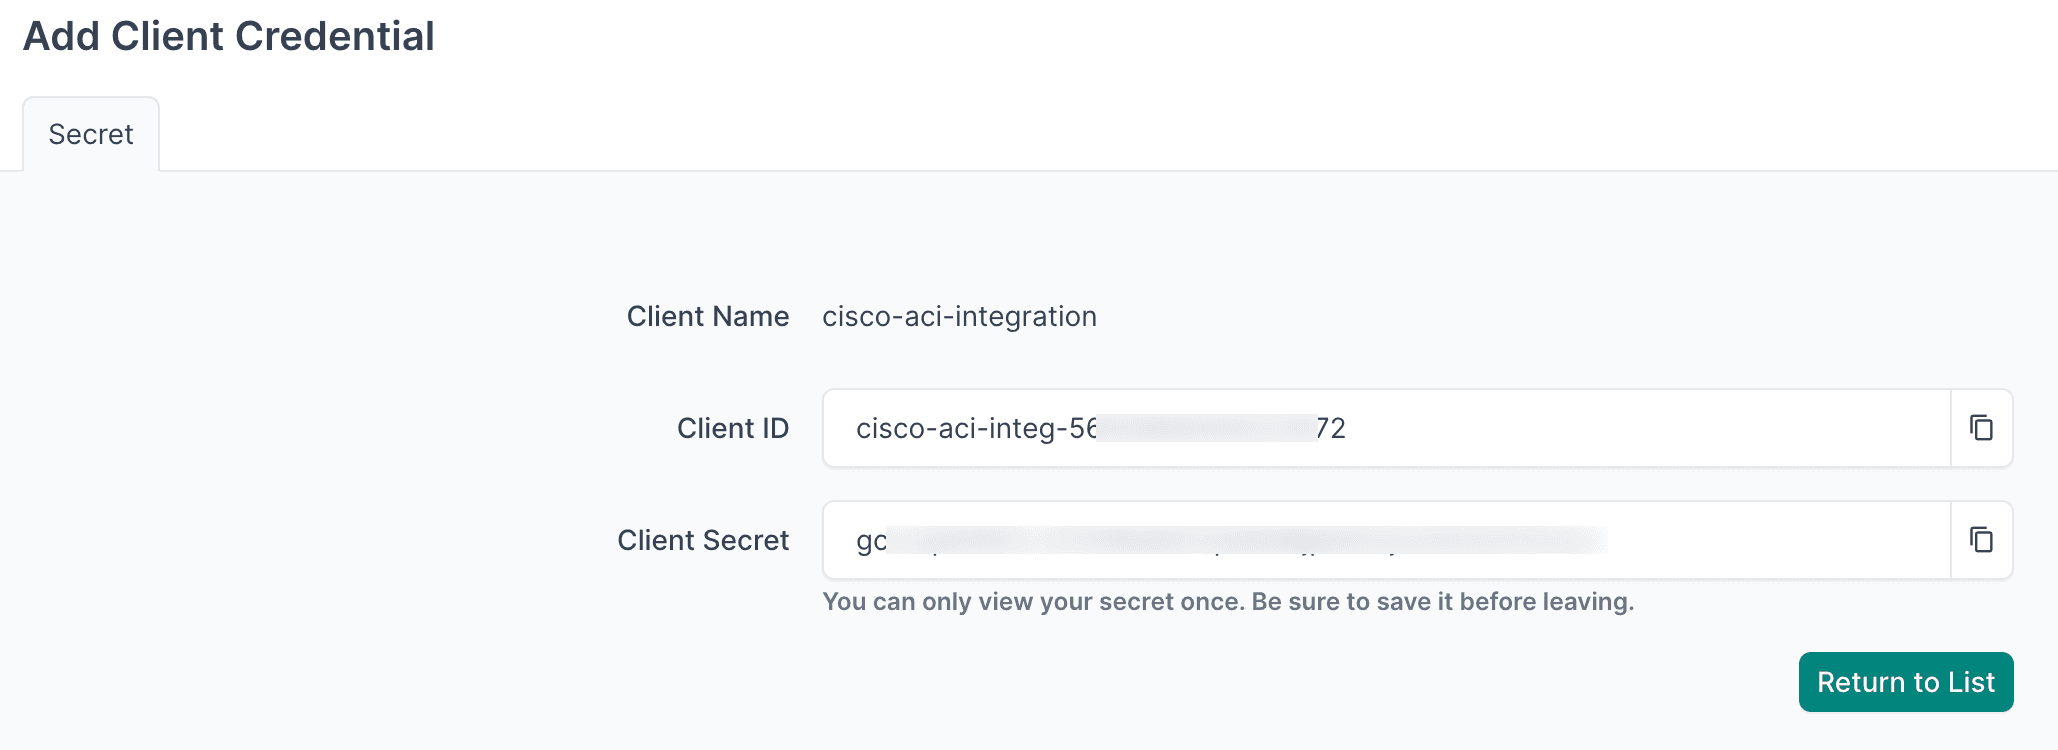
- Important: Copy and securely store the Client ID and Client Secret - you will need them in the agent configuration.
- Navigate to Diode → Settings.
- Copy the Diode target value - you will use this in the agent configuration file.

Agent Setup and Configuration
You can deploy multiple agents, each configured to sync data from a different CloudVision system. Give each a distinct agent_name and CVP_NAME.
Step 1: Authenticate to the NetBox Labs Image Registry
From your host machine, authenticate to the NetBox Labs registry using the CUSTOMER-IDENTIFIER and token provided by the NetBox Labs team:
docker login quay.io -u netboxlabs+<CUSTOMER-ID> -p <TOKEN>Example session:
% docker login quay.io -u netboxlabs+org-abc123def456 -p <token>
Login Succeeded
Then pull the agent image:
docker pull quay.io/netboxlabs/orb-agent-pro:developStep 2: Configure the Agent
- Create the configuration file (you can name the file anything you like):
touch agent.yaml- Edit the configuration file and add the following. Replace
grpcs://your-instance.netboxcloud.com/diodewith the value from Diode → Settings → Diode target in the NetBox UI:
orb:
  config_manager:
    active: local
  backends:
    worker:
    common:
      diode:
        target: grpcs://your-instance.netboxcloud.com/diode  # Get this value from Diode > Settings > Diode target
        client_id: ${DIODE_CLIENT_ID}
        client_secret: ${DIODE_CLIENT_SECRET}
        agent_name: arista_cloudvision_01  # Use a meaningful name to identify this agent
  policies:
    worker:
      arista_cloudvision_worker:
        config:
          package: nbl_arista_cloudvision
          schedule: "0 */6 * * *"  # Every 6 hours. Set your desired schedule (see examples below)
          CVP_HOST: ${CVP_HOST}              # CloudVision host, e.g. cvp.example.com (CVP) or www.<cluster>.arista.io (CVaaS)
          CVP_API_TOKEN: ${CVP_API_TOKEN}    # Service account token (preferred)
          # CVP_USERNAME: ${CVP_USERNAME}    # Alternative to CVP_API_TOKEN
          # CVP_PASSWORD: ${CVP_PASSWORD}    # Alternative to CVP_API_TOKEN
          SITE_NAME: "CloudVision"           # Fallback site name for devices without a topology_datacenter tag
          CVP_NAME: "cvp-primary"            # Optional instance identifier; used for the cv-{name} tag
          BOOTSTRAP: false                   # Set to true for initial setup only
          # CVP_SSL_VERIFY: true             # Set false to accept a self-signed cert (requires CVP_API_TOKEN)
        scope:                               # Optional: leave empty to ingest all devices
        # scope:                             # Or restrict ingestion by site or tag:
        #   sites:
        #     - London
        #   tags:
        #     - label: topology_type
        #       value: spine
Authentication methods
Provide either CVP_API_TOKEN, or both CVP_USERNAME and CVP_PASSWORD. A service account token is the recommended method for both CVP and CVaaS. Token authentication takes precedence when both are supplied.
Schedule Examples
The schedule field uses cron syntax. Common examples:
"*/30 * * * *"- Every 30 minutes"0 * * * *"- Every hour"0 */6 * * *"- Every 6 hours"0 2 * * *"- Daily at 02:00
Scope Configuration
The scope section limits which devices are synchronized. Configure it under a scope key in the policy, separate from config.
sites- a list of site names. Only devices whose resolved site name (from thetopology_datacenterCloudVision tag, or theSITE_NAMEfallback) matches one of the listed names are ingested. Use["*"]or omit to ingest all sites.tags- a list of{label, value}pairs. Only devices carrying at least one matching CloudVision tag are ingested. Omit for no tag filter.
Example:
scope:
  sites:
    - London
    - Amsterdam
  tags:
    - label: topology_type
      value: spine
Both filters resolve through CloudVision device tags. When a scope filter is active and the CloudVision tag API cannot be read, the run fails rather than silently ingesting no devices. See Scope Parameters for details.
Bootstrap Mode (First-Time Setup)
Bootstrap mode creates the static content in NetBox that the integration requires before the first full sync. Run it once on initial setup, then disable it for all subsequent runs. In bootstrap mode the integration makes no CloudVision API calls, so credentials are not required.
What bootstrap mode creates:
- Tags:
arista,cloudvision,discovered - Custom fields:
cv_streaming_statusandcv_interface_type - The
Aristamanufacturer - Device roles: Spine, Leaf, L2 Leaf, Superspine, Campus Leaf, Border Leaf, and the Network Switch fallback
Configuration:
config:
  BOOTSTRAP: true  # Set to true for initial setup, false for regular operation
First-time run process:
- Set
BOOTSTRAP: truein your configuration. - Run the agent and monitor the output for
executed successfully. - Stop the agent by pressing
Ctrl+Conce you seeexecuted successfully. - Apply the deviations in NetBox Assurance (see Apply Deviations below).
- Set
BOOTSTRAP: falsefor all future runs.
Optional - Dry Run Mode
The agent can run in dry run mode, which writes discovered data to a JSON file instead of sending it to NetBox. This is useful for troubleshooting or for sharing data with the NetBox Labs support team.
Add the following to the diode section of your configuration:
      diode:
        dry_run: true
        dry_run_output_dir: /opt/orb/  # Output file is written to this directory
Step 3: Run the Agent
Run the agent to synchronize CloudVision devices and their layer-3 configuration into NetBox.
Method 1: Set Environment Variables Manually
- Export Diode credentials:
export DIODE_CLIENT_ID="your-client-id"
export DIODE_CLIENT_SECRET="your-client-secret"- Export CloudVision connection details:
export CVP_HOST="cvp.example.com"
export CVP_API_TOKEN="your-cloudvision-service-account-token"- Run the agent:
docker run \
  -v $PWD:/opt/orb/ \
  -e DIODE_CLIENT_SECRET \
  -e DIODE_CLIENT_ID \
  -e CVP_HOST \
  -e CVP_API_TOKEN \
  quay.io/netboxlabs/orb-agent-pro:develop \
  run -c /opt/orb/agent.yaml
Method 2: Use a .env File (Recommended)
- Create a
.envfile:
touch .env- Edit the
.envfile and add the following:
## NetBox Diode credentials (from Step 1)
DIODE_CLIENT_ID=your-client-id
DIODE_CLIENT_SECRET=your-client-secret

## Arista CloudVision connection
CVP_HOST=cvp.example.com
CVP_API_TOKEN=your-cloudvision-service-account-token
Important
Replace the placeholder values with your actual credentials:
your-client-idandyour-client-secretfrom the NetBox Diode setupcvp.example.comwith your CloudVision hostname or IP address (do not include a URL scheme such ashttps://). For CVaaS, usewww.<cluster>.arista.io, for examplewww.cv-prod-us-4.arista.io. Thewww.prefix is required: the cluster hostname shown in your browser is not the gRPC endpointyour-cloudvision-service-account-tokenwith your CloudVision service account token. To use username and password instead, setCVP_USERNAMEandCVP_PASSWORDin place ofCVP_API_TOKEN
- Run the agent:
docker run \
  -v $PWD:/opt/orb/ \
  --env-file .env \
  quay.io/netboxlabs/orb-agent-pro:develop \
  run -c /opt/orb/agent.yaml
Security Best Practice
Add .env to your .gitignore file to avoid committing credentials to version control:
echo ".env" >> .gitignoreExpected Output
After starting the agent, you will see log output as the integration reads CloudVision and sends data to NetBox:
{"time":"2025-07-20T15:15:01.123456789Z","level":"INFO","msg":"worker stderr","log":"INFO:nbl_arista_cloudvision.cloudvision_diode:Starting Arista CloudVision integration for cvp.example.com"}
{"time":"2025-07-20T15:15:02.234567890Z","level":"INFO","msg":"worker stderr","log":"INFO:nbl_arista_cloudvision.cloudvision_client:Retrieved 12 devices from CloudVision inventory"}
{"time":"2025-07-20T15:15:03.345678901Z","level":"INFO","msg":"worker stderr","log":"INFO:nbl_arista_cloudvision.builders.sites:Built 2 site(s): ['dc1', 'dc2']"}
{"time":"2025-07-20T15:15:04.456789012Z","level":"INFO","msg":"worker stderr","log":"INFO:nbl_arista_cloudvision.builders.devices:Built 12 devices from 12 inventory entries"}
{"time":"2025-07-20T15:15:09.567890123Z","level":"INFO","msg":"worker stderr","log":"INFO:nbl_arista_cloudvision.cloudvision_client:Retrieved running configs for 12/12 devices"}
{"time":"2025-07-20T15:15:09.678901234Z","level":"INFO","msg":"worker stderr","log":"INFO:nbl_arista_cloudvision.builders.interfaces:Built 384 interfaces across 12 devices"}
{"time":"2025-07-20T15:15:09.789012345Z","level":"INFO","msg":"worker stderr","log":"INFO:nbl_arista_cloudvision.builders.ip_addresses:Built 96 IP addresses from device configurations"}
{"time":"2025-07-20T15:15:10.890123456Z","level":"INFO","msg":"worker stderr","log":"INFO:worker.policy.runner:Policy arista_cloudvision_worker: Successful ingestion"}
{"time":"2025-07-20T15:15:10.901234567Z","level":"INFO","msg":"worker stderr","log":"INFO:apscheduler.executors.default:Job \"PolicyRunner.run\" executed successfully"}
Monitoring and Testing
Success indicator: Look for Successful ingestion in the output to confirm data was sent to NetBox via Diode.
Configuration coverage: Retrieved running configs for X/Y devices shows how many devices' running configurations were read. Devices that were not read still sync their device-level data, but no interfaces or addresses that run. See Configuration Retrieval and Partial Runs.
Testing: Run the agent once and press Ctrl+C to stop it after seeing executed successfully. This lets you verify configuration before setting up continuous scheduled operation.
Continuous operation: The agent runs according to your cron schedule until the container is stopped.
View and Apply Discovered Data in NetBox Assurance
After the agent runs, work with the discovered CloudVision data in NetBox Assurance.
NetBox Assurance identifies deviations between data already in NetBox and the actual operational state discovered by the integration.
Understanding Deviations
Deviations are the delta between what is currently in NetBox and what the integration discovered from CloudVision. On the initial run, all discovered objects may appear as deviations if they did not previously exist in NetBox. After the initial sync and deviation application, subsequent runs produce deviations only for changed or new objects.
Accessing NetBox Assurance
- Navigate to your NetBox instance UI.
- Click on Assurance in the main navigation menu.
Explore Deviation Types
- Click on Deviation Types to view the categories of deviations discovered.
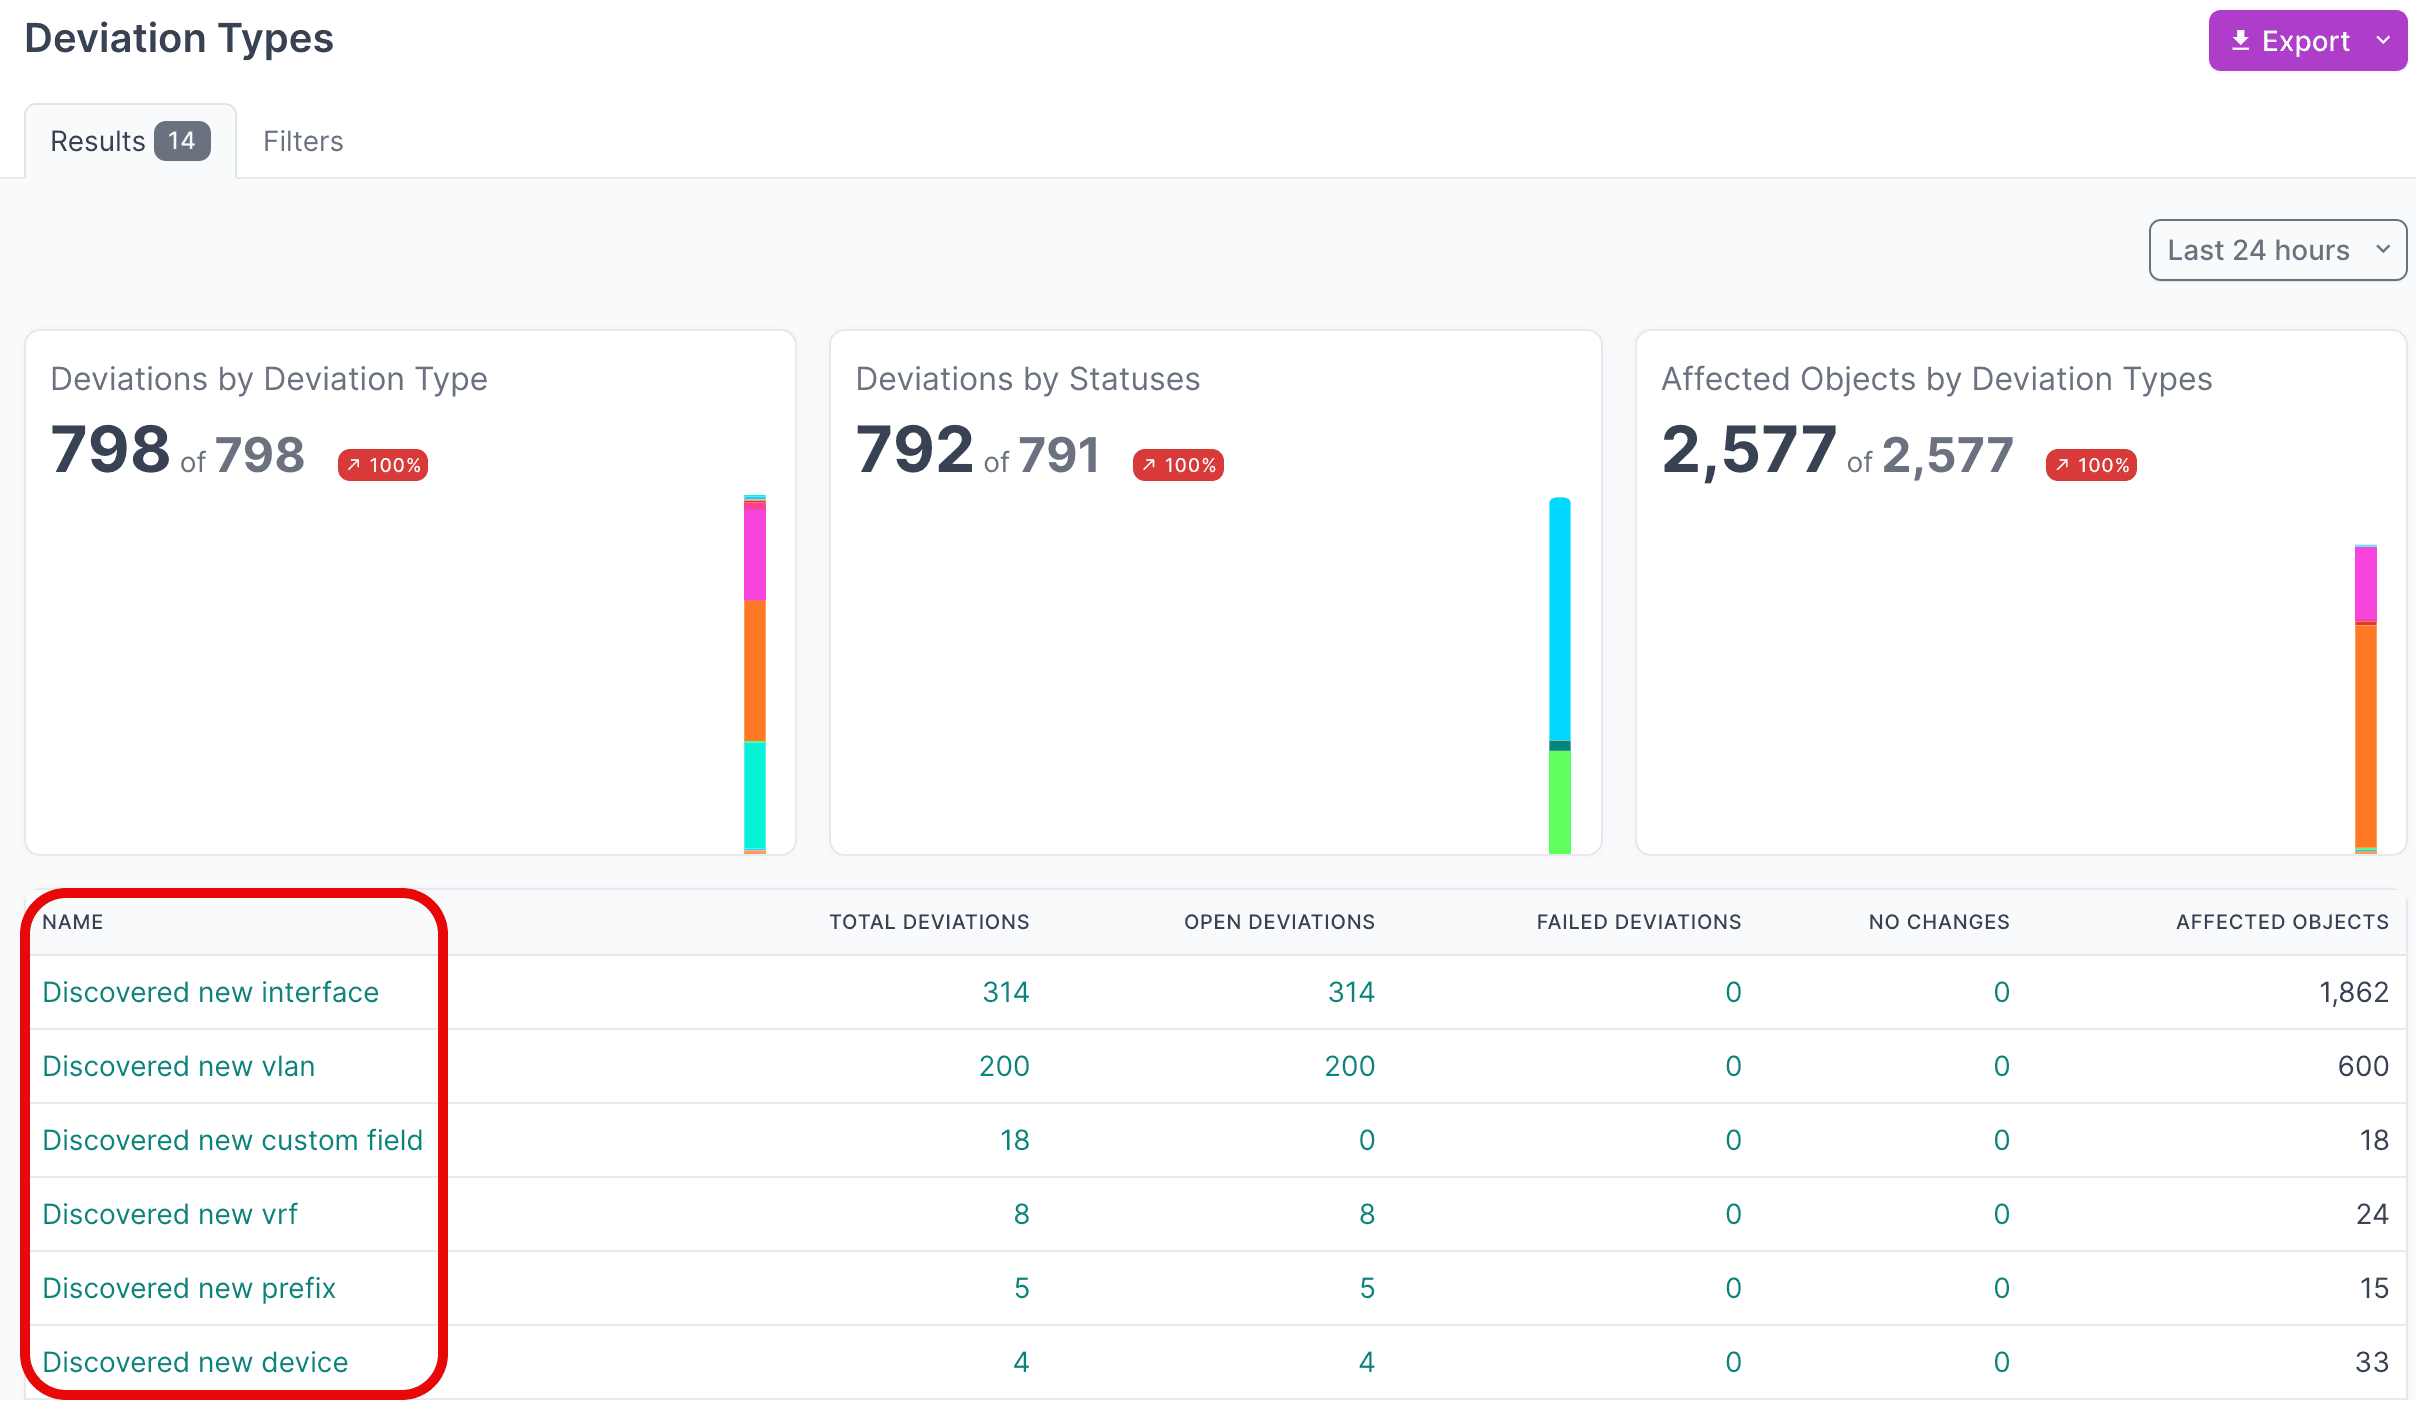
- Click the Name of a deviation type to view deviations of that type.
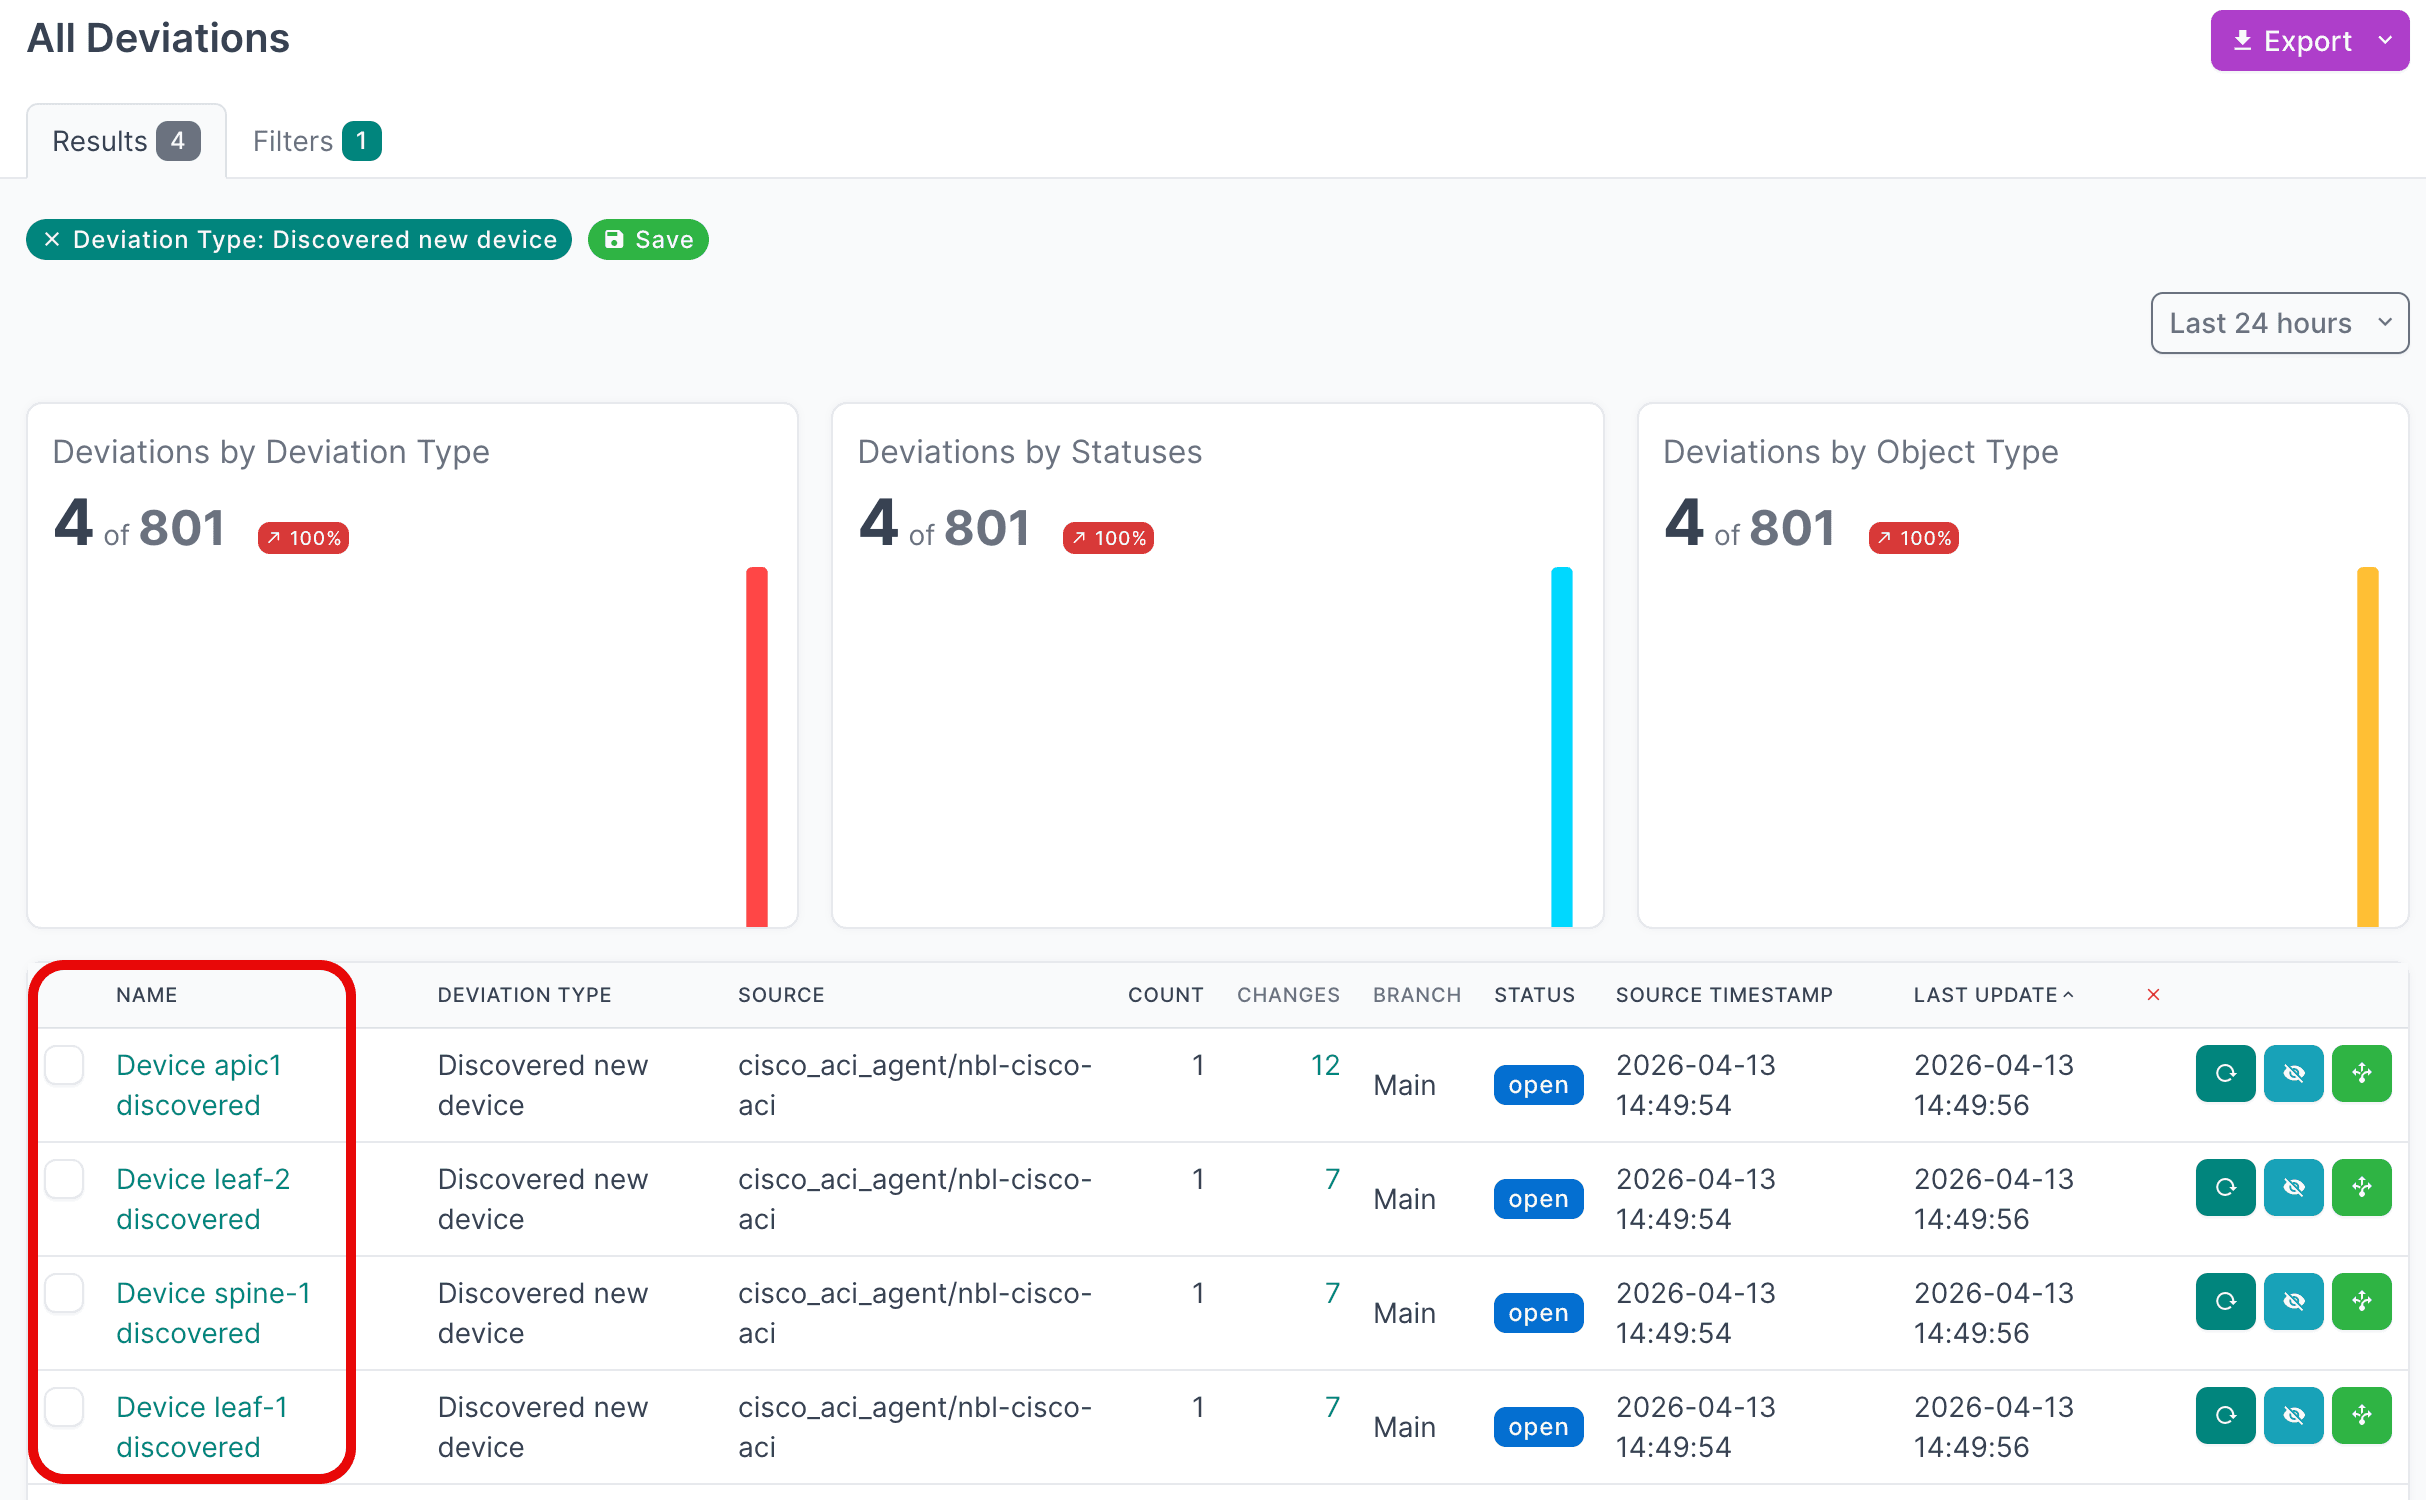
- Click the Name of an individual deviation to view its details.
View Active Deviations
- Click on Active Deviations to view all deviations that have not yet been applied or ignored.
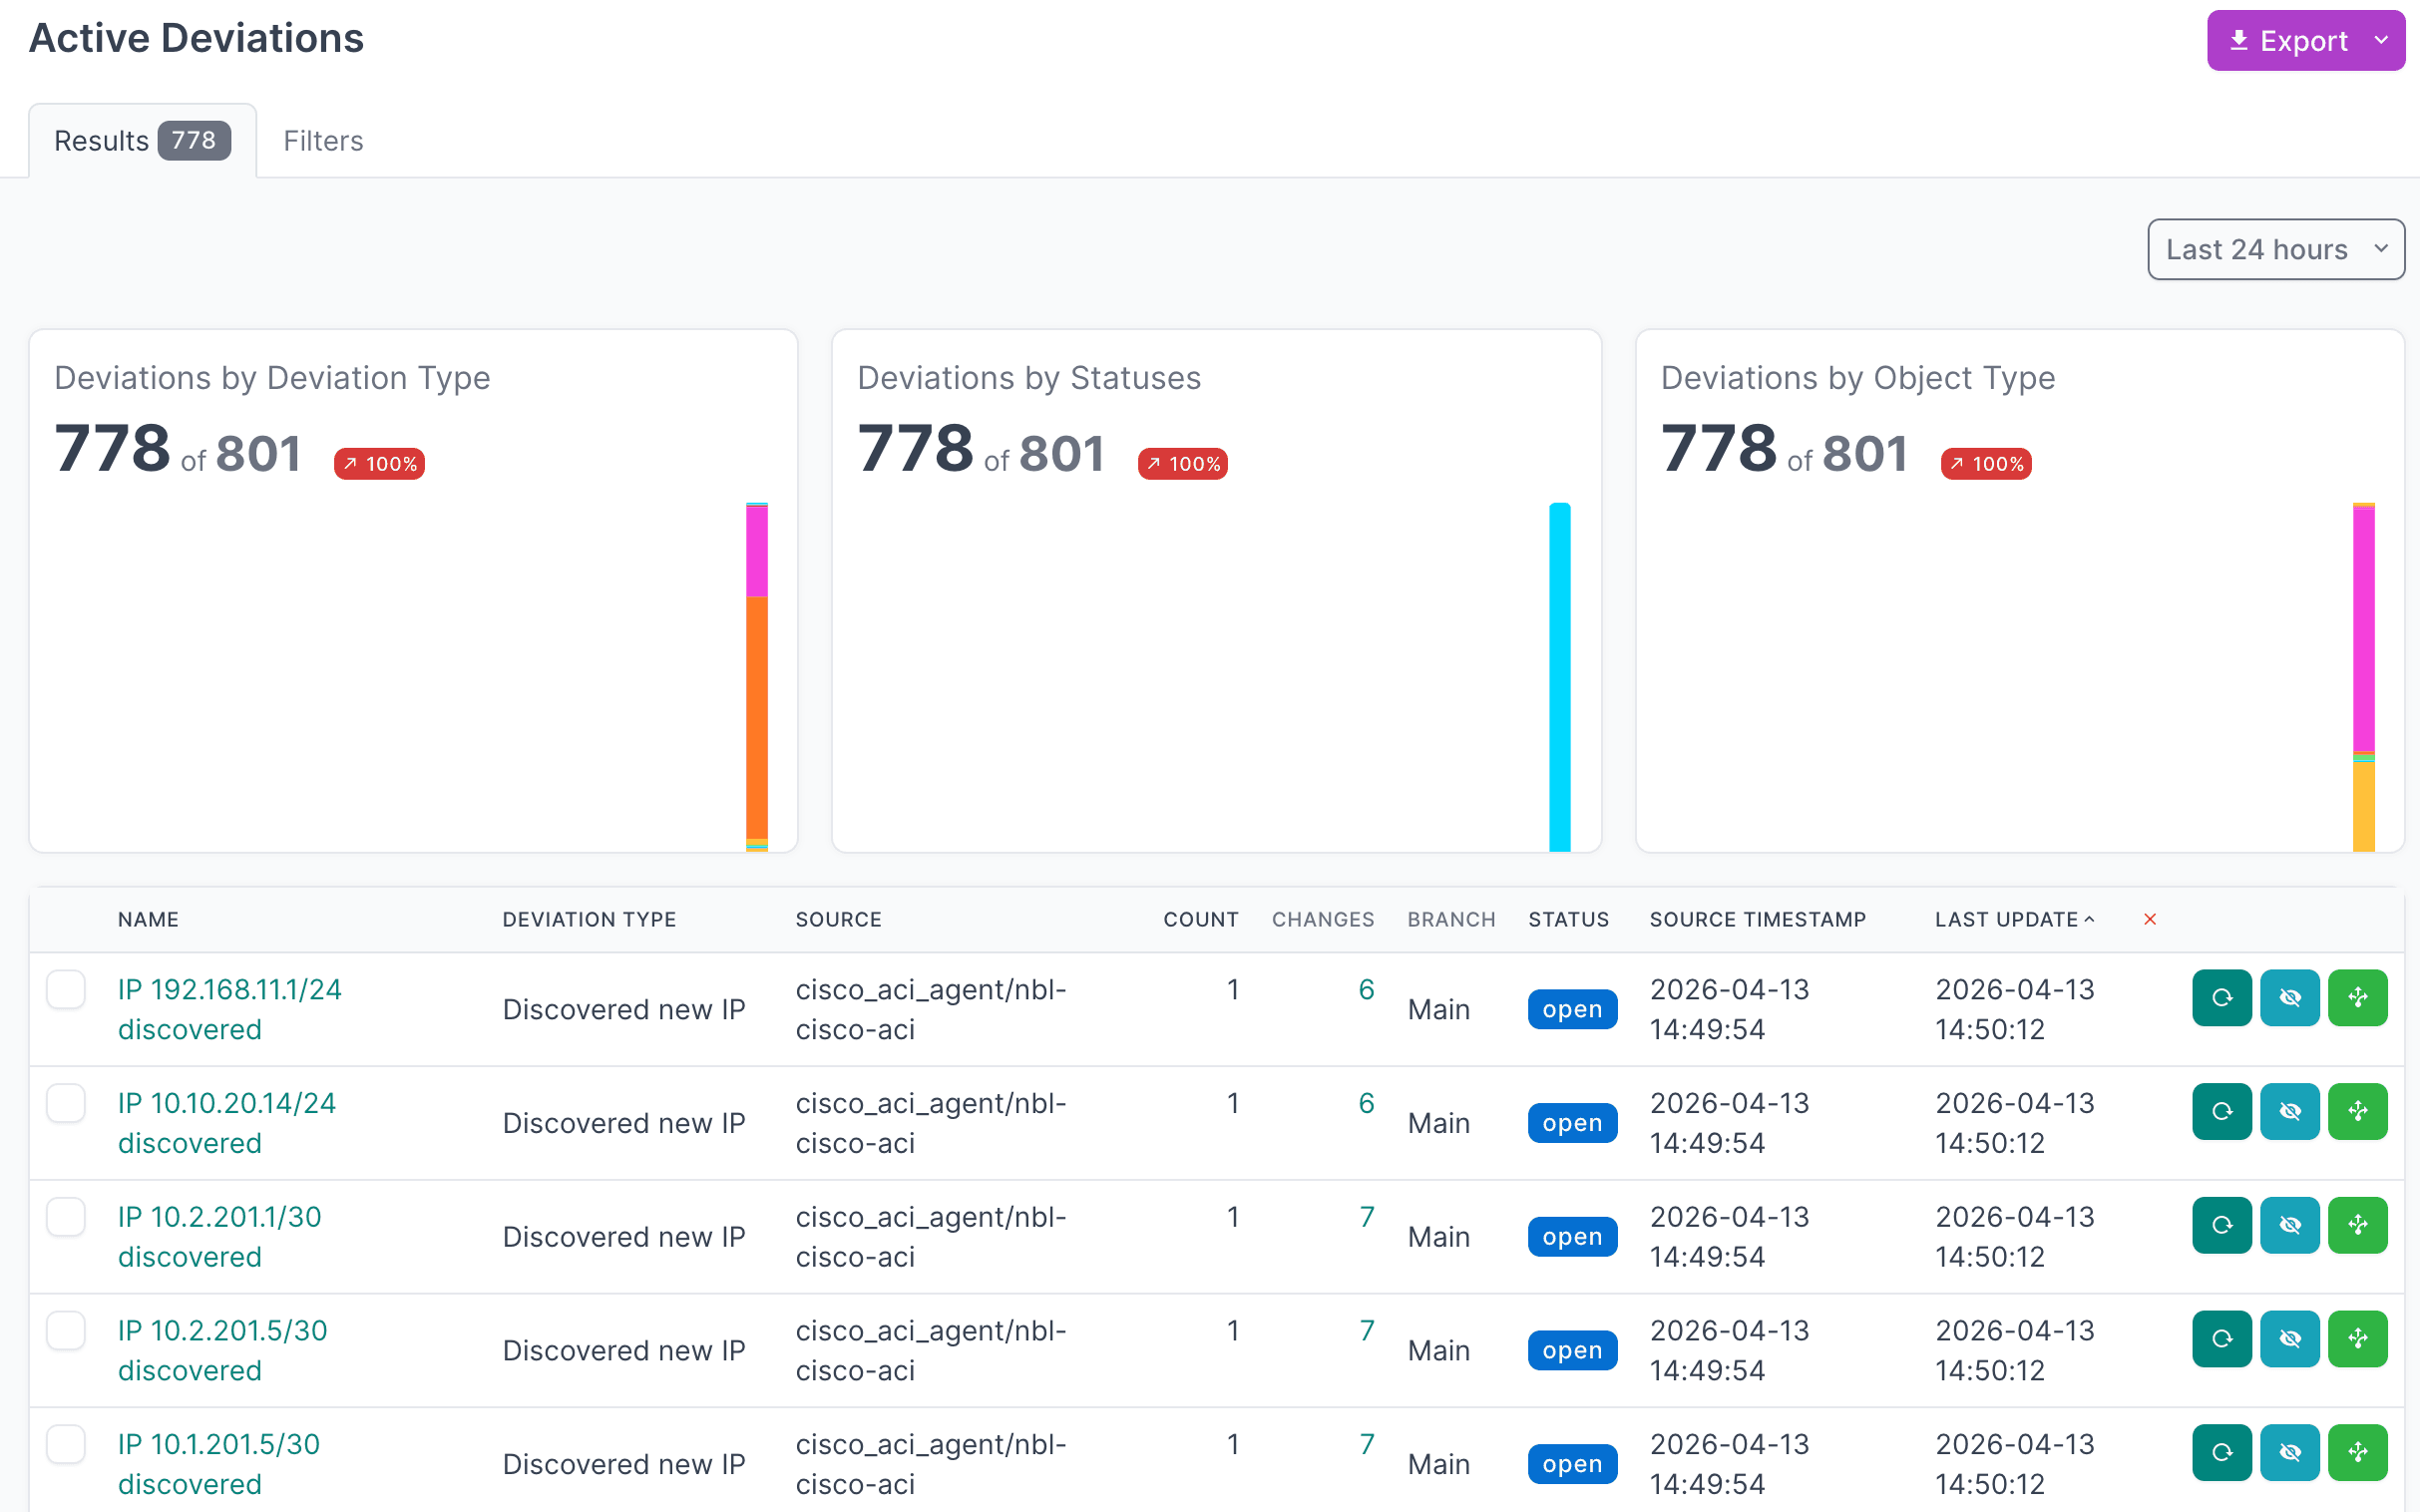
- Click the Name of a deviation to view its details.
Apply Deviations
- Select the deviations you want to apply. For large result sets, set Per Page to 500 first.
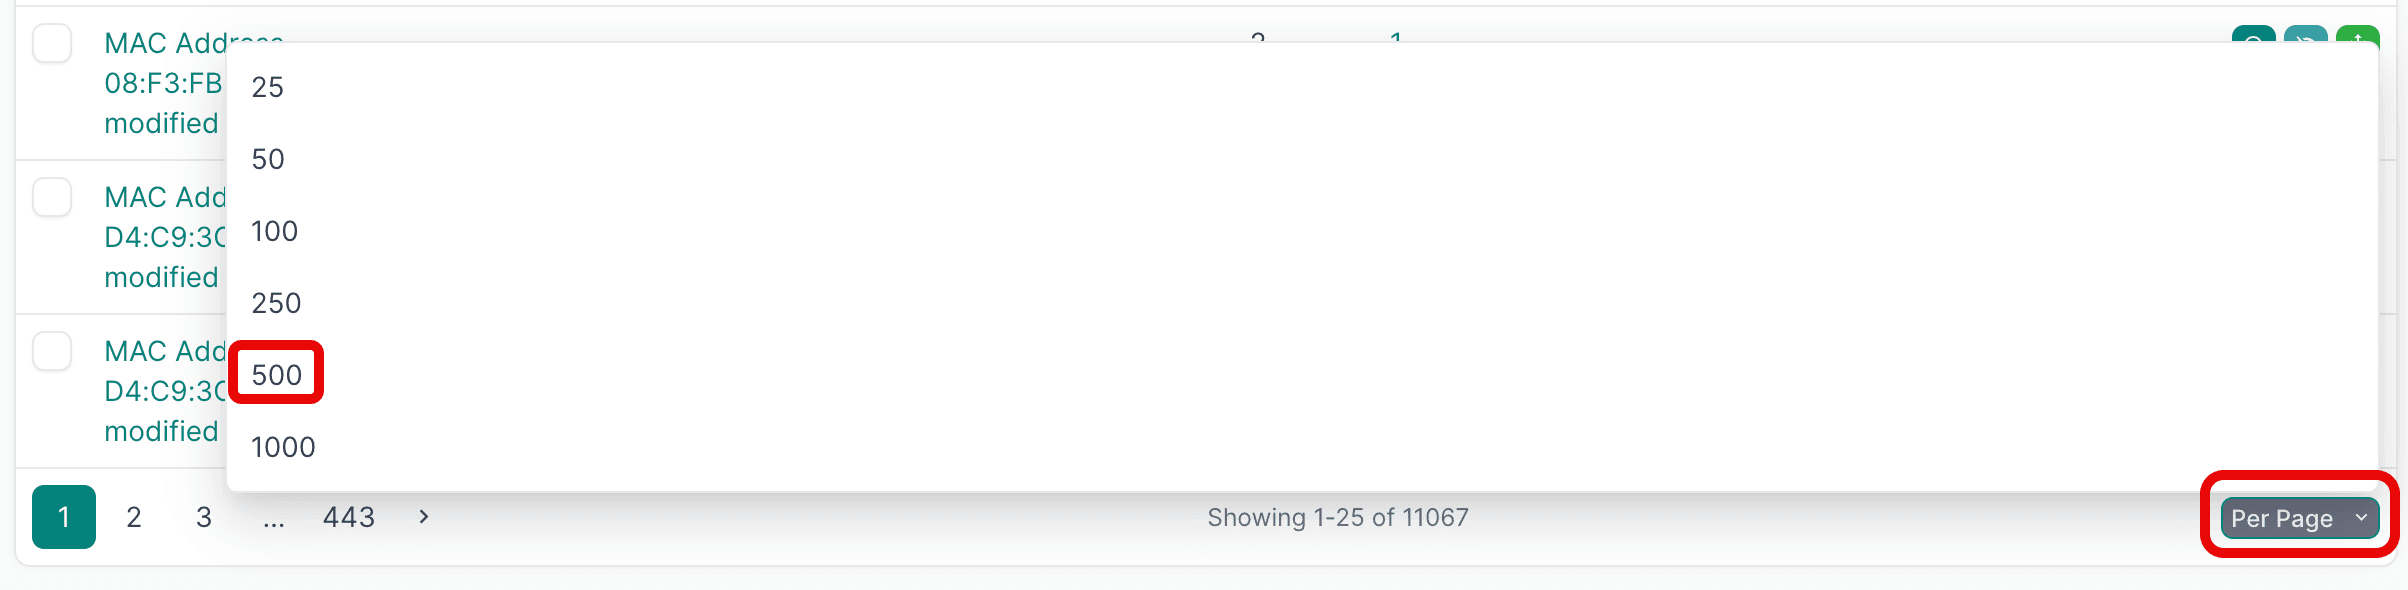
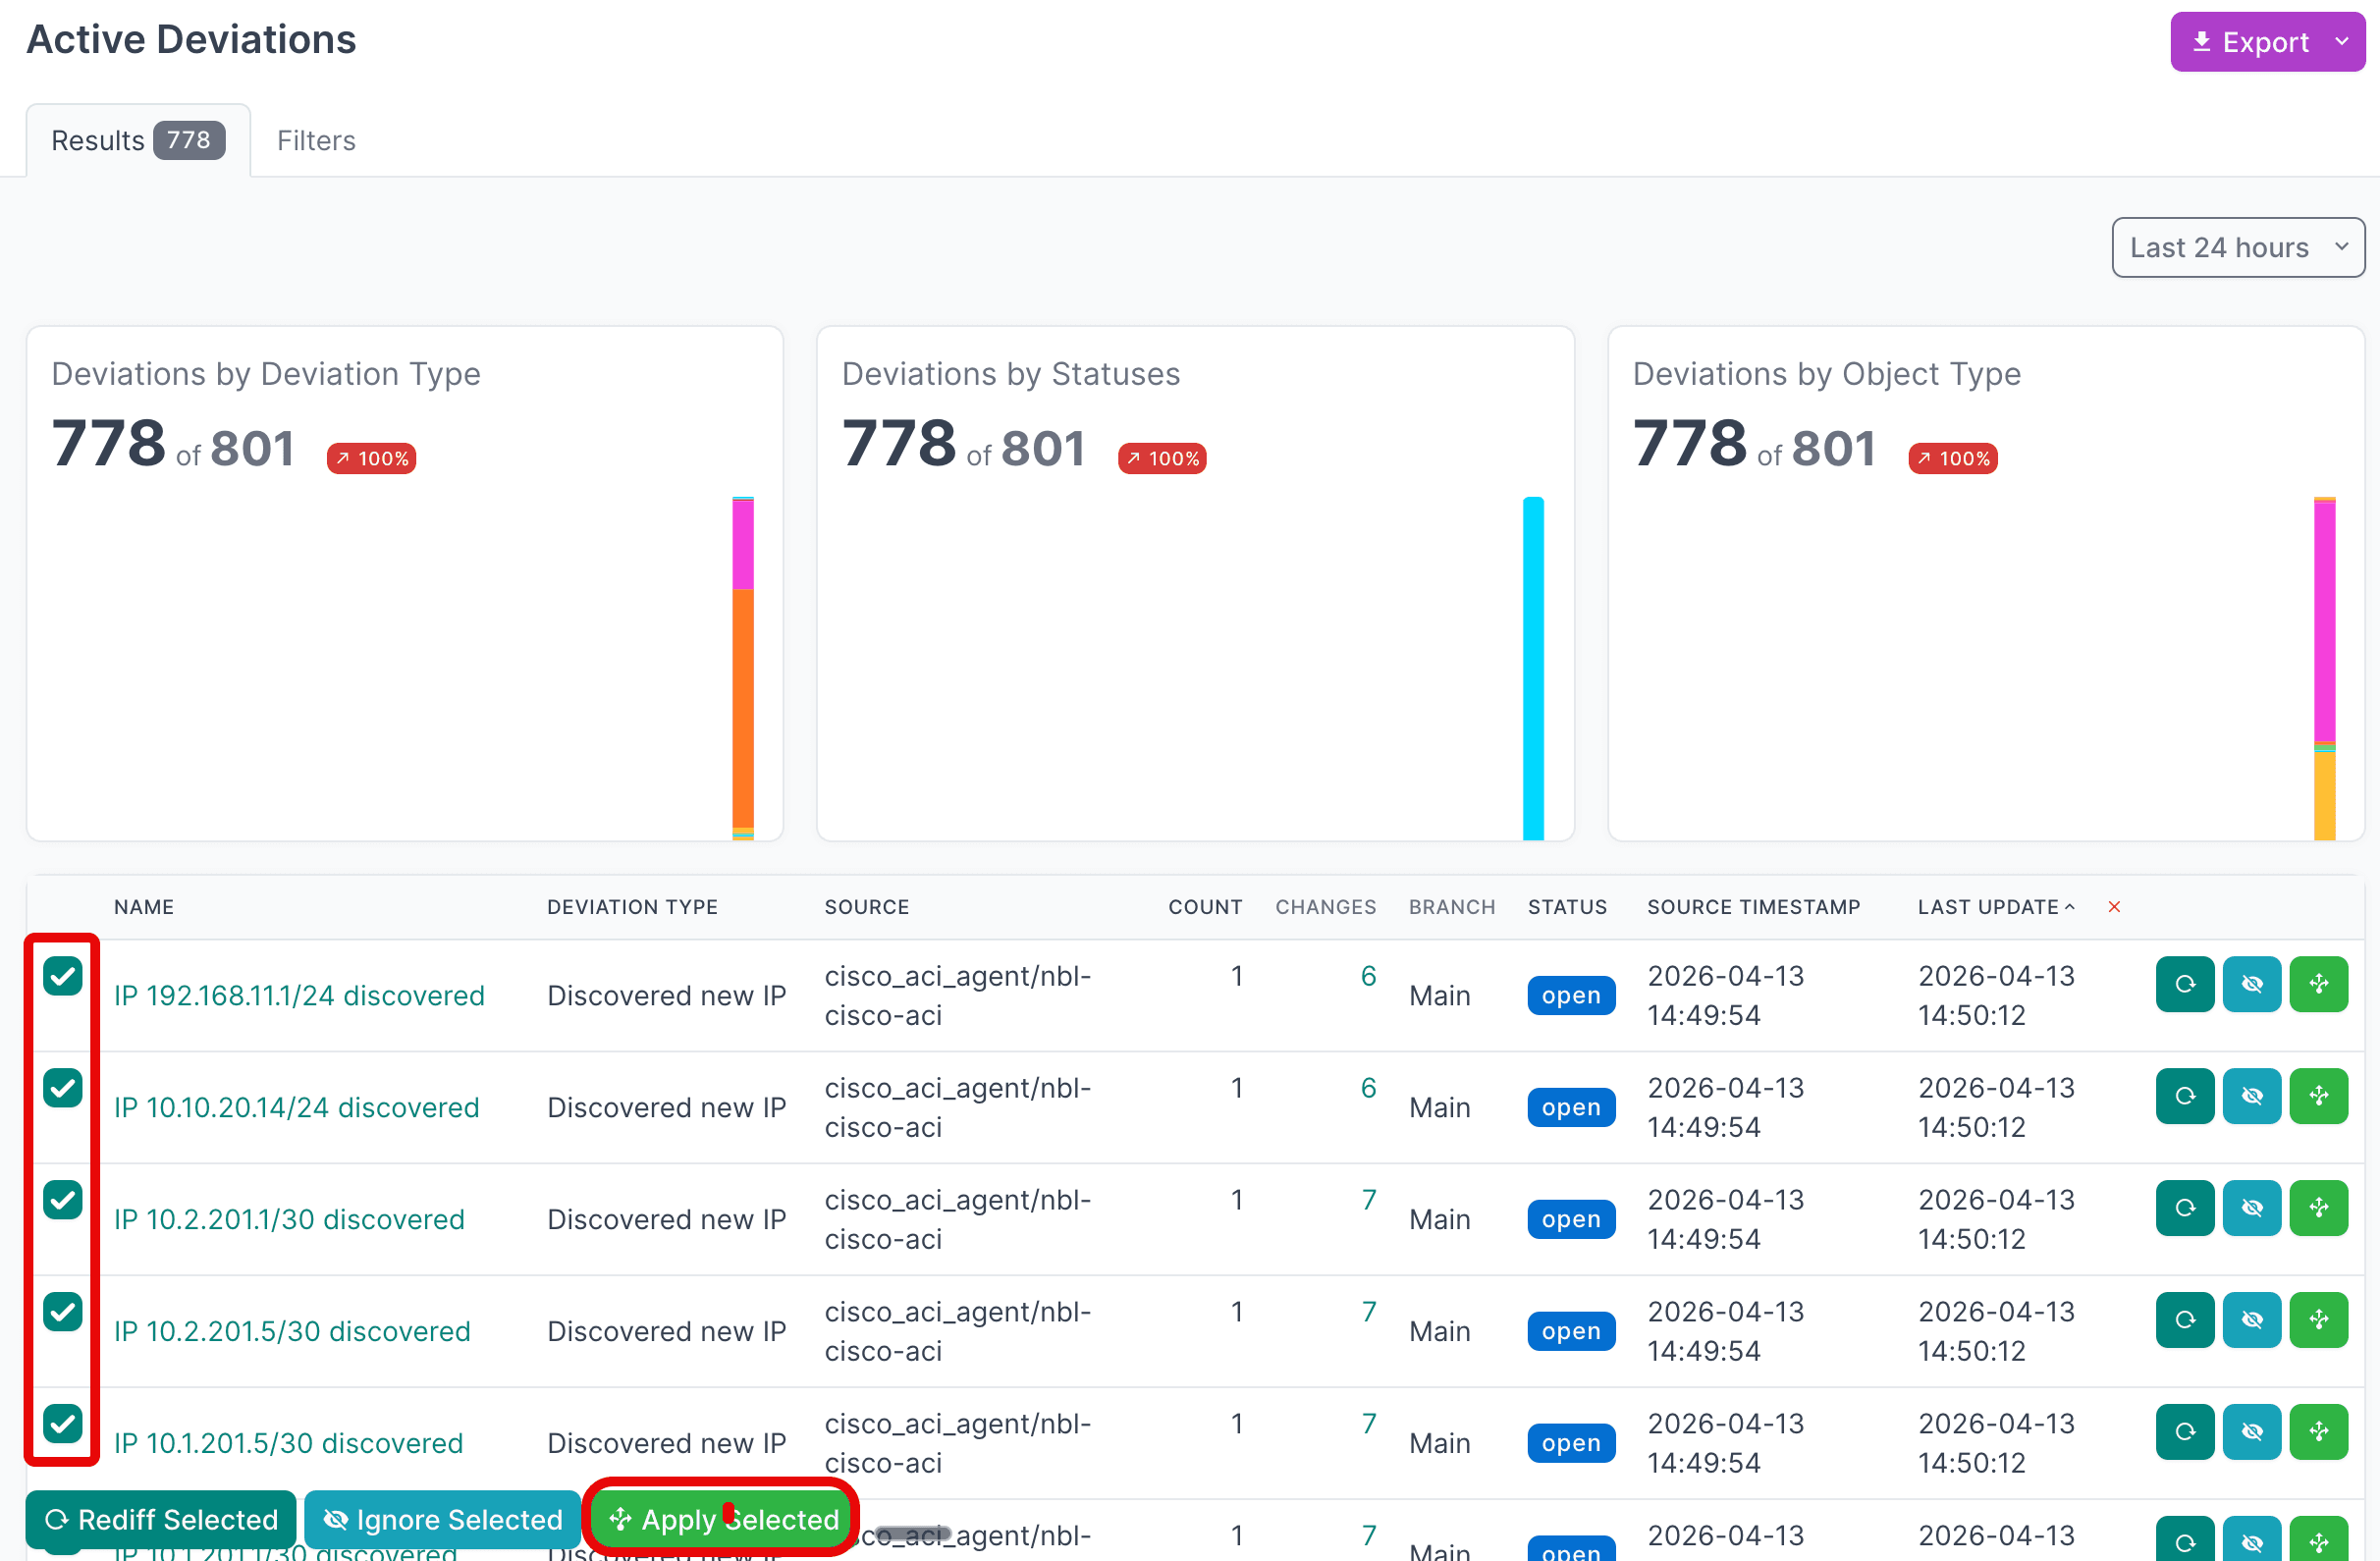
- Select the first deviation, hold
SHIFT, select the last one, then click Apply Selected.
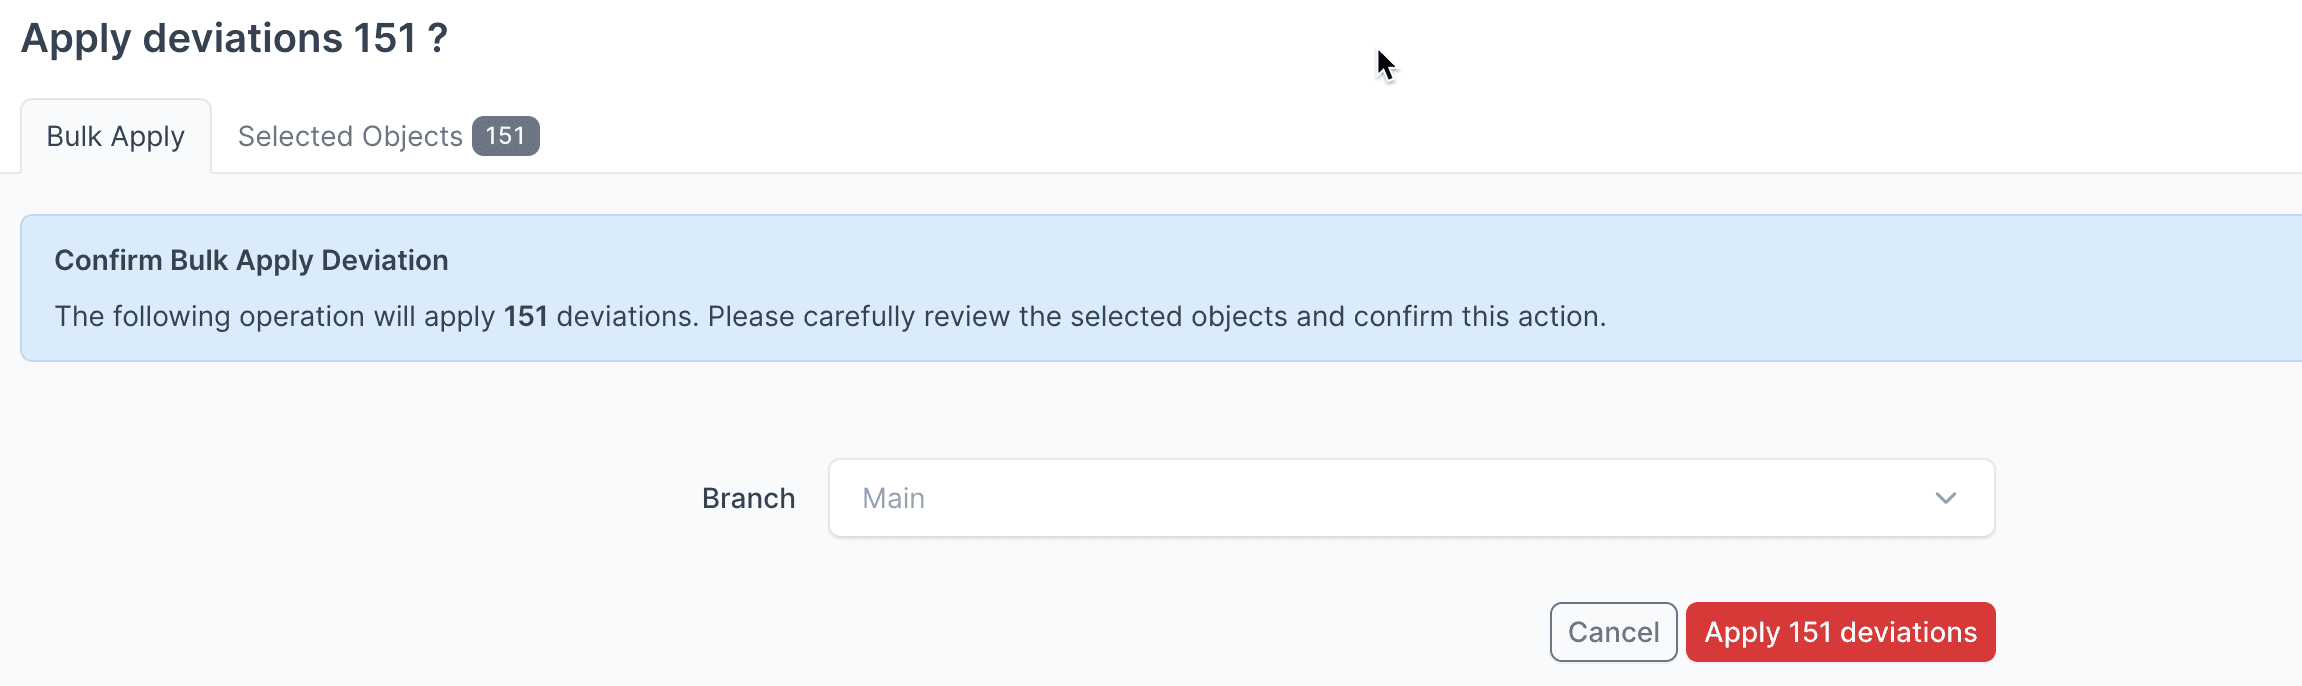
- Click Apply X Deviations to write the data to NetBox.
Apply Deviations to a Branch
Instead of writing deviations to the Main NetBox database branch, select another branch from the drop-down menu to apply deviations to that branch first.
Assurance Docs
For detailed information on working with NetBox Assurance, see the documentation.
View the Arista CloudVision Data in NetBox
After running the integration and applying discovered data, you can navigate the CloudVision inventory in NetBox:
- Click on Devices in the main navigation menu to view discovered EOS switches.
- Click on a device to see its device type, platform, role, site, primary IP, and the
cv_streaming_statuscustom field value. - Open the device's Interfaces tab to see its interfaces, with VLANs, VRFs, IP addresses, and the
cv_interface_typecustom field. - Navigate to IPAM to view the discovered VLANs, VLAN groups, VRFs, prefixes, and IP addresses.
Additional Resources
Related Documentation
- NetBox Assurance Documentation
- Orb Agent Documentation
- Arista CloudVision Integration - Technical Information
Support
Email support@netboxlabs.com for support.
Arista CloudVision Integration
Automatically discover and synchronize Arista EOS devices and their layer-3 configuration from Arista CloudVision - devices, sites, roles, interfaces, VLANs, VRFs, prefixes, and IP addresses - into NetBox via the Diode SDK. Currently in public preview.
Technical Information
This page describes how Arista CloudVision object types are mapped to NetBox objects by the integration, and lists every configuration key.