NetBox Agents quickstart
Connect a NetBox instance and create your first prebuilt agent.
This guide connects a NetBox instance to NetBox Agents and creates your first prebuilt agent.
Before you begin
You will need:
- NetBox Agents enabled for your organization.
NetBox Agents is in Public Preview on NetBox Cloud. If you don't see NetBox Agents in the NetBox Labs Console navigation, contact your account team. - A NetBox instance running NetBox 4.5 or later.
Guided setup asks for the HTTPS URL of your instance. - A NetBox API token.
A v2 token, beginning withnbt_, from that instance. Guided setup uses the token to create the webhooks and event rules that complete the connection, so it must have permission to create both. NetBox Agents then stores the token so agents can access your NetBox. It can be changed later.
We also strongly recommend:
- Connecting a non-production instance during the preview.
- Enabling branching and change management on that instance.
Write-capable agents stage their changes in a NetBox branch and promote them through a change request; without these plugins, those protections are skipped rather than enforced. - Using a non-superuser account for the token.
Superusers silently bypass main-branch protection, which defeats the point of staging agent changes in a branch. - Using a dedicated NetBox user account, not your own.
Agents act as the token's user, so their writes and change requests are attributed to that account. If you and your agent share the same identity, you may not be permitted to approve its changes.
Step 1: Connect your NetBox
- In the NetBox Labs Console, go to NetBox Agents → Settings and select the environment to connect.
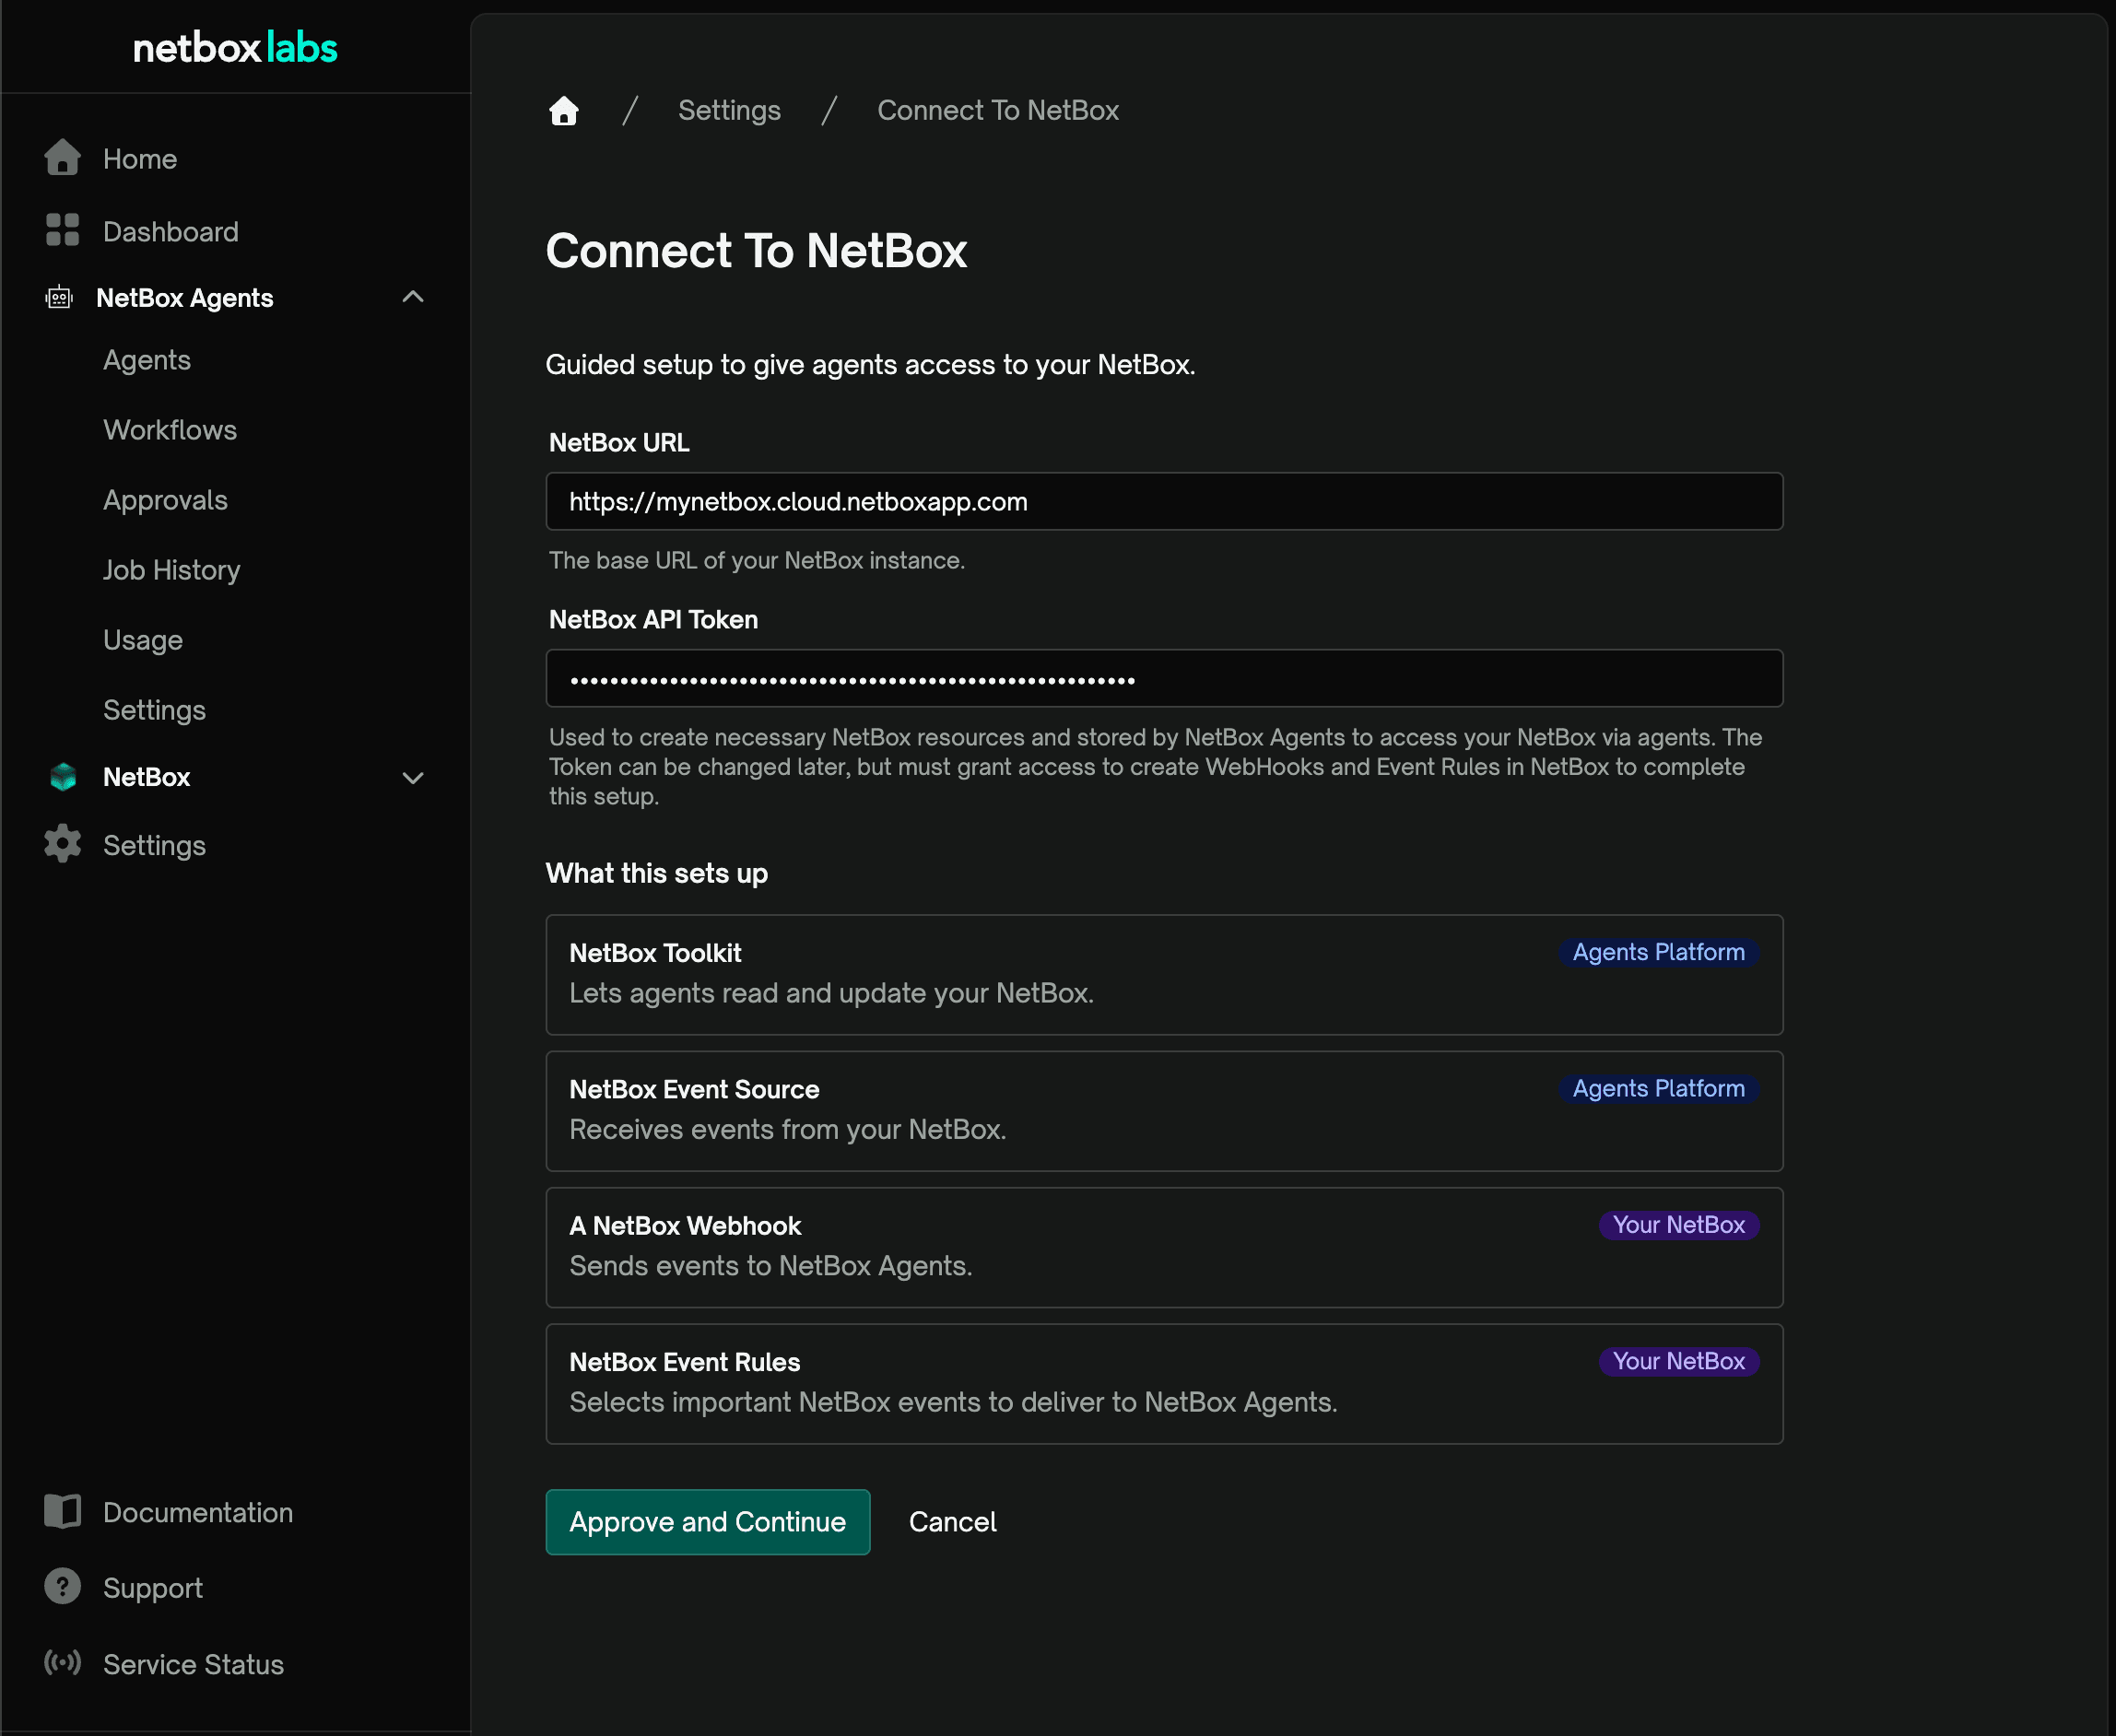
- Select Connect To NetBox to open the guided setup.
- Enter your NetBox URL (the base URL of your instance) and your NetBox API Token.
- Review the What this sets up list. The setup creates things both on the Agents Platform and in your NetBox:
- NetBox Toolkit - lets agents read and update your NetBox.
- NetBox Event Source - receives events from your NetBox.
- A NetBox Webhook - sends events to NetBox Agents.
- NetBox Event Rules - select important NetBox events to deliver to NetBox Agents.
- Select Approve and Continue.
Note - This setup creates a basic connection to NetBox that delivers Branching, Change Management and IPAM-related events needed by the IPAM Agent. For your own cases, additional events may be necessary and must be enumerated in a NetBox Event Rule for an agent to observe them.
Step 2: Create the Reporting Agent
Read-only agents are the right place to start: you see real output from your own data with no risk to it. This guide uses the Reporting Agent.
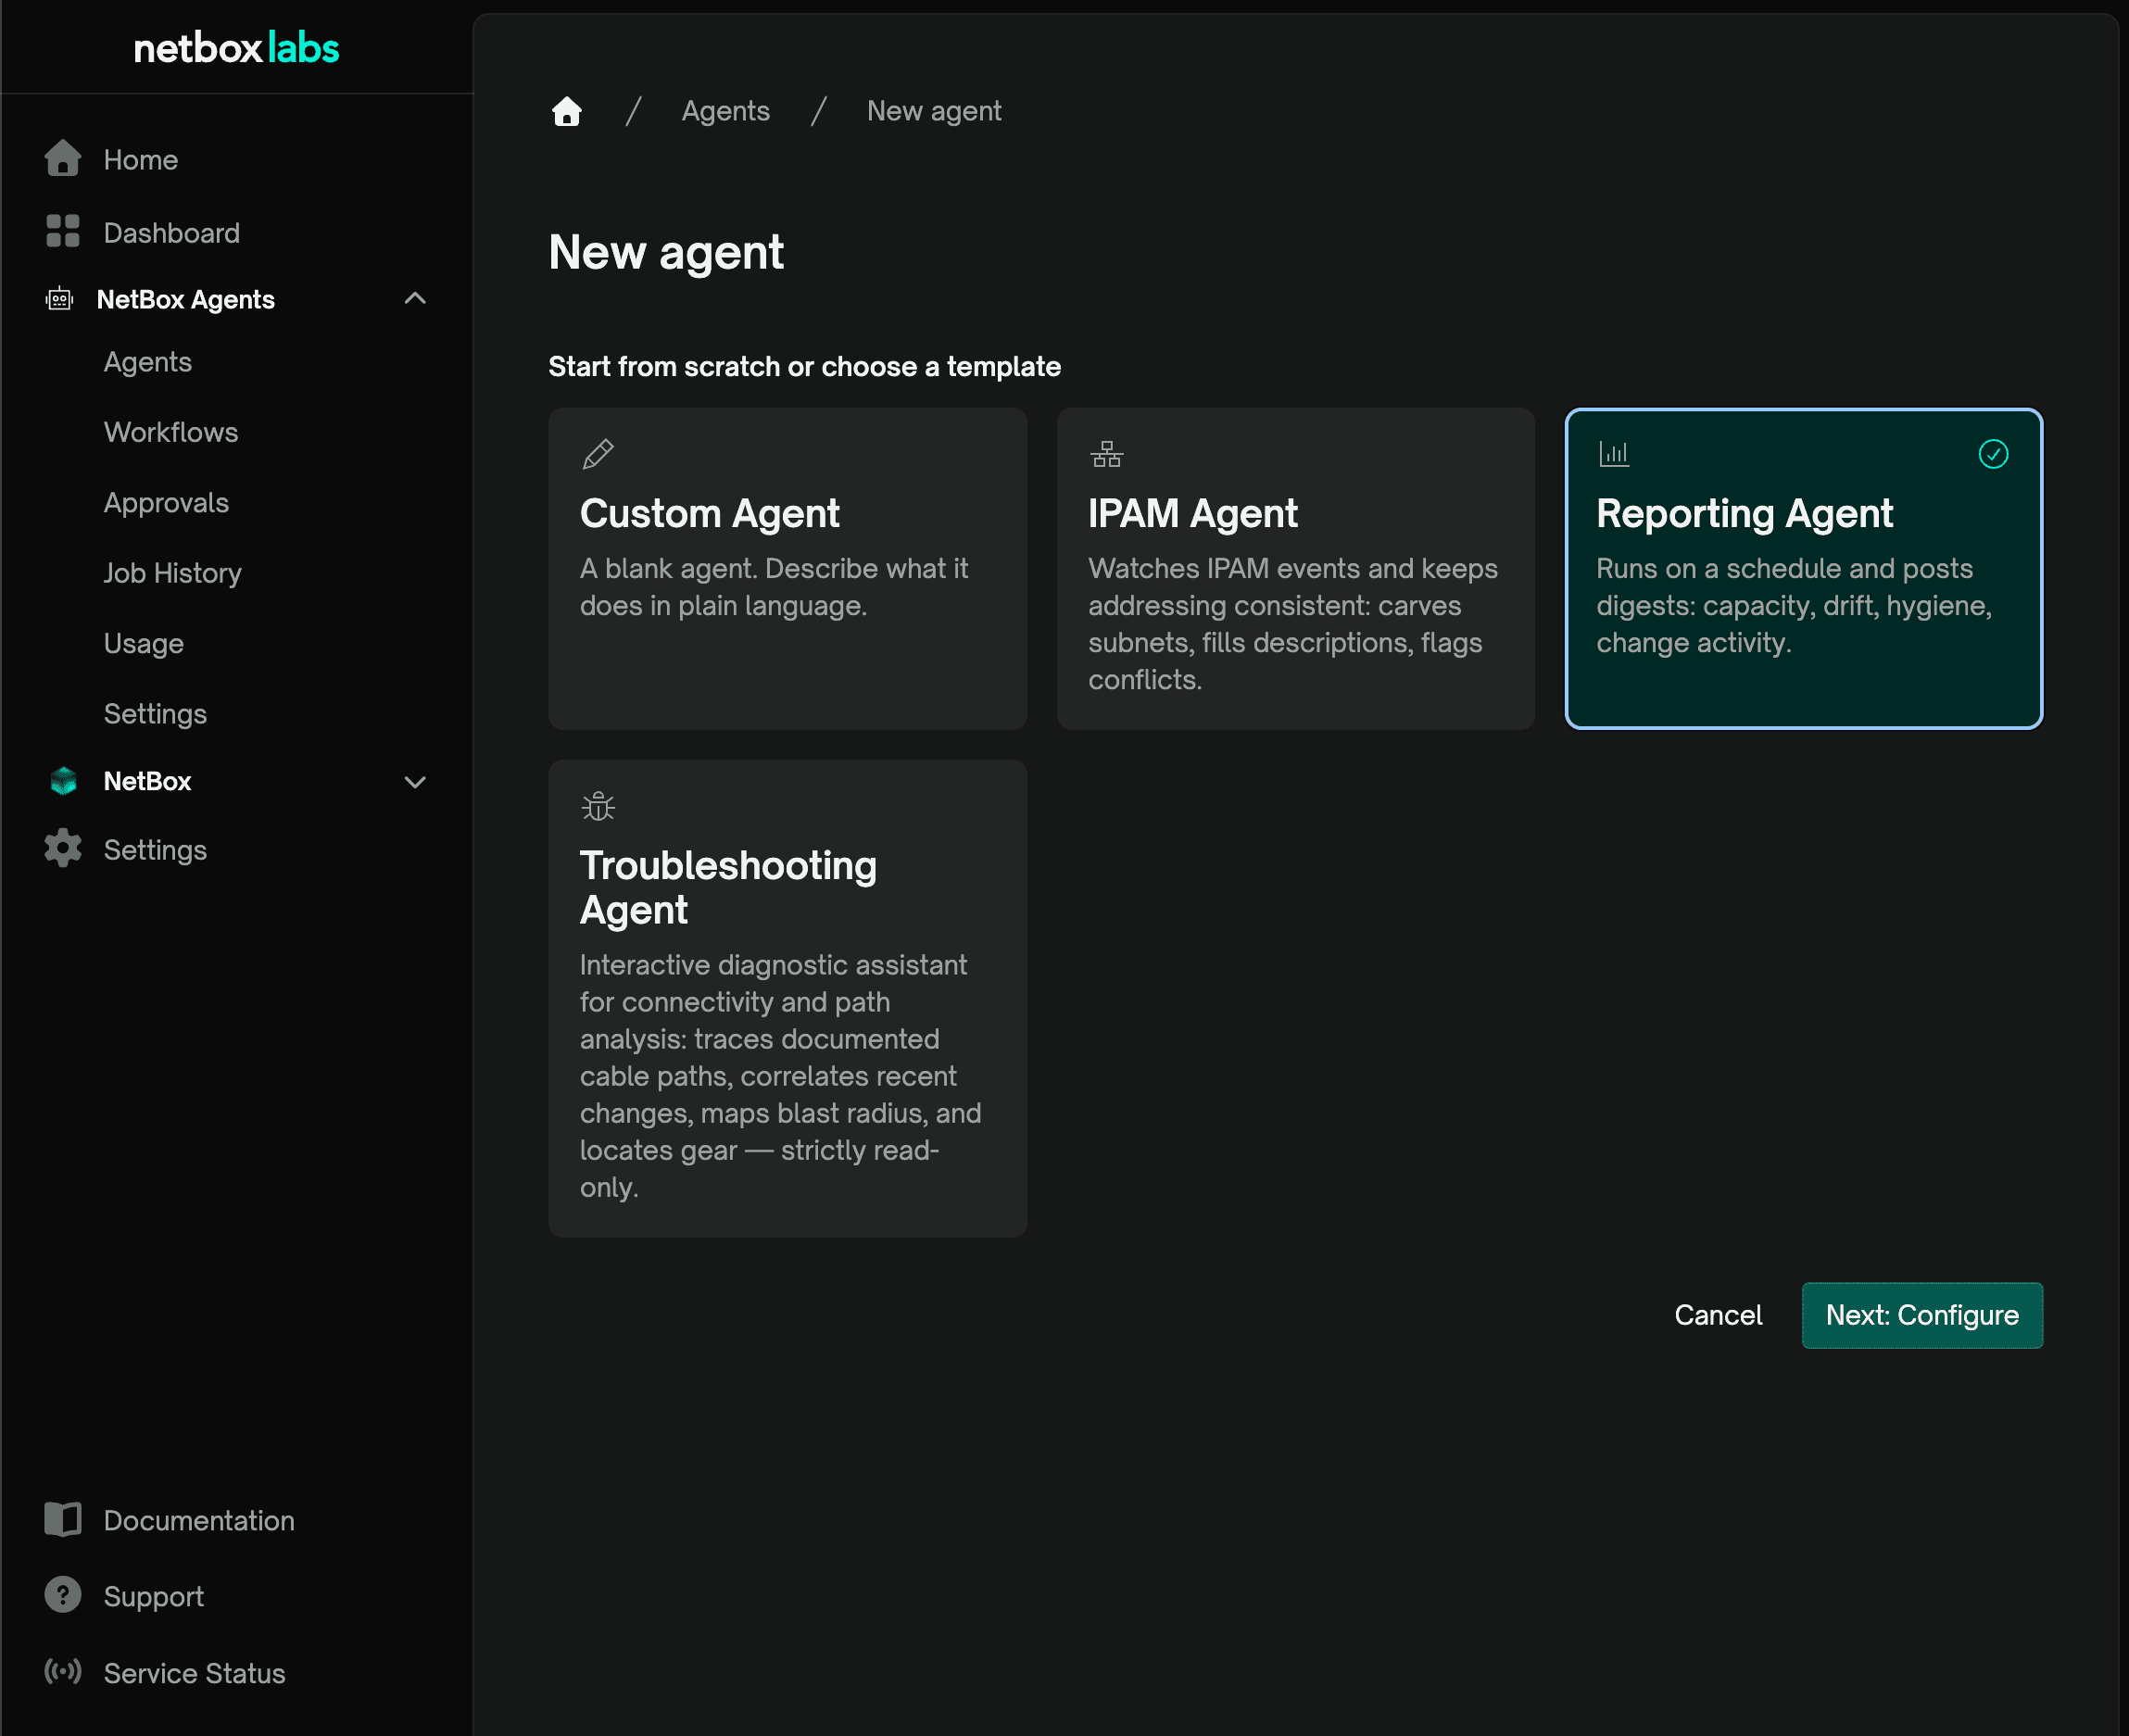
- Go to Agents and select New agent.
- Choose the Reporting Agent.
- Select Next: Configure and walk the short wizard:
- Prerequisites confirms the NetBox connection from Step 1 is in place and shows the prebuilt agent's setup guidance.
- Configure names the agent. Prebuilt agents arrive with instructions pre-filled; add anything specific to your environment under Additional instructions, or leave it as is.
- Toolkits shows what the agent can use. The defaults are correct for a first agent.
- Tool permissions sets what the agent may do without asking. For the Reporting Agent, Read-only is the right preset: reads go through, and anything else is refused.
- Select Create agent.
- The wizard finishes with Workflows: the Reporting Agent's suggested workflows - a weekly ops report and a monthly rollup - each with a plain-language description of the action to be taken and a schedule. Add these workflows to complete the setup.
Step 3: Run a report
Rather than waiting for its schedule, run the weekly report by hand:
- From the agent's Workflows tab, open the workflow and select Run now.
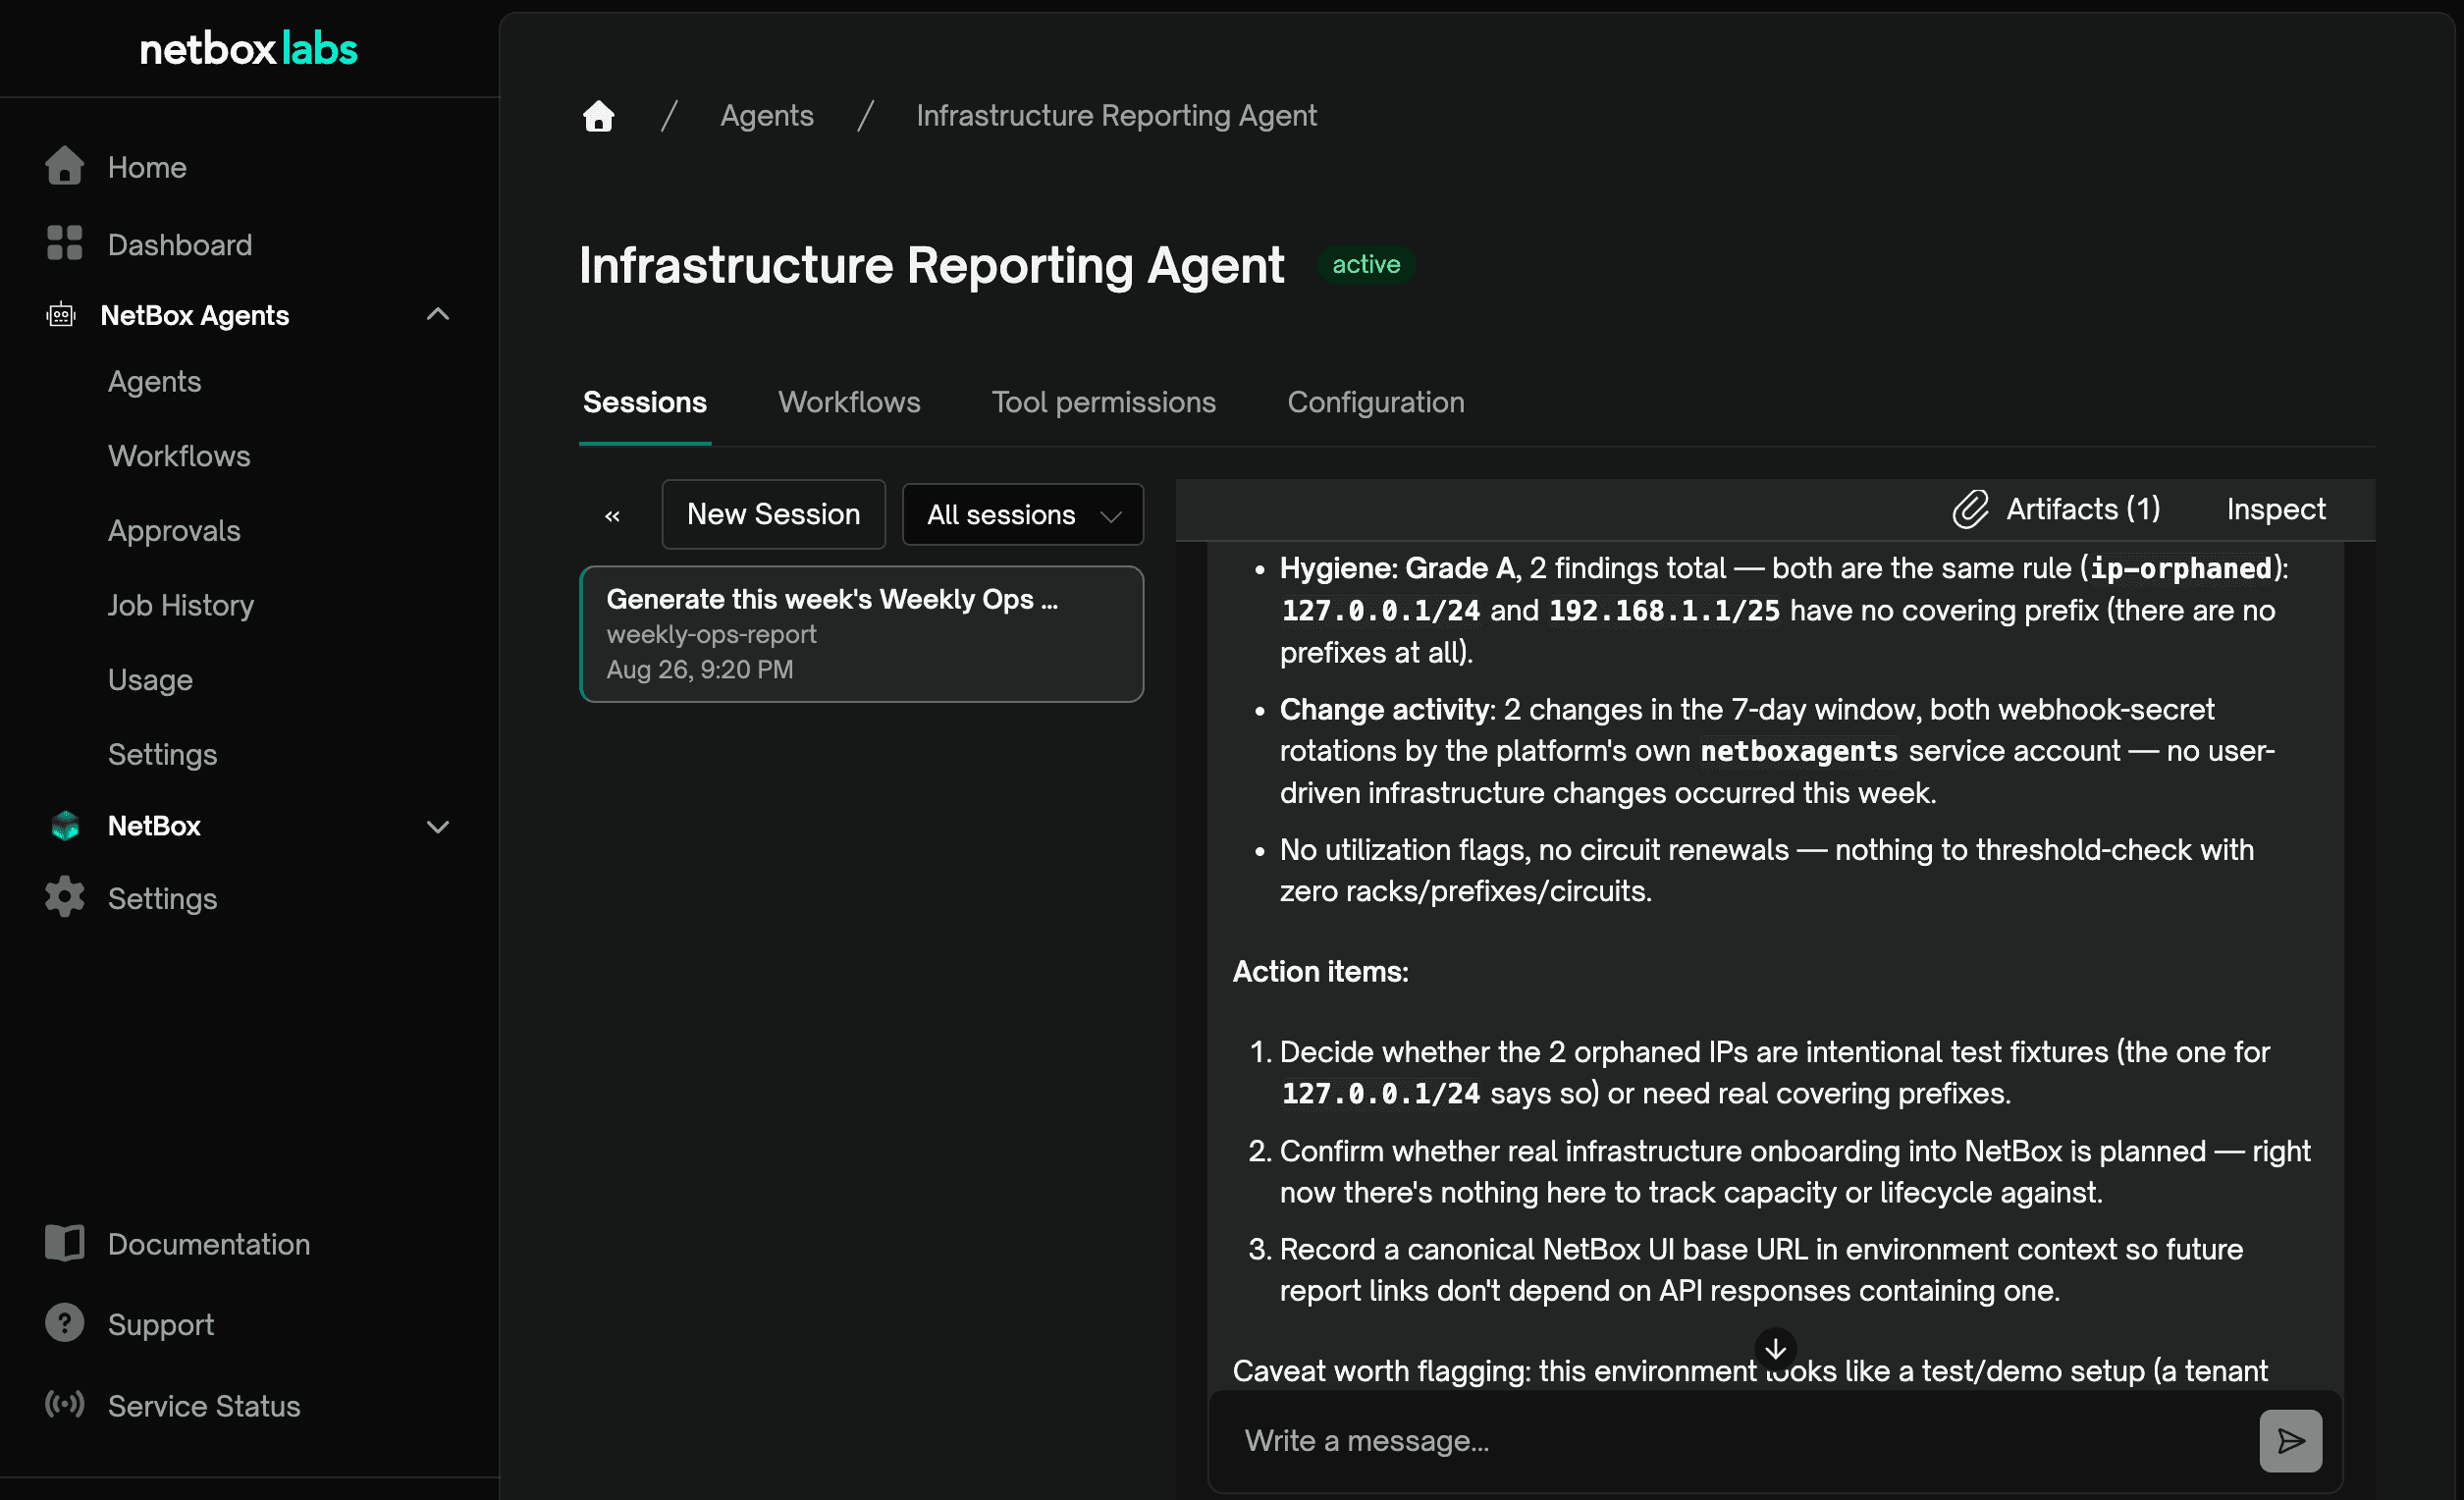
- Watch the run: it appears as a session on the agent, where you can follow the agent's progress as it gathers data from your NetBox.
- Read the report. The finished report is attached to the run as an artifact - open the session's artifacts to view it.
- Check a few of its figures against NetBox yourself - a report that cites a total you cannot reproduce is the failure mode worth catching early.
You can ask followup questions in the session - "which sites drove that number?" - and the agent answers from the same data.
What's next
- Let the schedule run. The weekly report now arrives on its own; Job history shows every run across agents, and Usage breaks down consumption by day, agent, and workflow.
- Introduce a write-capable agent. When you are ready, create the IPAM Agent and watch its first change travel the governance loop: proposed with a diff, held for your approval, staged in a NetBox branch, and promoted through a change request in NetBox. Pending decisions across all agents appear on the Approvals page.
- Tune permissions. Environment-wide defaults and limits live in Settings → Tool permissions; each agent, workflow, and session can adjust tool permissions up to the configured limits.
- Read the overview for additional concepts.
Getting help
Contact your account team or NetBox Labs support. During the preview, feedback directly shapes the product - tell us what your first agent should have been able to do.